A Really Cheap IP Security Camera

The Camera

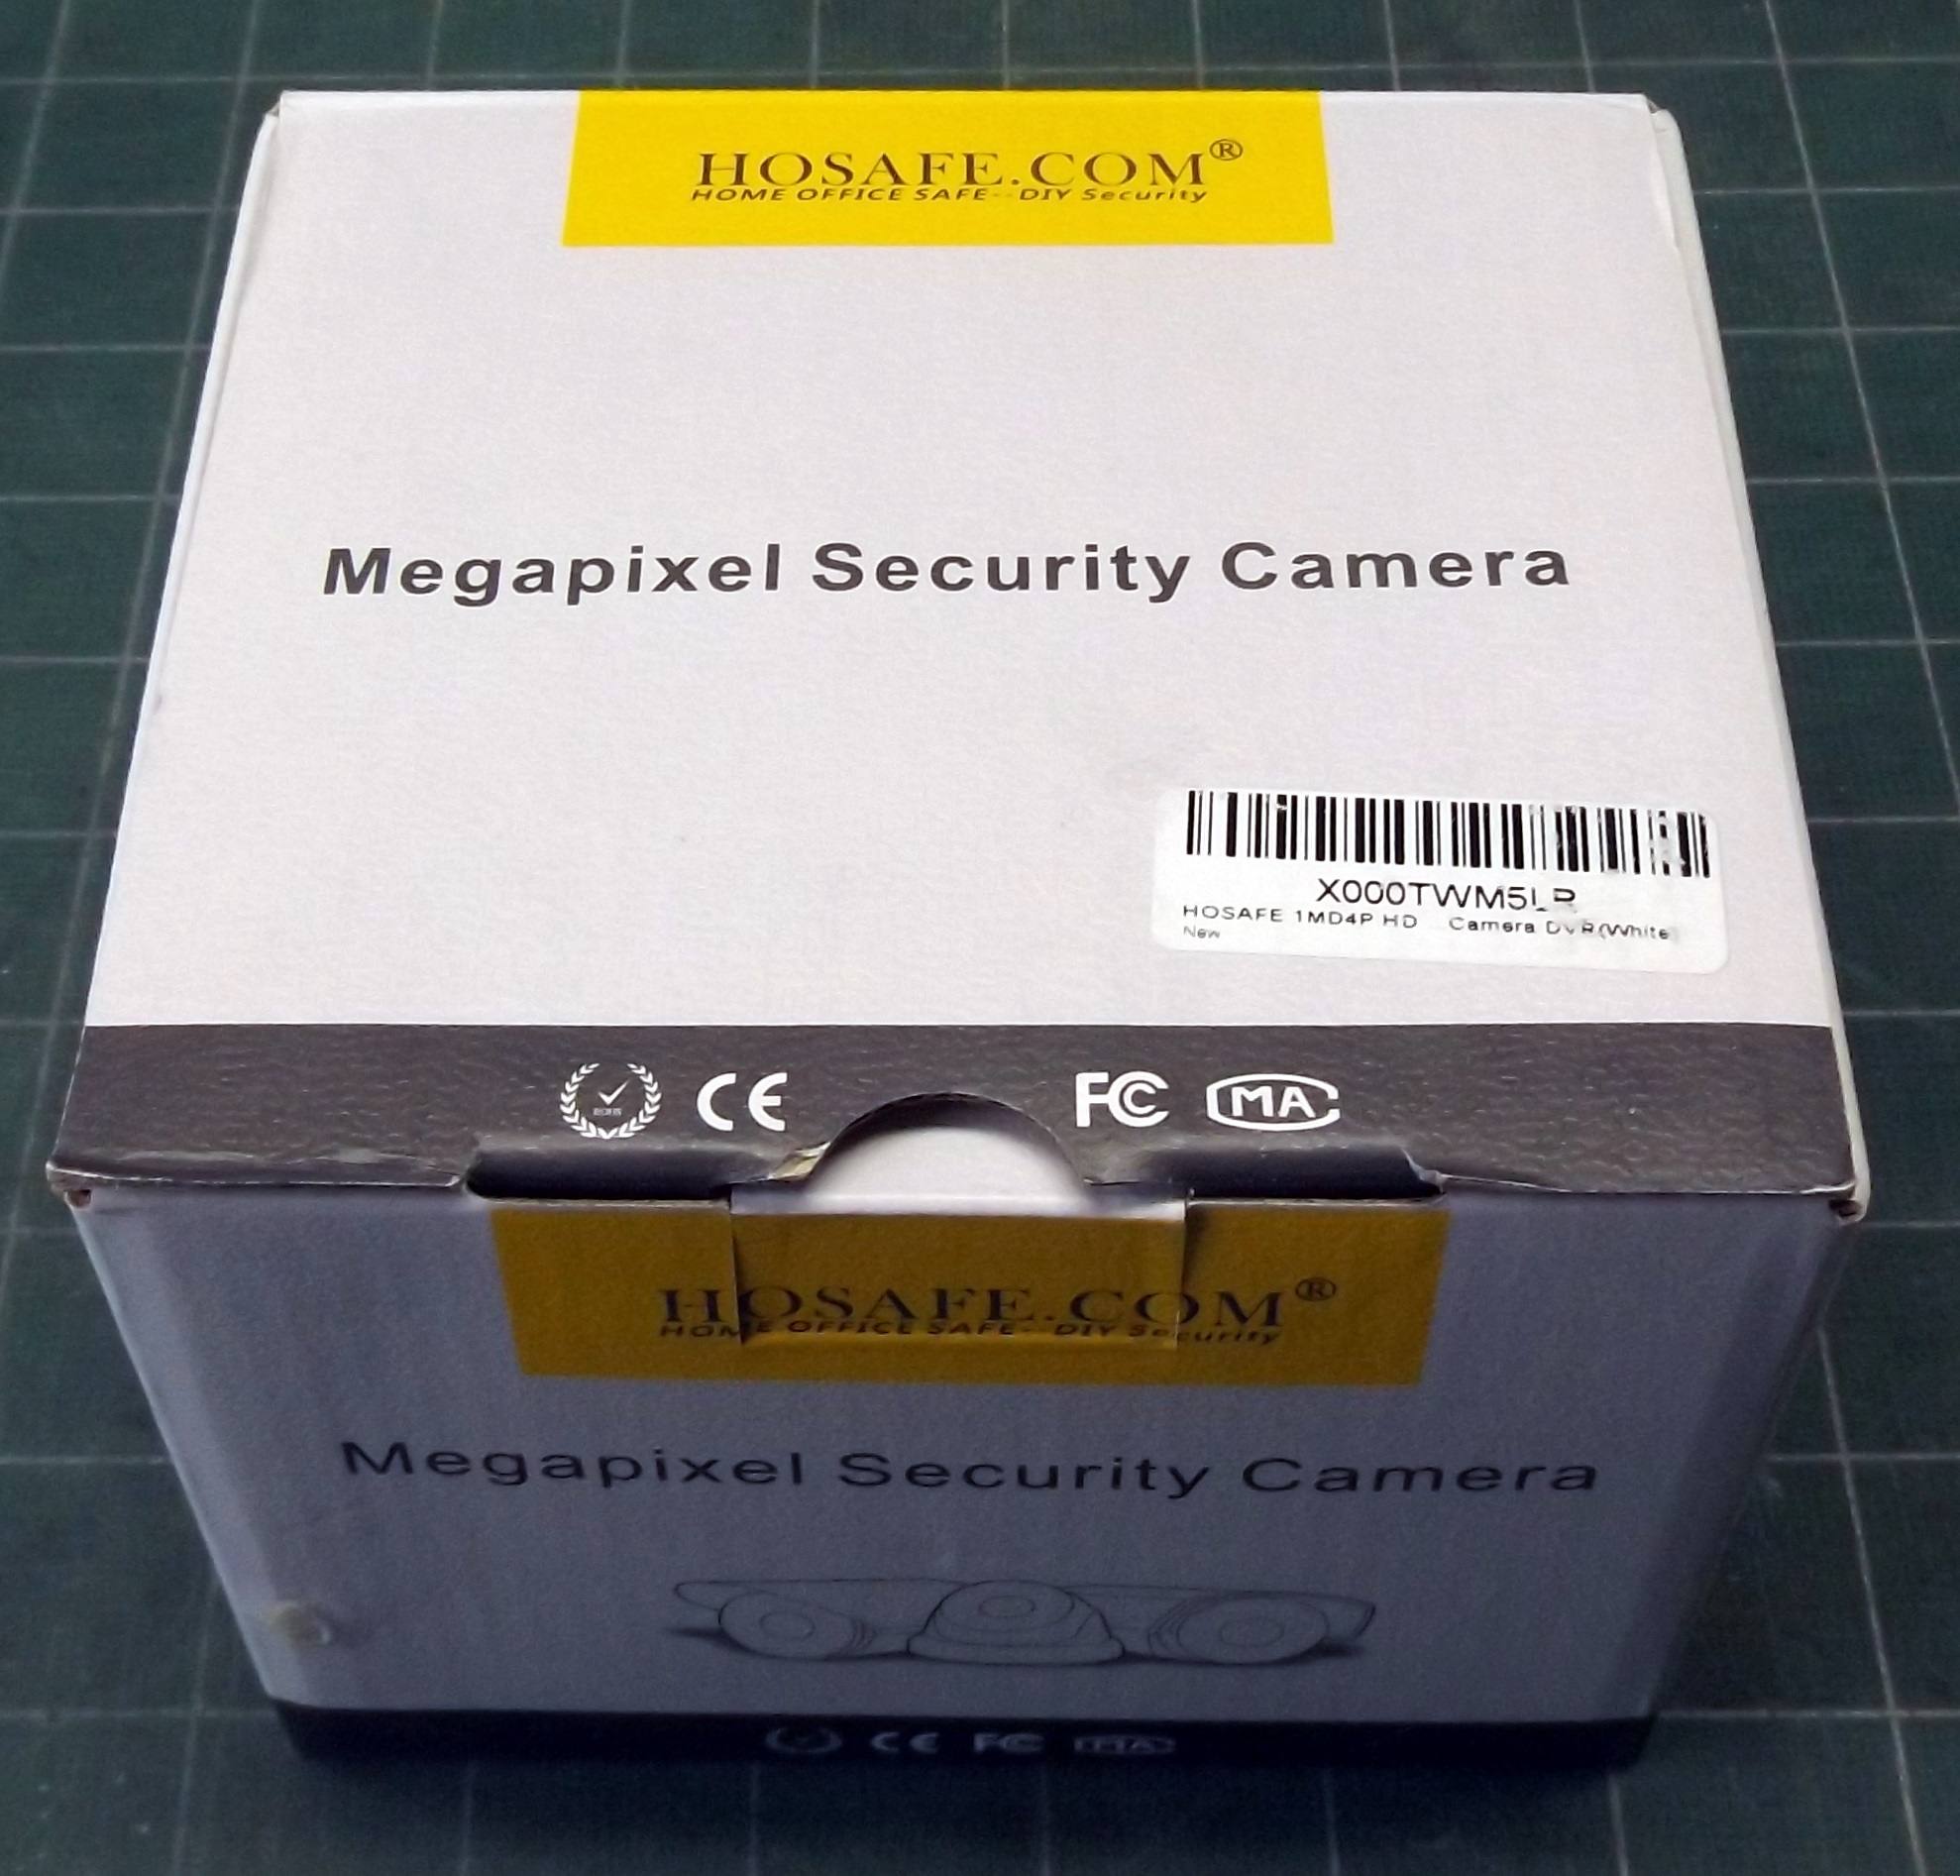
I just bought a $19.99 IP security camera from Amazon.  There is a bit more that I’ve learned about it than will reasonably fit in a review, including lots of tips and tricks, so I figured I’d share what I’ve learned. What follows is far from complete, and may contain errors. Please comment if you have any suggestions or corrections, or if you find this information useful.

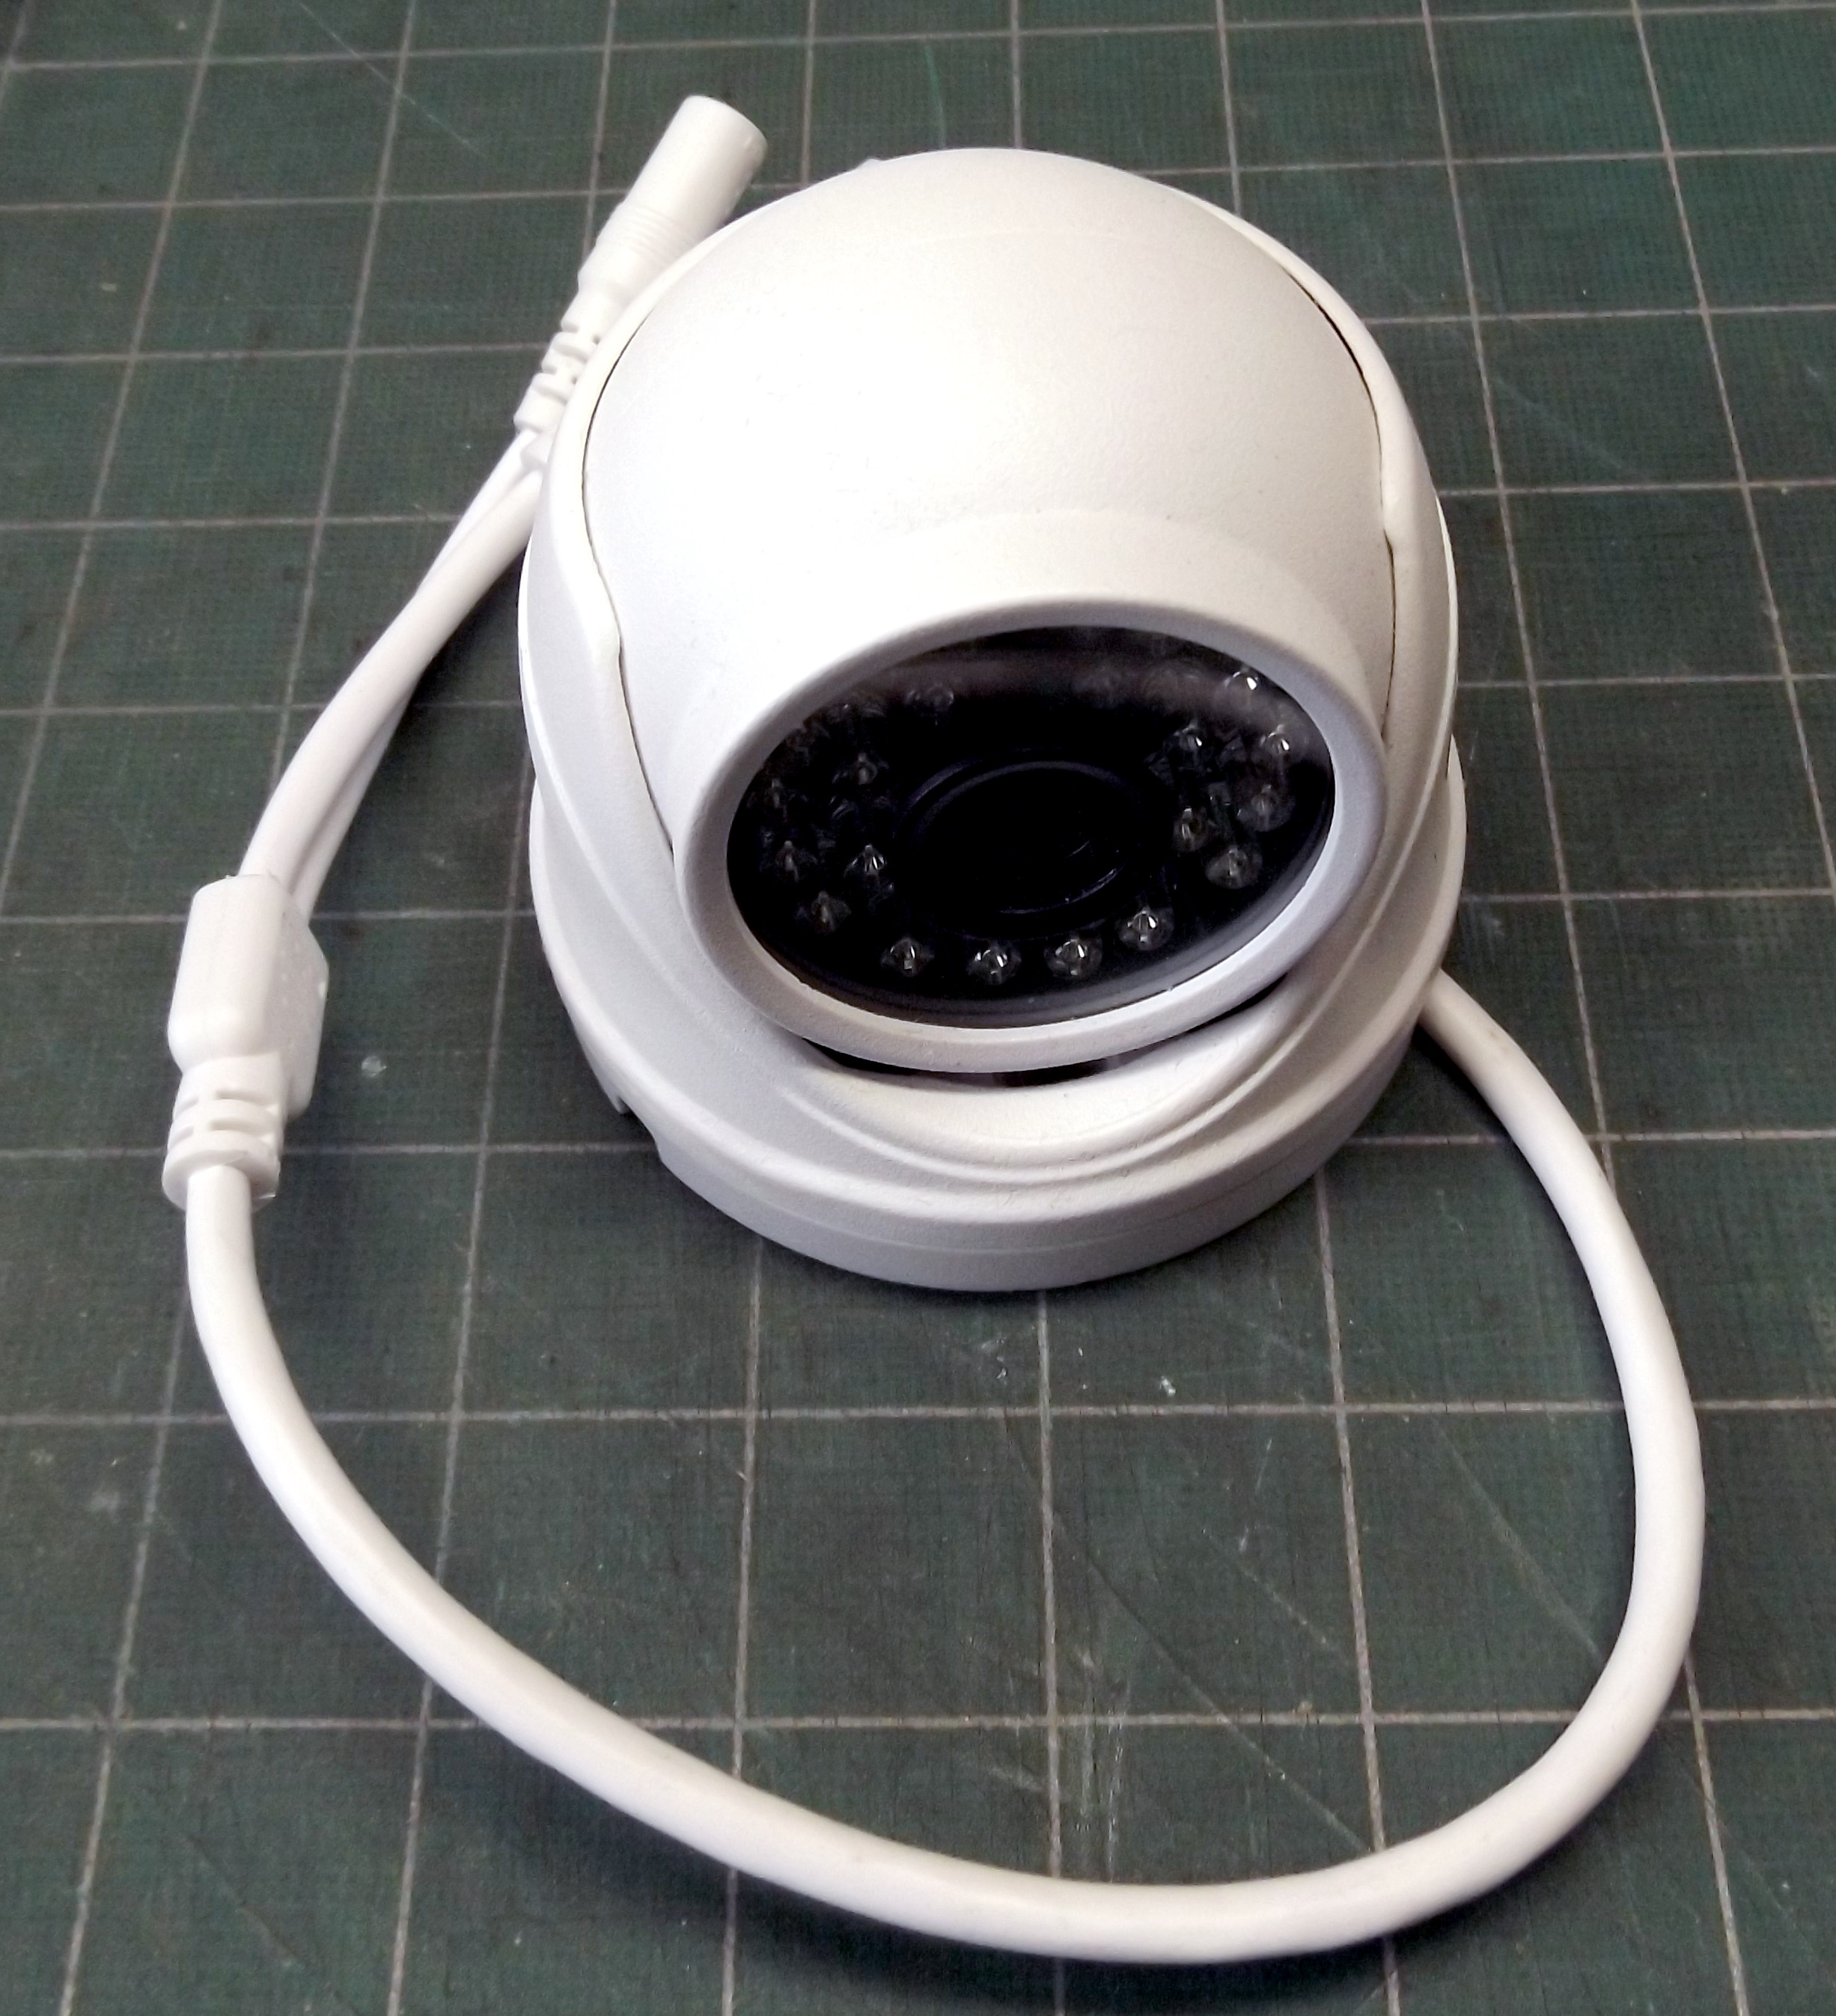
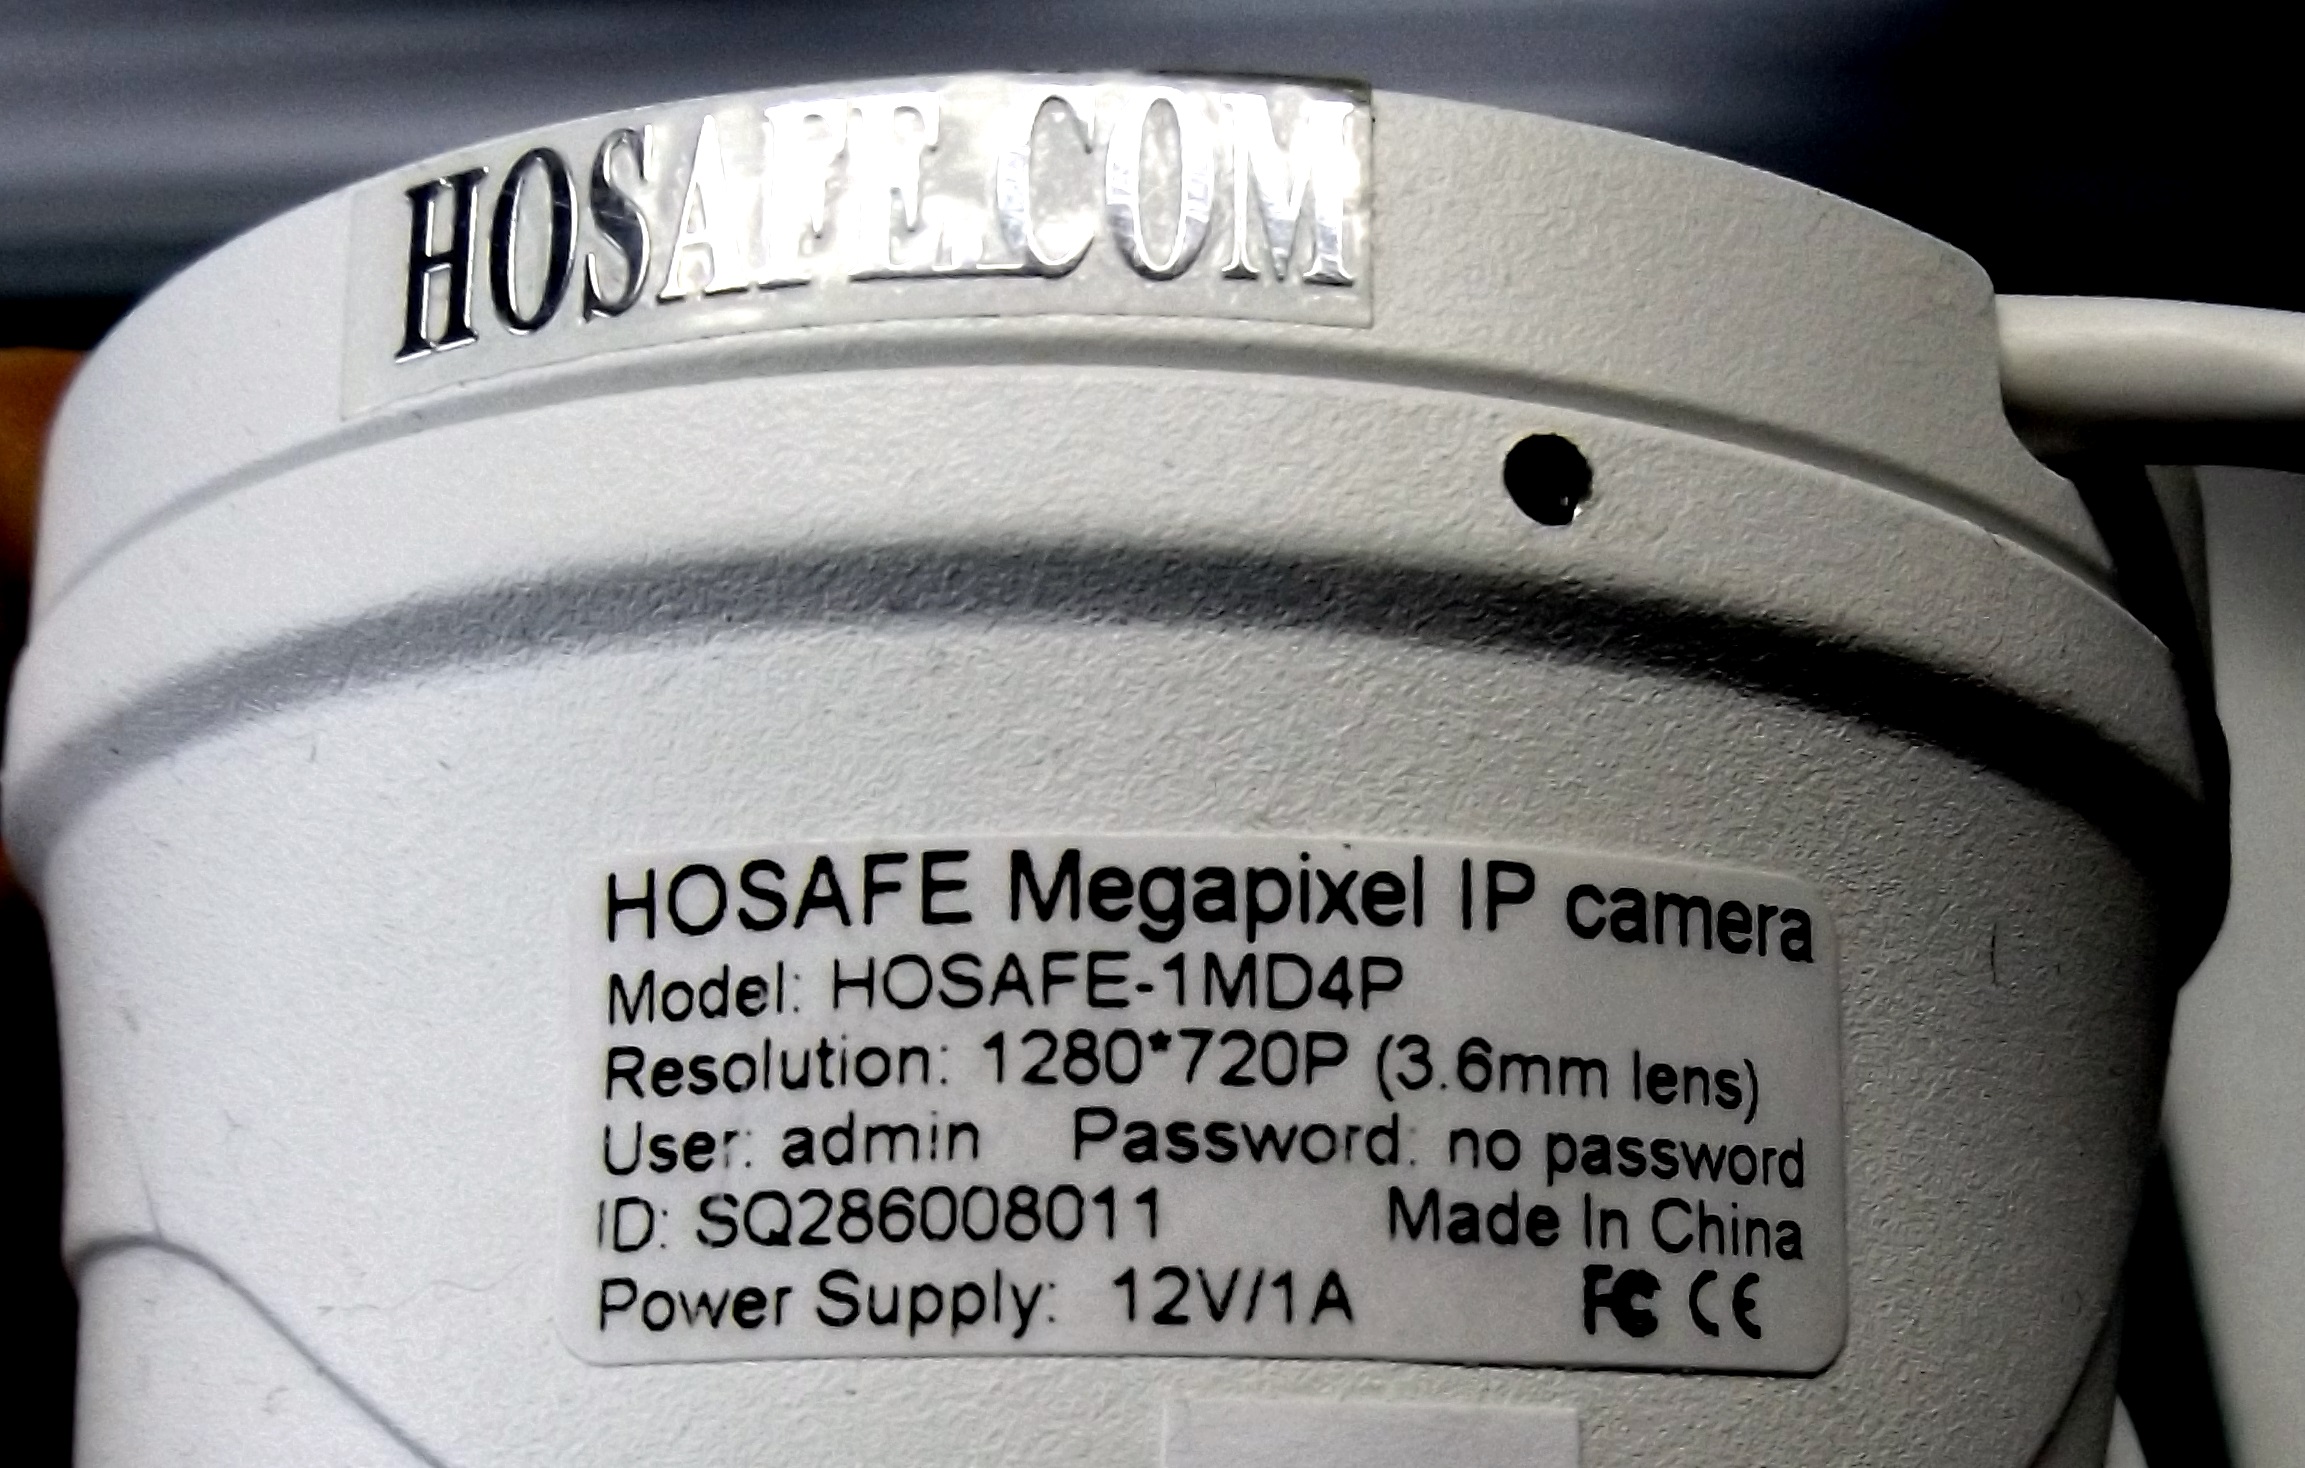
This camera is a HoSafe 1MD4P.  You can see it on Amazon here, but it seems to be discontinued.  However, I suspect that much of what appears in this post will apply to most other cheap cameras (though I don’t see any as cheap as this one).

The Box it Comes In

This is a long post.  Here are links to the various sections; sort of a table of contents:

I can recommend this camera if you are willing to put up with serious software limitations, some reported security issues, and reportedly questionable reliability.  In exchange you get a really cheap camera with pretty good picture quality and high resolution, that may or may not last.

Let’s start with a list of features/capabilities:

  • It’s a fixed dome camera for indoor/outdoor use
  • It is a wired IP camera, not Wi-Fi
  • Color 1280×720 resolution
  • Power by adapter or POE (see below)
  • White-painted metal case (black is also available but not on Amazon)
  • ONVIF compatible: works with 3rd-party software
  • IR night vision up to 40′

And to be fair, a list of weaknesses and problems:

  • No SD card memory
  • No audio
  • No pan/tilt/zoom
  • Reported: security concerns
  • Reported: some cameras won’t retain settings
  • Horrible software/firmware
  • Difficult to mount and aim
  • May require a large hole to run cable(s)

In the descriptions which follow I will give instructions for doing a number of things.  Don’t be surprised if the steps don’t do what you want or expect.  Be willing to experiment, and to retry things different ways.  Sometimes it helps to reboot the camera by disconnecting power.  I’m also not sure I haven’t done something at some point that has changed how things work, so don’t be too surprised if some things are different from what I describe.

Other Similar Cameras

There are many similar Chinese-made cameras available from a wide variety of manufacturers.  I’ve tried several of them with fairly poor results.  They all seem to suffer from bad software and bad firmware.

You shouldn’t buy any of these cameras without expecting to have to use third-party software to run it.  Doing so requires that the camera supports a standard API such as ONVIF.  Many don’t, which makes them pretty much worthless.

Many of these cameras use similar software and firmware; I suspect there are vendors in China that supply chipsets, firmware, and operating software, and that camera manufacturers all use the same basic parts and code.

So it doesn’t much matter what off-brand camera you buy; they’re all pretty bad.  At least with Amazon you can try them and get your money back if they don’t work.

Physically Setting Up and Installing the Camera

This should probably be the last thing you do, but you’ll have questions right away.

What Comes in the Box

The pan/tilt position is locked.  You might be able to adjust it a little by forcing it, but don’t.  There is a tiny Allen wrench in the box.  Use it to loosen the three tiny setscrews around the base.  Loosen them a little to make minor adjustments; a lot to take the camera apart for mounting.  To tighten them, hold the part with the setscrews tight against the mounting ring while tightening the setscrews.  It’s a little awkward and I wouldn’t want to do it while up on a ladder.

Bottom of Camera Showing Mounting Ring and Cradle

If you play with the adjustment you’ll probably get the camera rotated in the mount, so the picture looks tilted.  Don’t be alarmed.  The camera itself is a ball and is not restrained on any axis.  Expect to have to fiddle with it to get it right.

If you loosen all the setscrews the camera will come apart into three pieces: the baseplate, the cradle, and the camera ball.  To mount the camera, say to a ceiling, first remove the baseplate.  You’ll see three mounting holes to be used to screw the baseplate to the mounting surface.  Once the baseplate is mounted, you can put the camera back together.  It’s probably best to just tighten the setscrews enough to hold things together, so you can adjust the aim of the camera.  When all is the way you want, fully tighten the setscrews.

Camera Connectors

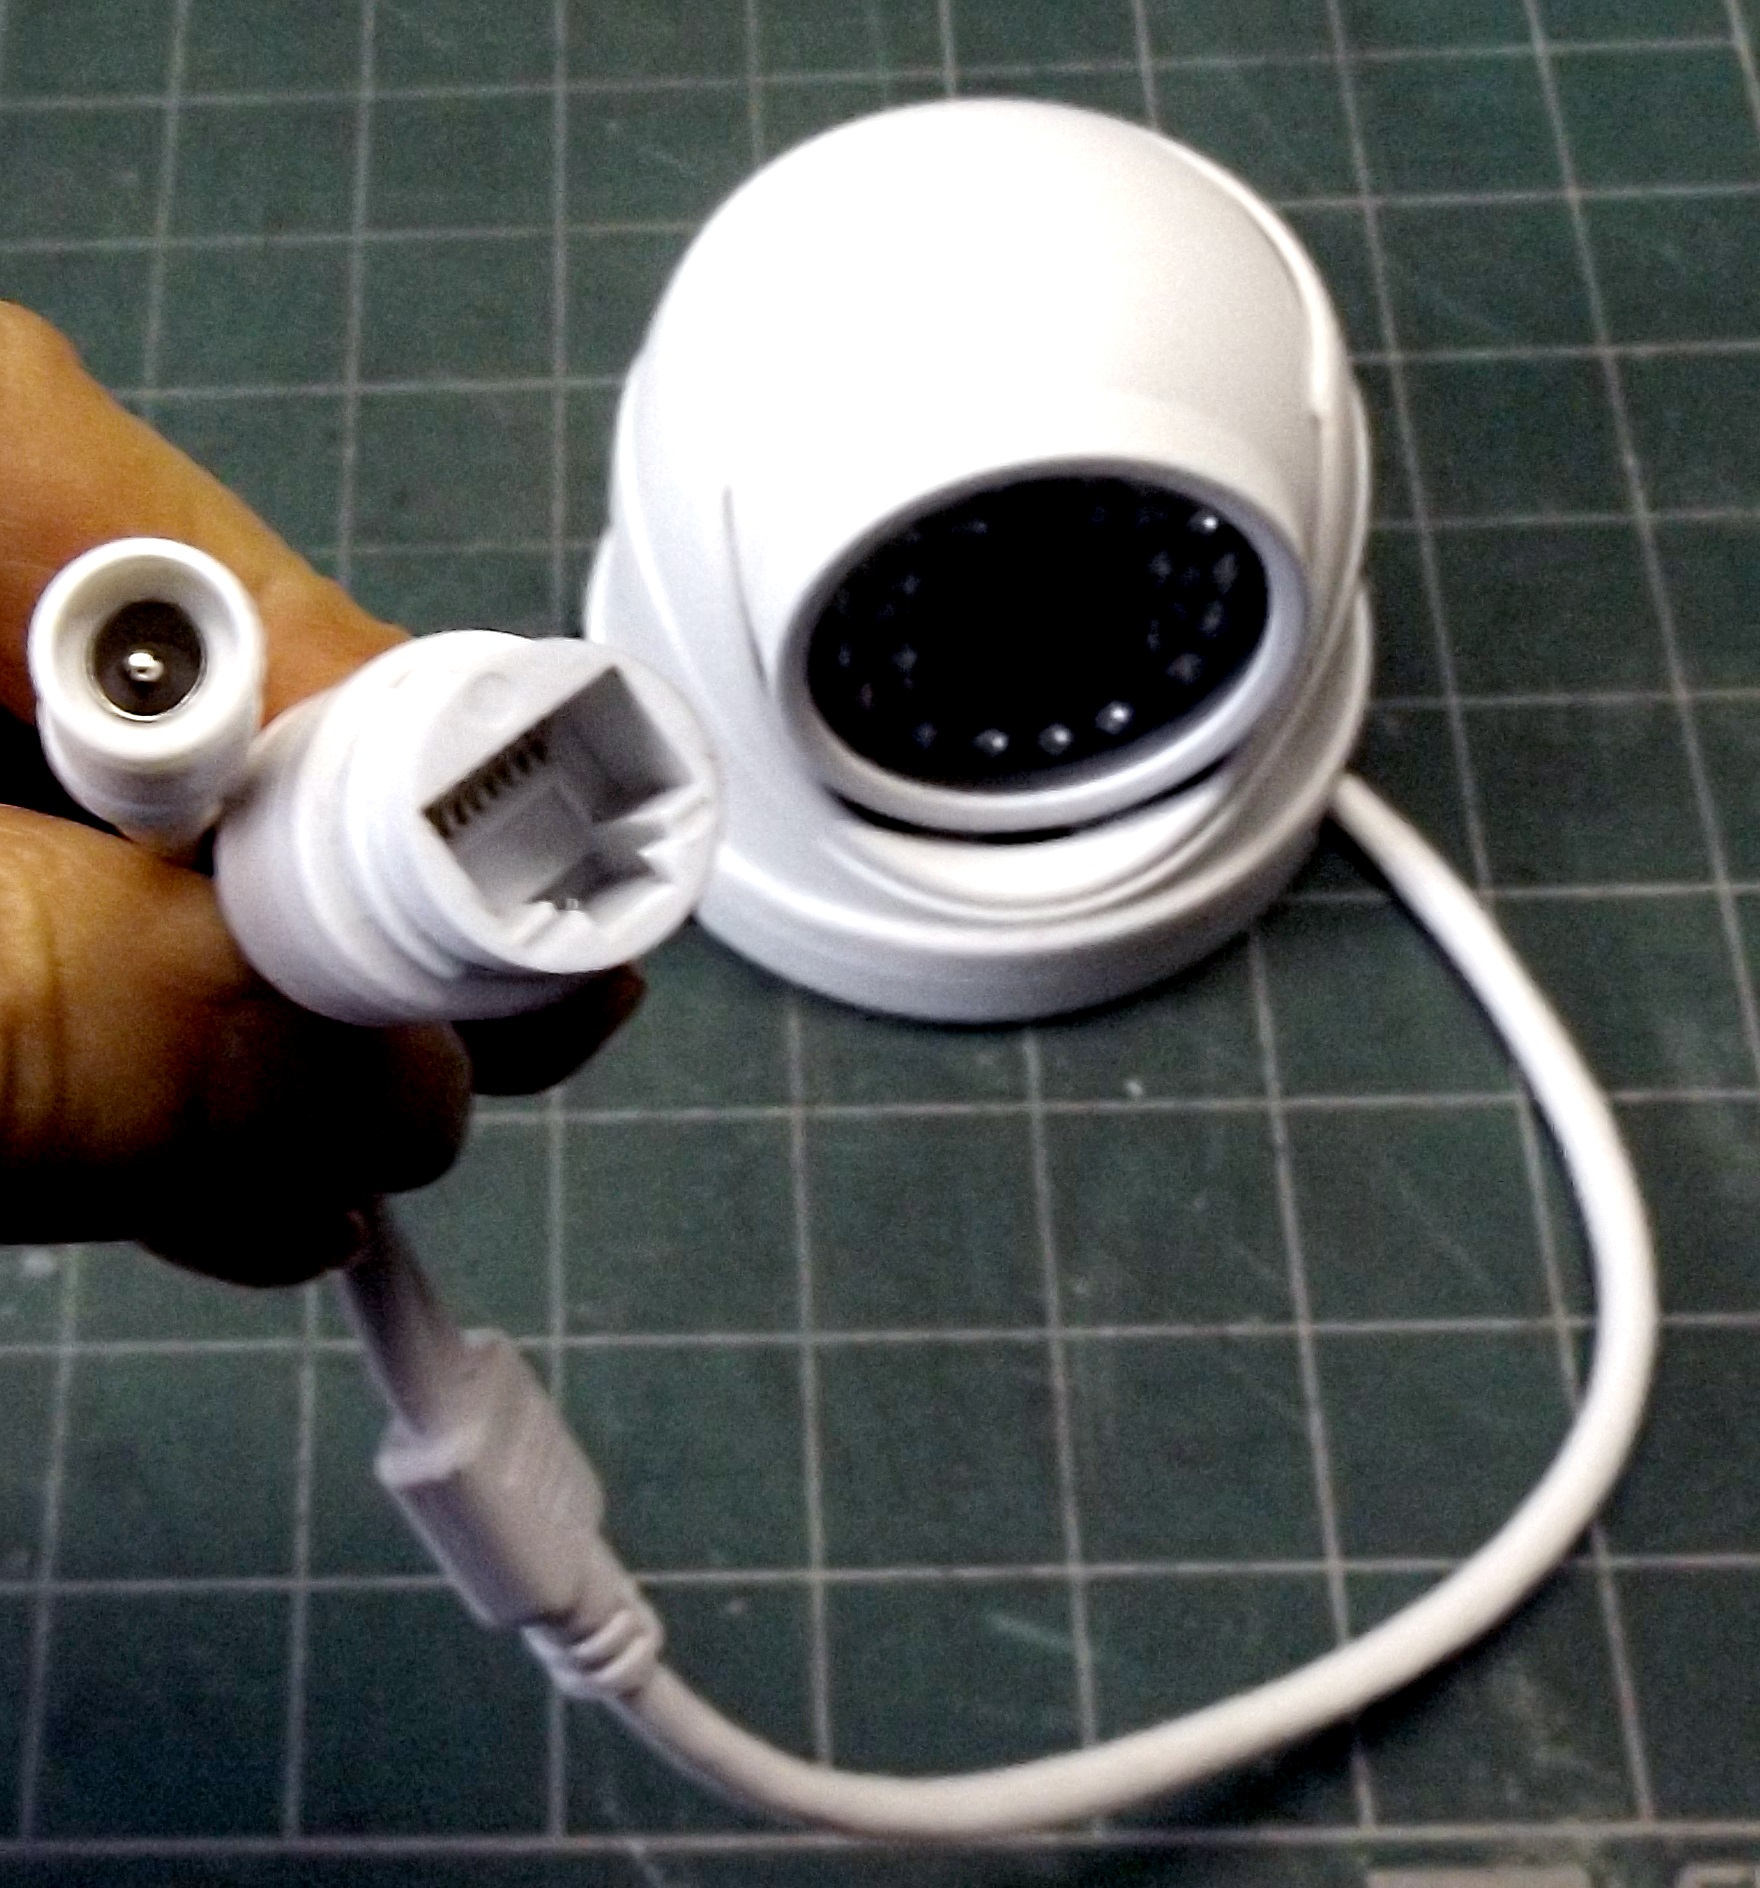
The camera requires a wired Ethernet connection and that in turn requires a big hole to run the cable.  Figure on drilling a 3/4″ hole to run the wires through, if you run the wires through the mounting surface as you would on a ceiling or soffit mount.  If you use surface wiring, you could conceivably drill a 1/4″ hole, thread Ethernet cable through it, and terminate the cable by crimping on an RJ45 plug.  If you do this and are mounting the camera outside, use the included shield to protect the cable from the weather — I’d add silicone grease or RTV to it for extra protection.

Supplying Power to the Camera

The camera I got came with a little wall transformer and a two-ended cable with both an Ethernet connector and a jack to connect the transformer.  Other reviewers have said that their camera was POE only and didn’t come with a transformer.  But no matter; you’ll probably want to use POE.

POE (Power Over Ethernet) is, as the name implies, a way to power things using just an Ethernet connection.  It works very well and greatly simplifies the installation of cameras.  I very highly recommend it.

Regular Ethernet doesn’t include power.  You have two ways to add power to an Ethernet connection: a POE switch, or a POE injector.  A POE switch is much easier — you use it like any other switch, and some or all ports include POE power — and is cheaper if you’re powering several cameras.  A POE injector just moves the complexity from the camera location to your router/switch location, but may be preferable if you’re only mounting one or two cameras and there isn’t power readily available where the cameras are to be installed.

I don’t worry about POE standards.  There seems to be a fair amount of anxiety about making sure standards match for POE equipment.  My experience has been that there is agreement among hardware vendors about what “POE” means.  That may not have been true in the past.

Passwords and More Passwords

The camera itself has an admin password, and I think you can define more passwords with other usernames and varying sets of permissions.  The CMS software also has a password.  And in the NVSIP Android app there is a password associated with an email address that I entered once, I think for some sort of cloud storage that may or may not be implemented.

I haven’t figured out how to set most of these passwords, and I haven’t seen any evidence that they do anything.  I think when I first started out I set a password for the camera somehow, but I’ve not been able to reproduce that condition.  All software I use just works, no matter what password I use.

If your experience with passwords is different from mine, you may want (or need) to set up and use a password for the camera itself.  To do this, use the CMS software (described below) to connect to the camera.  Then right-click on the camera image, Pick System->User Setting, select the “admin” user, pick Modify, then enter a desired password.

Security (or Lack of Same)

Passwords are just the beginning.  Some reviewers on Amazon have done packet tracing on the network traffic generated by the camera, and have found communication to a variety of servers in China.  I tend to not care about such things, and to suspect that most of it is just bad programming such as incomplete/undocumented cloud storage or remote access.  But maybe I’m foolish and I should be worried about it all.

I’m not that interesting and I don’t have much of value, so I really don’t care if hackers can get to my camera feeds.  Yes the lack of security theoretically makes it possible for someone to hack my system and disable cameras or delete recordings, but the odds of some lowlife, looking for something to steal so they can buy drugs, having the ability and motivation to hack my system is pretty low.

One source of communication with China is the camera’s time lookup setting, which refers to a server in China.  It’s harmless, but you can change it in the CMS software or ONVIF Device Manager to use a local time server such as pool.ntp.org.

Many cheap cameras are listening on port 23 (Telnet), and this one is no exception.  This theoretically gives you the ability to log in to the Linux shell running on the camera, and do pretty much whatever you want.  The login requires a username and password, which are not readily available.  If you search for them, you’ll find lists of passwords that have worked on similar cameras, but I’ve tried all I could find (dozens of them) without luck.  From the command prompt, type telnet camera_IP_address and try your luck.

A major danger of the lack of security demonstrated by the Telnet vulnerability is that cameras can be hacked en masse and recruited into botnets.  Also, any camera that is successfully hacked will have access to everything on your local network.

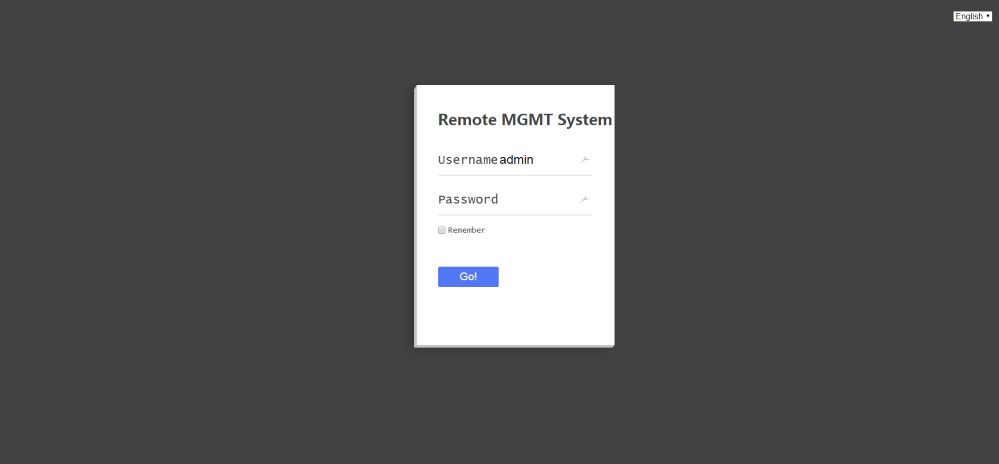
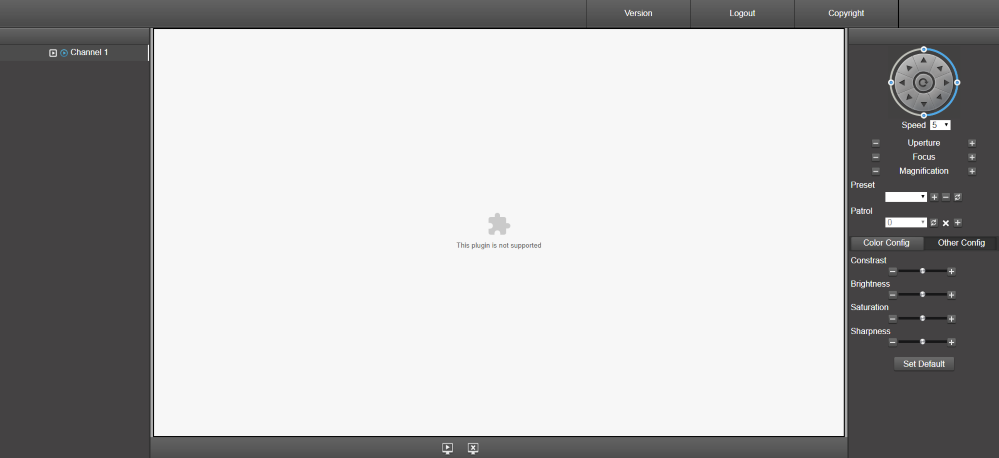
The Camera’s Web Interface
If you’re used to devices like this camera, the first place you’re likely to look is the web page you get if you go to the device’s IP address.  Don’t bother (though I know you’ll try).
Camera’s Login Screen
You first are presented with a login screen.  I first had the camera set up without a password, and no matter what password I entered I got a pretty useless configuration screen.  I know in the past I’ve seen similar screens with more choices but for now I can’t get to it.  Most recently I set a password for the camera, and it would not log in at all; it would just stay on the login screen.
Limited Configuration Screen
Note the “This plugin is not supported” message on the configuration screen.  There is a lot of useless information on the web about this situation.  Some people say it only works with old versions of IE, some say you have to load Quicktime, and sometimes it asks to load a plugin.
No matter what you do, it won’t work.  Save your time and just ignore it all.  This is typical behavior for the camera; things are not repeatable and don’t seem to follow any rules at all.
ONVIF and ONVIF Device Manager

A good place to start is to download a third-party open source program called ONVIF Device ManagerONVIF is a standard for interfacing with IP cameras, and is most likely how you will be using the camera.  The ONVIF Device Manager (“ODM”) pokes around in the camera settings that are accessible using ONVIF, and lets you change some of them.  Unlike CMS, it is fairly straightforward to use, and it’s nice to have something working this early in the process.

ONVIF Device Manager

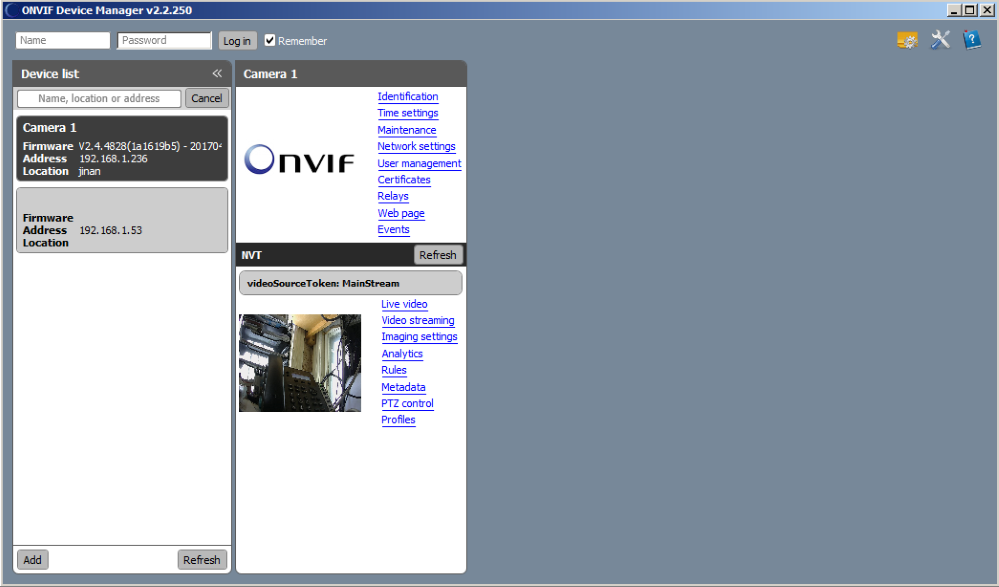
You can use ODM to set up many of the configurable parameters in the camera.  Most things work but a few don’t, so test any changes you make with it to make sure they “stick”.  You can use it to reset or reboot the camera, which no other software will let you do.  The “soft reset” function supposedly resets camera parameters but not things like networking parameters, and seems to work, and “hard reset” is supposed to return the camera to original factory settings but it doesn’t.

I’d suggest setting the following things with ODM:

  • Identification->Name:  camera ID
  • Identification->Location:  changes don’t “stick”
  • Time settings->Time zone:  set this here not in CMS
  • Time settings->Daylight savings time:  changes don’t “stick”
  • Network settings: set these up how you want; I like fixed IPs
  • Network settings->NTP servers: set to “pool.ntp.org”
  • User management: I couldn’t get any of this to work
  • Live video: seems to work most of the time
  • Video streaming: changes don’t “stick”
  • Imaging settings: seem to work

The various display modes work sometimes but sometimes put up a “NO SIGNAL” message.  I don’t know what that means, but I’m not worrying about it.

ODM development is based in Russia.  It is open source so is unlikely to be doing anything that it shouldn’t.  Use your discretion as to whether you think it is safe.

Installing and Using the CMS Software

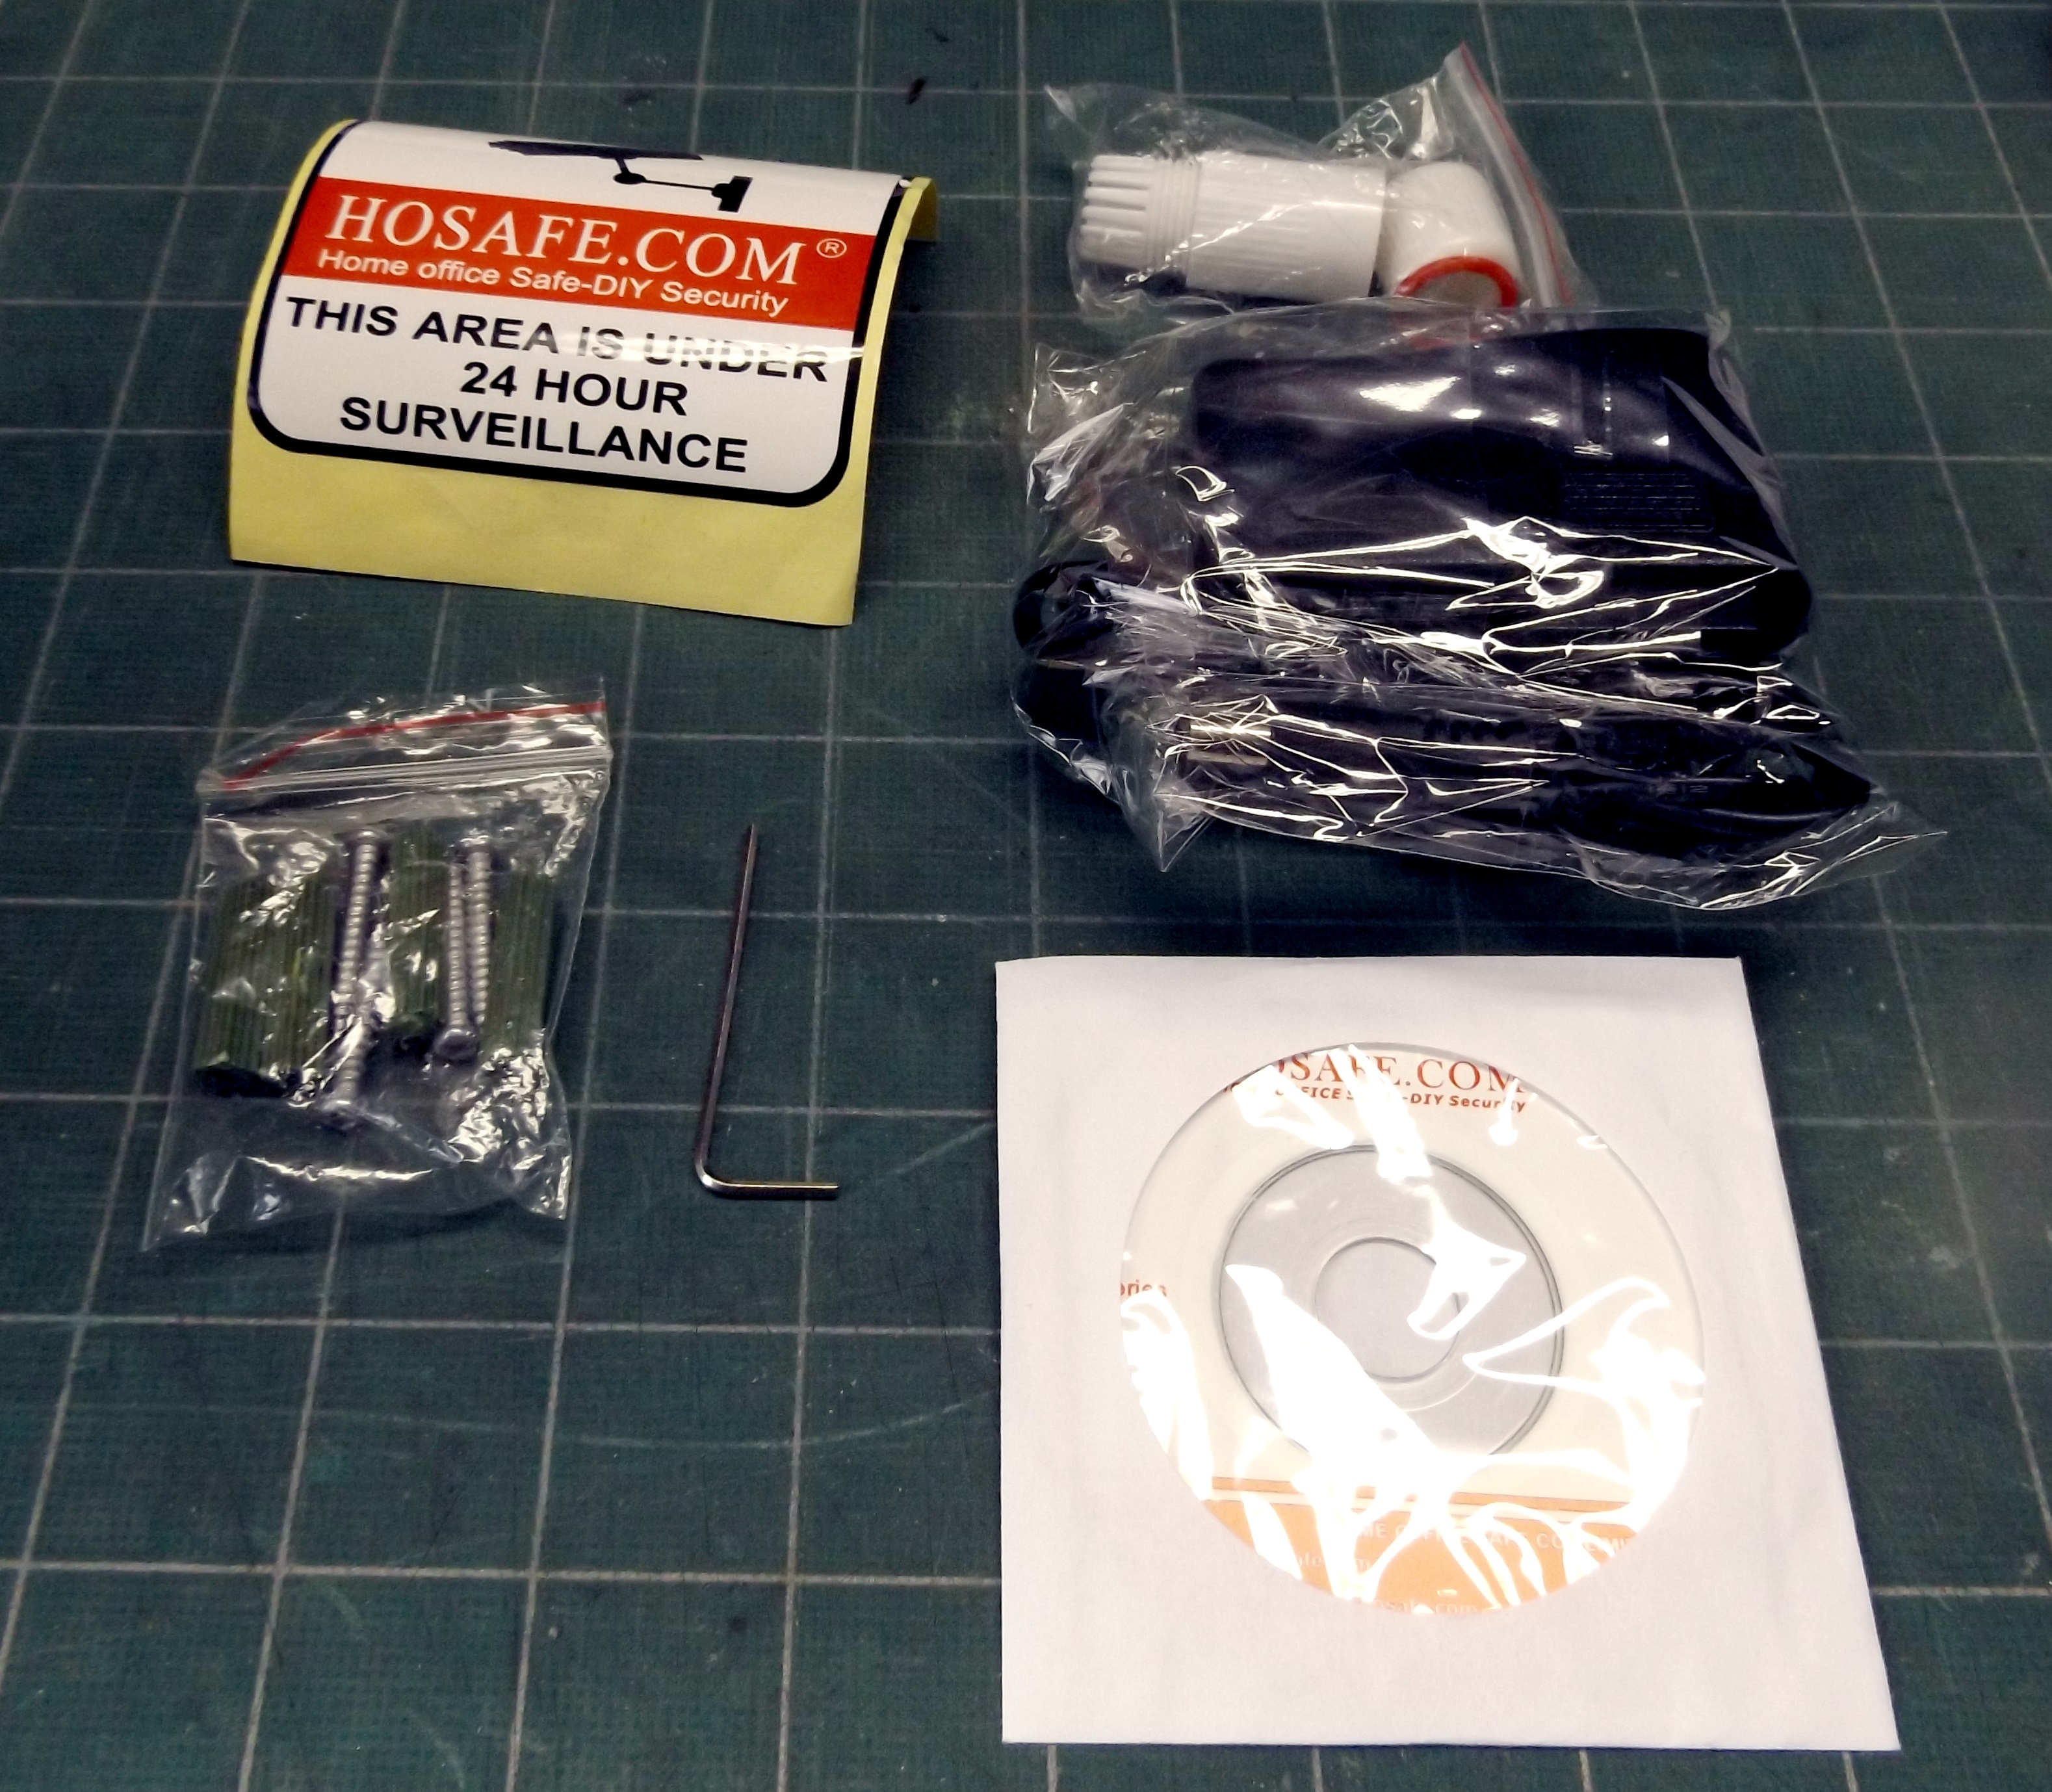
You’ll find one of those annoying little CDs in the box.  It has a bunch of software on it and some very modest documentation.  Once you’ve looked over the documentation, install the CMS software and nothing else.  Run it and prepare to enter a bizarro-world of software design.  The stuff is not just bad, it’s bad in ways that took considerable creativity.  Luckily you only have to use it to set up the camera once (we hope).

CMS Software Main Screen

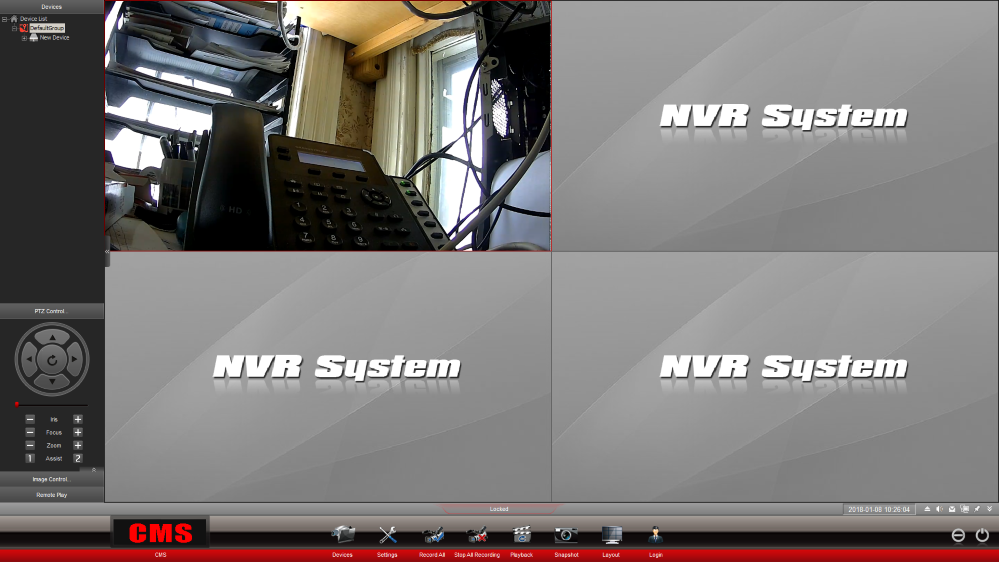
I’m going to give very terse instructions for using it.  It’s painful to use, and it doesn’t work the same way every time, so instructions are not terribly helpful.  Expect to have to fuss with it to get it to do what you want.

Note that the CMS software is supposed to be a complete monitoring system, and as such it has many, many options.  Most of the options control the functioning of the software, not the camera.  A few control settings in the camera itself, and those are the ones we’re interested in.

The CMS software has its own password.  I use a blank password since I won’t be running it much or leaving it running.  Once you get past logging in, you need to select your camera.  Pick “Devices” from the menu at the bottom (if the menu doesn’t show, fuss with it until it does).  There is an auto-detect function which I’ve never gotten to work — add your camera manually.  All you need to enter is the camera ID taken from the camera’s label.

Camera label showing camera ID (SQ286008011)

Once you’ve gotten your camera selected, you should see video from it.  It may take a few seconds to connect.  You then can get to camera-specific settings by right-clicking on the camera image and picking “Remote Config”.  That will put up a new menu bar in the center of the screen.   Note that the “Exit” target will exit the remote configuration mode, not the CMS program.

Start by picking “System”.  This gets you into a property page for the camera itself.  In “System Setting” you will probably want to change “OSD Position” and “Time Position” to “HIDE”.  This will let the software you end up using to manage text overlays.  In the “Time Setting” section make sure “time synchronization” is checked, and verify that the time zone and NTP server are set as you want (you set these in the ONVIF Display Manager).

In the “Maintenance” tab of the “System” menu you can set up automatic rebooting of the camera (I don’t) and attempt to upgrade the firmware in the camera.  I couldn’t get it to work, but if you like to live dangerously, give it a try by picking “Update begin”.  Also in this tab are three buttons, “Diagnosis”, “Restart”, and “Recovery” that sound like they might be useful if things go south.

Back to the “Remote Config” menu.  Pick “Stream” and you get to yet more property pages.  Of interest is the “Image” tab, on which you will see two checkboxes: “Mirror” and “Turn”.  These control the orientation if the camera image.  If the picture is upside down or otherwise wrong, some combination of those checkboxes will fix it.  I find that my camera requires both to be checked, which is not the default.

Another icon on the “Remote Config” menu is “Network”.  This lets you set things like the IP address of the camera.  You should already have set this up the way you want using ONVIF Device Manager, but take a look and fix up anything that isn’t how you want it.

One last thing about the CMS software: there are Minimize and Close icons at the lower right corner of the screen.  Minimize minimizes to the tray.  Close brings up a login screen, which you must satisfy before the program will actually exit.  It’s some sort of security I think.

Installing and Using the NVSIP App

There are apps that will let you access your camera from a smartphone.  If you want to be able to do this, you’ll want to use a third-party app that comes with the software you use to run the camera.  This section is about the NVSIP app that comes with the camera.  You may want to play around with it, but I doubt it will be something you’ll want to use on a regular basis.  I use an Android phone so I can’t report on the iPhone app; I assume it is similar.

Don’t install the app from the little CD; go to the app store to get the latest version.  Search for “NVSIP”.  Once you get it installed and running, it will ask you to log in with your email address and password, or to sign up or enter using “Guest Mode”.

I haven’t had luck signing up for an account, and have always just used “Guest Mode”.  I don’t know what features you’ll unlock by signing up, but I expect to be able to do whatever I need to do using third-party software.  The account is probably necessary to allow access remotely using the app, but once again I’d suggest just using other software to do this.

Next, pick the “+” in the upper right to begin adding your camera.  I haven’t had luck with automatic methods of adding devices.  You can try if you want but I’d recommend just adding the device manually.  Enter the camera ID from the sticker on the camera; it will look like “SQ286123456”.  It will ask for “Channel Amount”; enter “1”.  I think the camera has two channels but they both seem to show the same video, so I don’t know what the point is.  Enter a password, but it doesn’t seem to matter what you enter.  Leaving it blank doesn’t work.

Once you’ve entered your camera you will see a list of available cameras.  Pick the one you just entered, and you should be taken to a screen that shows the camera’s output.  At the bottom of the screen are several targets, some of which work and some which don’t.  You can play around to figure out what they do.

Third-Party Software

There are a number of third-party programs out there that let you manage and use your camera.  Two of the most popular are Blue Iris and iSpy.  Both are free for the basic functions and require a subscription if you want to get fancy.  If you are serious about using your camera(s) for security purposes you’ll probably want to get a subscription.  To date I have not done so, so will not be able to report on their subscription-based features.

Theoretically you can do everything you want using the free CMS software.  But that software is so awful that I can’t imagine it doing everything you want without glitches and bugs.  Third-party software works much better, even though it may cost a bit to be able to use the features you want.

Installing and Using iSpy

First download, unzip, and install iSpy.  It will ask you to create an account, used for logging on to the iSpy program, and accessing camera feeds and recordings from other devices.  It doesn’t commit you to buying anything; go ahead and sign up.

iSpy Main Screen

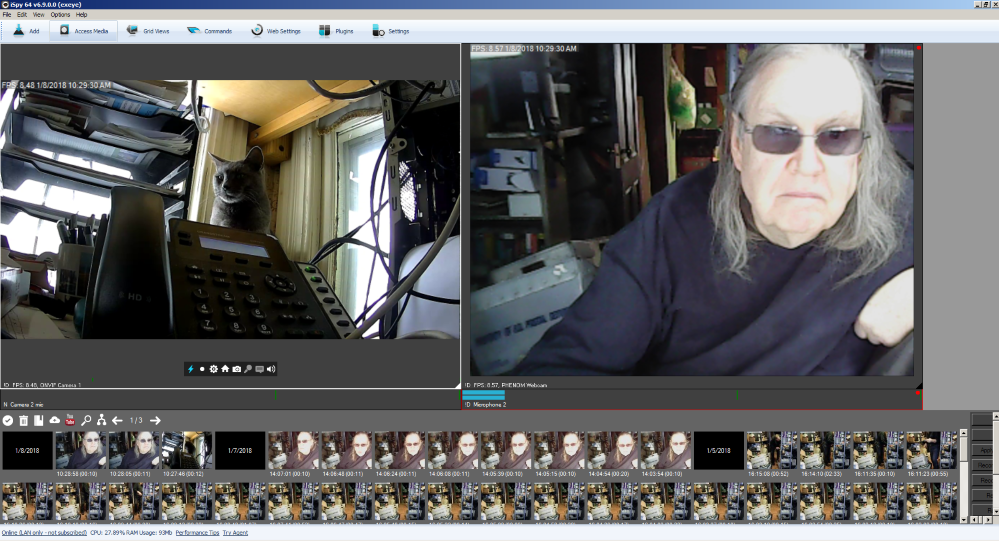
Once you get started, pick “Add” then “ONVIF Camera”.   Ignore the camera’s “User:” and “Password:” fields; they don’t seem to do anything.  It should show the IP addresses of all ONVIF cameras you have; pick the one you want.  Now, pick “Next”.  You’ll get a list of all streams available for the camera.  These cameras seem to have two identical streams so it doesn’t matter which one you pick.  Next pick “Done” which will take you to the camera’s property page.  Give it a name and turn off motion detection if you want, then pick “Finish”.  You should have an active camera being displayed.

iSpy can add other “cameras” to monitor, including webcams and the screen of the computer you are using, so long as they are connected to the PC you are using or are accessible from the local network.

iSpy has several property pages, some of which are hard to find.  Right-clicking on a camera image will get you to some of them.  Play around and see what you can do.

The iSpy subscription versions unlock remote monitoring features.  If you’re happy with only being able to view cameras and recordings from the local network on which iSpy is running, you don’t need to subscribe.  There are a number of subscription options which are pretty much all the same, differing only in the number of PCs that iSpy can be running on and the term of the subscription.  Once you subscribe you can enable SMS alerts based on events you select; to use this feature you need “SMS credits” some of which may be included in your subscription plan, or which can be purchased separately.  There is also an Android-only app which will alert you directly without requiring SMS credits.

For remote access from a PC, go to www.ispyconnect.com/monitor/.  Log in to your server, pick Live->Video Wall, and drag and drop cameras to the “Wall” to display them.  Remember that without a paid account you can only do this from your local network.

For remote access from a smartphone, open Chrome or another browser and go to m.ispyconnect.com.  Log in with your iSpy credentials and the rest is easy.  Again, you need a paid account to use this away from your local LAN.

Installing and Using Blue Iris

Blue Iris is paid software.  If you download it you get 15 days to try it out then it stops working until you pay.  Paid versions are $30 for one camera or $60 for up to 64.  The license comes with one year of email support.  You can buy more support for $30/year and better support for $60/year.

I long ago used up my trial and don’t want to pay, so I don’t have much help to offer.

I can say that it looks like a good, professional product, it’s not expensive, and many people use it.  Documentation is limited, and there’s no user manual.

One difference between Blue Iris and iSpy is that iSpy requires an ongoing monthly charge to use remotely, for which you get to use their servers to facilitate remote access without needing to use dynamic DNS or requiring setting up port forwarding.  Conversely, Blue Iris runs a web server on your machine to be used for remote access, which (I think) requires DyDNS and port forwarding.  Someone please correct me if I’m wrong — I can’t check this myself.

Miscellaneous Manuals, Software, and Documentation

This post is for copies of manuals and other stuff that I can’t find online. If I have a copy I will scan it and post it here. I expect this post will typically be found by people searching for specific things listed here.  I’ll add things as I get them.

There are a few floppy images mostly of driver disks, made with WinImage.  You can download WinImage and use it free for 30 days, plenty of time to make copies of, or extract files from, floppy images downloaded here.  But I strongly suggest registering your copy — it is a useful program and worth supporting.

If you find any of these postings useful, please leave a comment! Thank you!


Casio MS-80TE Calculator

This also applies to the HS-85TE, the SL-305TE, and the SL-910TE.

Casio MS-80TE manual


Sears Weider Crossbow Exercise Machine

This is for model number 831.153951.  There are no doubt other similar models of this machine with different model numbers for which this manual would be useful.

As the machine is basically a copy of the Bowflex machine, books and manuals written for the Bowflex are useful for people with the Crossbow.

The machine itself has been sold as parts on eBay.

The manual is a PDF file of the original User’s Manual for the machine.  It contains assembly and adjustment instructions, a parts list and exploded view, and very brief instructions on use of the machine.  It doesn’t have information on specific exercises done with the machine.

Crossbow Manual


Bektronic Computer Parts

Bektronic was a lesser-known Chinese computer parts supplier fairly widely used back in the 1990s and 2000s.  Their manuals typically don’t have a brand name (as is true of many Chinese knock-off brands).


IBM Cobalt-AT 486 Blue Lightning System Board

IBM actually sold motherboards for building clones for awhile.  I sold quite a few computers built with these motherboards — they were cheap and fast.  I still have one which I’m planning on putting on eBay once I get the dead BIOS battery replaced.  Here is the manual for it:

IBM Cobalt-AT 486BL System Board

Here is the driver disk that came with it.  It is WinImage format floppy image (1.44 MB), zipped so I could upload it.

IBM On Board IDE Driver #1855


Generic UN-1072 IDE Multi-I/O Card

This is a very common generic 16-bit ISA multi-I/O card.  This particular one was purchased 11/02/93 from Triton for $12.27.  It has a Winbond chip and is probably typical of many of these cards.

UN-1072 IDE Multi-IO Card


Generic Oak VGA Card

This is a manual for a generic Oak VGA card from 1991.. The specs are 1024×768 512K.  It was originally purchased from IPX Informatic on 12/12/91 for $39.99.  It is amusing because it is so typical of generic parts of the era: no brand name or manufacturer but including a warranty card.  They tried very hard to look legit.

Oak VGA #28


Vitex H757AF IDE Multi-I/O Card

This is a manual for a late version of a generic Winbond-based IDE Multi-I/O card.  It was originally purchased from Triton on 8/3/95 for $10.21.

Vitex H757AF Winbond W83757AF IDE Multi-IO Card #2503


Generic Trident 8900D Super VGA Card K928

This manual is for a generic Trident 8900D super VGA card vintage 1995.  These were very common in very many generic versions.  This particular one was originally purchased from Triton on 5/31/95 for $58.45.  The specs are 1024x768x256 1MB.

Trident 8900D Super VGA #2335

This is a driver disk for a different Trident 8900D VGA card.  I think driver disks are pretty much interchangeable.

Trident 8900D driver #2492


Generic Trident PCI-47 TGUI9440AGi VGA

I found a manual for a generic version of the Trident 9440 VGA.  It took a while but I finally got a complete copy scanned.  Here it is:

PCI-47 manual


CNet CN30BC Ethernet PCMCIA Card

This is an off-brand LAN card for laptops with a PCMCIA slot. CNet sold a lot of stuff back in the day, and it was pretty good for cheap hardware. It’s probably a design used by many off-brand manufacturers. (Hint: the manual doesn’t say CNet anywhere.) Anyhow, here is the manual:

And here is a zipped copy of the contents of the driver disk:


Wentop Digital Timer

This is a cheap Chinese digital timer for controlling power to a device. It has a tiny instruction sheet which you’ve probably lost, and it’s sufficiently non-obvious how it works that you need the instructions every time. Here it is:


Atlas Workshop Tools 1952 Catalog

This is a copy of a catalog for Atlas Workshop Tools, a line of low-cost woodworking tools made in the US back when such things were made here. An eBay listing for a copy of this catalog says it is from 1952, but I suspect it may be from around 1956. In any case, it’s old.

I sold my copy on eBay so you’re probably out of luck if you want an original. If all you want to do is look at it, here you go:

DBtech 35mm Film/Slide Scanner

DBtech has made a number of film/slide scanners under a variety of names and model numbers. The one I have doesn’t seem to have a model number, so you’ll have to look at the pictures in the manual to see if it is like yours.

I think they are all pretty similar in operation, so if yours is different this may still help. It’s not easy to figure out how it works without the manual.

Teac FD235 Series 3.5″ 1.44 MB Floppy Disk Drive Installation Guide

This is interesting because it describes how to install 3.5″ drives in PC/XT/AT computers that don’t have BIOS support for them. There is a reference to a driver that provides such support (“Bastech driver”). I don’t have one and don’t know where to get one. Google will probably help.

Multi I/O Card IODE-3290U

This is a manual for yet another no-name multi-I/O card, this one “Model IODE-3290U”. The card has IDE HDD/FDD/2 serial/1 parallel/1 game ports, like most all such cards.

If you have one of these or one that looks like it, the jumper settings might be helpful.

Bektronic Multi-Motherboard Driver CD from 2001

This is an ISO CD image file containing the contents of a driver CD that came with a 2001-vintage Bektronic motherboard. It has drivers for most of the motherboard chipsets of the era and would probably work for most motherboards based on those chipsets. I would have uploaded a zip file of it but WordPress doesn’t allow them.

Here is a picture of the CD which lists chipsets and Bektronic motherboard models which are supported by this CD:

I’ve also uploaded the ISO image of this CD to the Internet Archive http://archive.org should you wish to access it that way. The Internet Archive is a great and growing resource for obsolete software of all kinds.

Below this line is a list of chipsets and motherboards as printed on the CD, to help people find this post using search engines. Chipsets are listed with the Bektronic (“BEK”) motherboards that use them following each group of chipsets. A ew other thigs on the CD are at the bottom of the list.


Intel I810
Intel 810DC-100
Intel 810E
BEK 6P2M810
BEK 6P2A810
BEK 6M810E
BEK 6B810E
BEK 6F810E
Intel I815
Intel 815EP
BEK 6A815EP
BEK 6A815EPT
Intel I845
BEK P4A845D
BEK P4A845S
BEK P4A845
VIA 693A
BEK 6VA693A
BEK 6VA693AM
BEK 6VA693AT
BEK 6VM693A
VIA 694X
VIA 694T
BEK 6VA694
BEK 6VA694T
VIA PRO266 DDR
BEK VAP266A
BEK PRO266
VIA KT266A
BEK K7VA266A
VIA KT133
VIA KT133A
BEK K7VAT
BEK KTAPRO
VIA KLE133
BEK K7MKLE
VIA PLE
BEK 6VPLE1
BEK 6VMPLE1
BEK 6VMPLE2
VIA PM133
BEK 6VMPM
VIA P4X266
BEK P4VAS
VIA P4M266
BEK P4VAD
BEK P4VAS
SIS-645
SIS-650
BEK P4SAD
BEK P4SMD
NET2100 Driver
TV2100 Driver
Flash ROM Program
RTL 8139 LAN Driver
RTL 8100 LAN Driver

[Trying to figure out how to upload zip files…]

Sears Craftsman 315.25020 Power Plane

These use a special cutter head with integral blades that is no longer available, so my guess is that there are few people still using them. But for anyone who still is, here’s the manual.

Sears Craftsman 3/8″ 12V Cordless Drill-Driver

This is the English part of the manual for this drill. Mine is about to be recycled as the battery is dead and I have much better, newer drills. I suspect no one is using these any more.

This manual represents the period when Craftsman power tools had begin to deteriorate in quality. For example, there is not a complete parts list — you’re not expected to fix them, just throw them away.

Black & Decker NST2118 Trimmer/Edger

This is the English part of the manual for this trimmer/edger. I am selling mine on eBay because I bought a Ryobi one. The B&D one is better, actually, but the batteries are a pain, and I have lots of Ryobi batteries.

Jaton Video-158PCI Quick Start Guide

This is the manual that comes with the Video-158PCI (GeForce4 MX440) video card.

Apex Data IBA-1414 Modem User Technical Reference Guide

This is a manual that came with an internal 14.4K modem made specifically for the IBM Thinkpad 350C by Apex data. It cost $180 in 1994(!).

While there are probably few if any of these modems still in use, the manual has very extensive technical details of the modem, especially commands and return codes. Such details would apply to many modems of the era.

Sears Craftsman Jointer/Planer 149.236223 Owner’s Manual

This is a copy of the user manual for this 4-1/8″ benchtop jointer/planer, which is probably also similar to a number of other models.

I am selling blade sets and belts for this machine on eBay:

 
Poulan/Electrolux Mowers; Tecumseh Engines & Carburetors

I just retired an old 2002-vintage Poulan/Electrolux push-type rotary mower. So I scanned the manuals before throwing them out and am posting them here. Maybe they will be of use to someone…

The mower was a Poulan model P35TN20SE with a Tecumseh LEV-80 (LEV80) engine.

Toro Rake and Vac Superblower/Vac Blower/Vacuum

Applies to model numbers 51573 and 51591-210000001-up of this machine.

This is a pretty good machine but only works well with very dry, “fluffy” leaves. I gave up on mine and am selling it on eBay. I figured I’d scan and post the Operator’s Manual before it’s gone.

Craftsman 10″ Belt Drive Table Saw Owners Manual

For model numbers 113.298032 (saw with legs, table extensions, and motor), 113.298142 (saw only), and 113.298240 (saw with legs, table extensions, motor, and hold down).

These saws were sold in the early 1980s.

Craftsman 1-HP Capacitor Start AC Motor Owners Manual

Motor model no. 113.12172, used on early 80s 10″ belt drive table saws and probably other things.

Craftsman Sawdust Collector Owners Manual

This is for model 113.299660. It is used on 80s-vintage Craftsman 10″ belt drive table saws. Not for direct drive saws.

Kenmore 850.5436740 Ductless Range Hood Instructions & Parts List

This is a manual for a 70s-vintage Kenmore range hood. It is for a wide range of model numbers, covering different widths and colors. A list of applicable models is on the first page of the manual. I’m too lazy to type them all in, which probably will make this hard to find by most search engine users.

Kenmore 103.7426641 Gas Range

This is all the printed materials that came with the range. Some of this material is specific to one series of model numbers, others for all 70s-vintage Kenmore gas ranges.

Lafayette TE-13 Pocket AC-DC VOM Meter

This is a small analog volt-ohm meter from the 60s.

CLP – Command Line Text File List Program

I’ve decided to post some of the useful small programs I’ve written for my own use.

CLP is a simple C# console program that lists text files on a Windows printer. It was originally intended to list C source code, but it is useful for printing many kinds of text files. Yes you can use Notepad for this but CLP has some useful differences and additional features:

1. As a command line program that takes a filename as an argument, you can put it in your SendTo list and thus be able to print text files from a right-click.

2. CLP puts a header in bold on each page with the filename, the file date and time (not the current date), and the page number.

3. Output is in a fixed-pitch font, which makes outputting things like tables easy.

4. Printed lines are 80 characters long. Continuation lines are used for lines that are too long. Continuations are marked with bullet characters to make it clearer that they are continuations.

5. Output is to any Windows printer. A CLP default printer selection is maintained, with the ability to list available printers and select a new default from the command line.

6. Multiple files can be specified and files to list can be specified with wildcards or through the use of a file containing a list of filenames.

7. Operating instructions can be displayed by simply entering the program name with no arguments. The resulting output looks like this:

C:\Users\Jim>clp
clp default printer: HL-5250DN 2-sided

clp - print file(s) to clp default printer - 12/25/16 (.NET)

To execute enter: clp [namfl1...namfln] [-p[n]] [-1|-2]

where each namfl is a file to print namfls can use paths and wildcards an @namfl prints files named in namfl.nms namfl.nms entries can use paths namfl.nms entries cannot use wildcards or @namfls
-1 simples (driver default is ignored)
-2 duplex (driver default is ignored) -p lists available printers by number -pn selects clp default printer n printer selections are saved between runs (clp has its own default printer)

The program is written in C# using the .NET library. Here is a zip file containing the latest source and executable files:   CLP.zip

Enjoy!

-jimc


Version 4/12/19: The program was updated to allow parameters to specify 1-sided or 2-sided output, overriding the driver default. These are especially useful if using CLP with SendTo: create “CLP 1-sided” and “CLP 2-sided” links in the SendTo folder.


Version 10/19/20: Fixed a bug that caused pages to be printed in landscape orientation if the printer driver was defaulting to that. Changed to force use of Portrait orientation.


Version 11/10/20: Fixed a related bug that caused duplex pages to flip horizontally rather than vertically.

Version 12/23/23: Fixed a bug that caused it to fail if the CLP default printer name was not a valid Windows printer name. This could happen if you rename a printer.

How I Handle Email

I’ve come up with a slightly complicated system for managing email, but one that works well for me. Most people are happy with just using Gmail or something like that, and if it works for you, great. But I have a few needs that Gmail won’t satisfy. I want my email sorted by category, automatically and accurately. I get a lot of spam and junk email and don’t want to have to see most of it, but I don’t want to miss anything that might get miscategorized as spam. I want to keep all my email on my main computer, but still want access to important email on my smartphone.

Here’s what I do. You can pick and choose among these suggestions, but it works best if you do all of them.

1) I have my own domain, which is something I recommend for everyone. It isn’t expensive, and gives you an email address you own, that can’t ever be lost against your will, as recently happened to people using Verizon email addresses. Even a Gmail address can potentially go away. If you want to use Gmail, get your own domain and forward that email to your Gmail account.

2) I use a different email address every time I register on a website, and set up my email account as a “catch-all” so I will get any email sent to my domain (anything@mydomain.com), rather than having separate mailboxes for everything. For example, if I register on xyz.com, I use the email address xyz@mydomain.com. This is very important for security. I can be reasonably sure that if I get an email from XYZ Corp. at the address xyz@mydomain.com, it is legitimate. Likewise if I get an email supposedly from XYZ Corp. but it comes to a different email address than xyz@mydomain.com, it is probably a phishing email. This protection works very well. Further, sometimes email addresses “get loose” when a company gets hacked or sells their email list. I can then change the XYZ Corp. account to use a different email address (say xyz-2@mydomain.com, or just cancel the account, and then route all email to the original address directly to my spam folder.  Lastly, email addresses are one of the main ways that sites track people.  By using a different one each time you sign up for something, you break the link that connects different sites you sign up with and that lets them track you between those sites.

3) I have an email client running on my main computer that downloads, sorts, and stores all email I receive to any of my various email accounts. I use an email client called “The Bat!” by http://www.ritlabs.com (yes it has an exclamation point in the name). The Bat! is very configurable, which makes it more complex than most other clients, but if you’re comfortable around computers you won’t have trouble figuring it out. It does cost money, but not a lot, and I think it is well worth the cost.

4) I use an email classifier called “PopFile” that works as a fancy spam filter, and assigns a category to every email I receive. I have a dozen or so categories, each of which gets routed to a different folder in The Bat!, and some of which get additional processing like being marked read, or having a copy sent elsewhere. PopFile works by intercepting POP3 traffic and processing it to determine what category it belongs in, and adding a flag to it which specifies the category. It requires “training”, but is probably 99% accurate once you’ve given it a few examples. You do have to correct it when it miscategorizes something, but that only happens with a couple of emails a day, and is very easy to do.

5) I have a separate Gmail account that I only use for copies of emails that I want to have available on my smartphone (there are a few PopFile categories that I consider “important”). The Bat! forwards copies of those emails to that Gmail account, and they pop up on my phone. I review them several times a day when I’m away from my computer, and delete them from the special Gmail account (remember that there is still a copy stored in The Bat!) when I’m done with them on the phone.

This whole procedure is kind of old-fashioned (few people still use POP3 for email) but it works for me and newer ways of dealing with email won’t do everything that this does. Enjoy!

-jimc

Goodbye Hurricane Electric, Hello Namecheap!

I’ve been putting this off for months, but I’ve finally made the change, and it wasn’t that hard!

What change, you might ask? Well for the past 12 years this website was an increasingly embarrassing one-pager. It was hosted by Hurricane Electric, one of the earliest hosting companies (they did manage to get a two-letter domain). I’ve never had a problem with them, but they seem to be getting out of the hosting business and don’t offer the latest bells and whistles (like automated WordPress installs). They were also costing me $10 a month, which for a small website was a bit much.

I had Hurricane Electric providing my nameservers and email service as well as hosting. Switching over was scary because I have a lot of ongoing projects and it wouldn’t do to start losing emails. Especially if I broke things and couldn’t figure out how to fix them quickly.

My first step was to build this new site using another domain I have (exeye.org) so I could get it minimally presentable before the cutover. It turns out that WordPress is not very good at being moved; instead of having everything relative like any good programmer would design things, WordPress is full of absolute paths and names of external resources like the database. I was a little overwhelmed by the prospect of having to move my website from exeye.org’s WWW directory to exeyesoftware.com’s new home. The NC how-to page, which was not very encouraging, came out to be 41 pages long when I printed it. Luckily NC support, which is very good, handled the job of moving WordPress for me.

I also created a new catch-all email account for exeyesoftware.com at NC and set up my email client to be listening to the new account in addition to the HE one. Finally I turned on NC nameservers for the domain. For a day, while the new nameservers took over, both the HE account and the NC account were active so you’d get to me regardless of which nameserver you got. After a couple of days I just removed references to the HE email account, and it was all done.

Now I’ve got all the goodies of a modern web host, like cPanel, WordPress, and a zillion other things. I don’t have extensive experience with other hosting providers, especially the current crop, so I don’t know how NC compares. All I know is that I’m really happy with them, especially their support.

-jimc

My VoIP Book(s)

For the past couple of years I’ve been working on a book for beginners to VoIP. I’ve learned a lot over the past few years by implementing a VoIP PBX for a client and for myself. One thing I learned is that VoIP is insanely complex, and that the existing books for VoIP beginners don’t tend to start at the beginning. So I somewhat naively figured “Why don’t I write a book for beginners myself?”. After all I was a beginner, so I know what beginners need.

Well that has turned into an on-again, off-again project that never seems to get closer to being done but manages to consume vast amounts of time. I’m going to try to get something published within the next few months, but I’ve been thinking that for a couple of years now. We’ll see.

The book is tentatively titled “Installing Your First VoIP PBX — Working With Callcentric and Grandstream — Volume 1: Orientation”. Originally I wanted the book to have both an orientation and specifics for setting up a PBX and VoIP phones. What I’ve learned is that that is simply too much for one book, and further, that VoIP hardware is evolving so quickly that it is impossible to keep hardware-specific content up-to-date. To adapt to these constraints, it seemed more sensible to produce three shorter books rather than one huge one.

The plan is to get the books produced by Amazon’s on-demand publishing service, Createspace. It’s reasonably priced, and aside from the fact that Amazon keeps a lot of the money, it has the huge advantage of not costing anything to get started.

I’ve been distributing a small number of copies of the book by email to interested beginners who are willing to critique it, as well as to VoIP professionals who are willing to tell me about any mistakes I’ve made. If you fit into one of those categories, contact me with your email address and I’ll send you a review copy of the book in its current unfinished state. I’ll stop doing this once I’ve got enough reviewers, or the book actually makes it into print.

-jimc

Update (9/5/19):  I’ve given up on the book.  The main reason is that Grandstream updates their firmware (and thus the user interface of their products) often enough that it is pretty much impossible to produce an up-to-date book based on Grandstream (or probably any manufacturer’s) hardware.  I’ve found myself losing ground; content is becoming obsolete faster than I can write it.

My intent is to start putting much of the non-obsolete stuff I’ve written into posts on this website.  There’s a lot of good stuff that I think could be helpful to others.  I’ve already posted about ATAs.  Hopefully I can get the rest done this winter.

The New EXEYE Website

We’ve had a simple one-page website for (way too) many years. What you are reading is an attempt to move into the twenty-first century.  Welcome!

I will not be selective on what to publish here. I’ll include information about EXEYE projects and products, technical information learned while doing EXEYE work, as well as posts about things unrelated to EXEYE that I think might be interesting or useful to others, so you might find anything here.

I’ll try to keep the category structure relevant to help you find your way around, but I’ll leave it to Google to handle the indexing. I expect most visitors to find this site by searching for a topic I’ve written about.

Enjoy!

-jimc