I’ve been using (and selling) Canon MX922 inkjet multifunction printers for a long time and very much like them. They do pretty much everything, and I’ve seen them on sale for $49 (a couple of years ago). If you use them with non-OEM ink, you can get your cost per page down to pretty much the cost of the paper.
Unfortunately the MX922 has been discontinued. I’ve done a lot of searching and haven’t found a reasonable replacement. at any price, from any manufacturer. There are new and used ones for sale on eBay and other places, but you’re likely to pay over $300 for one (as of mid-2021). It’s a measure of how good these printers are, and why it’s worth considerable effort and expense to keep them running.
I don’t know if non-OEM ink can cause problems, but I use it exclusively with good results. You may have trouble with colors being a bit off when printing on photo paper. You also may end up with a clogged printhead, which is what this post is about. I don’t know if I would have had the same trouble if I used Canon ink, but from what I read online, you will end up with a clogged printhead eventually no matter what ink you use.
This post really needs some pictures but I’m not that motivated right now. Maybe someday…
The Symptoms
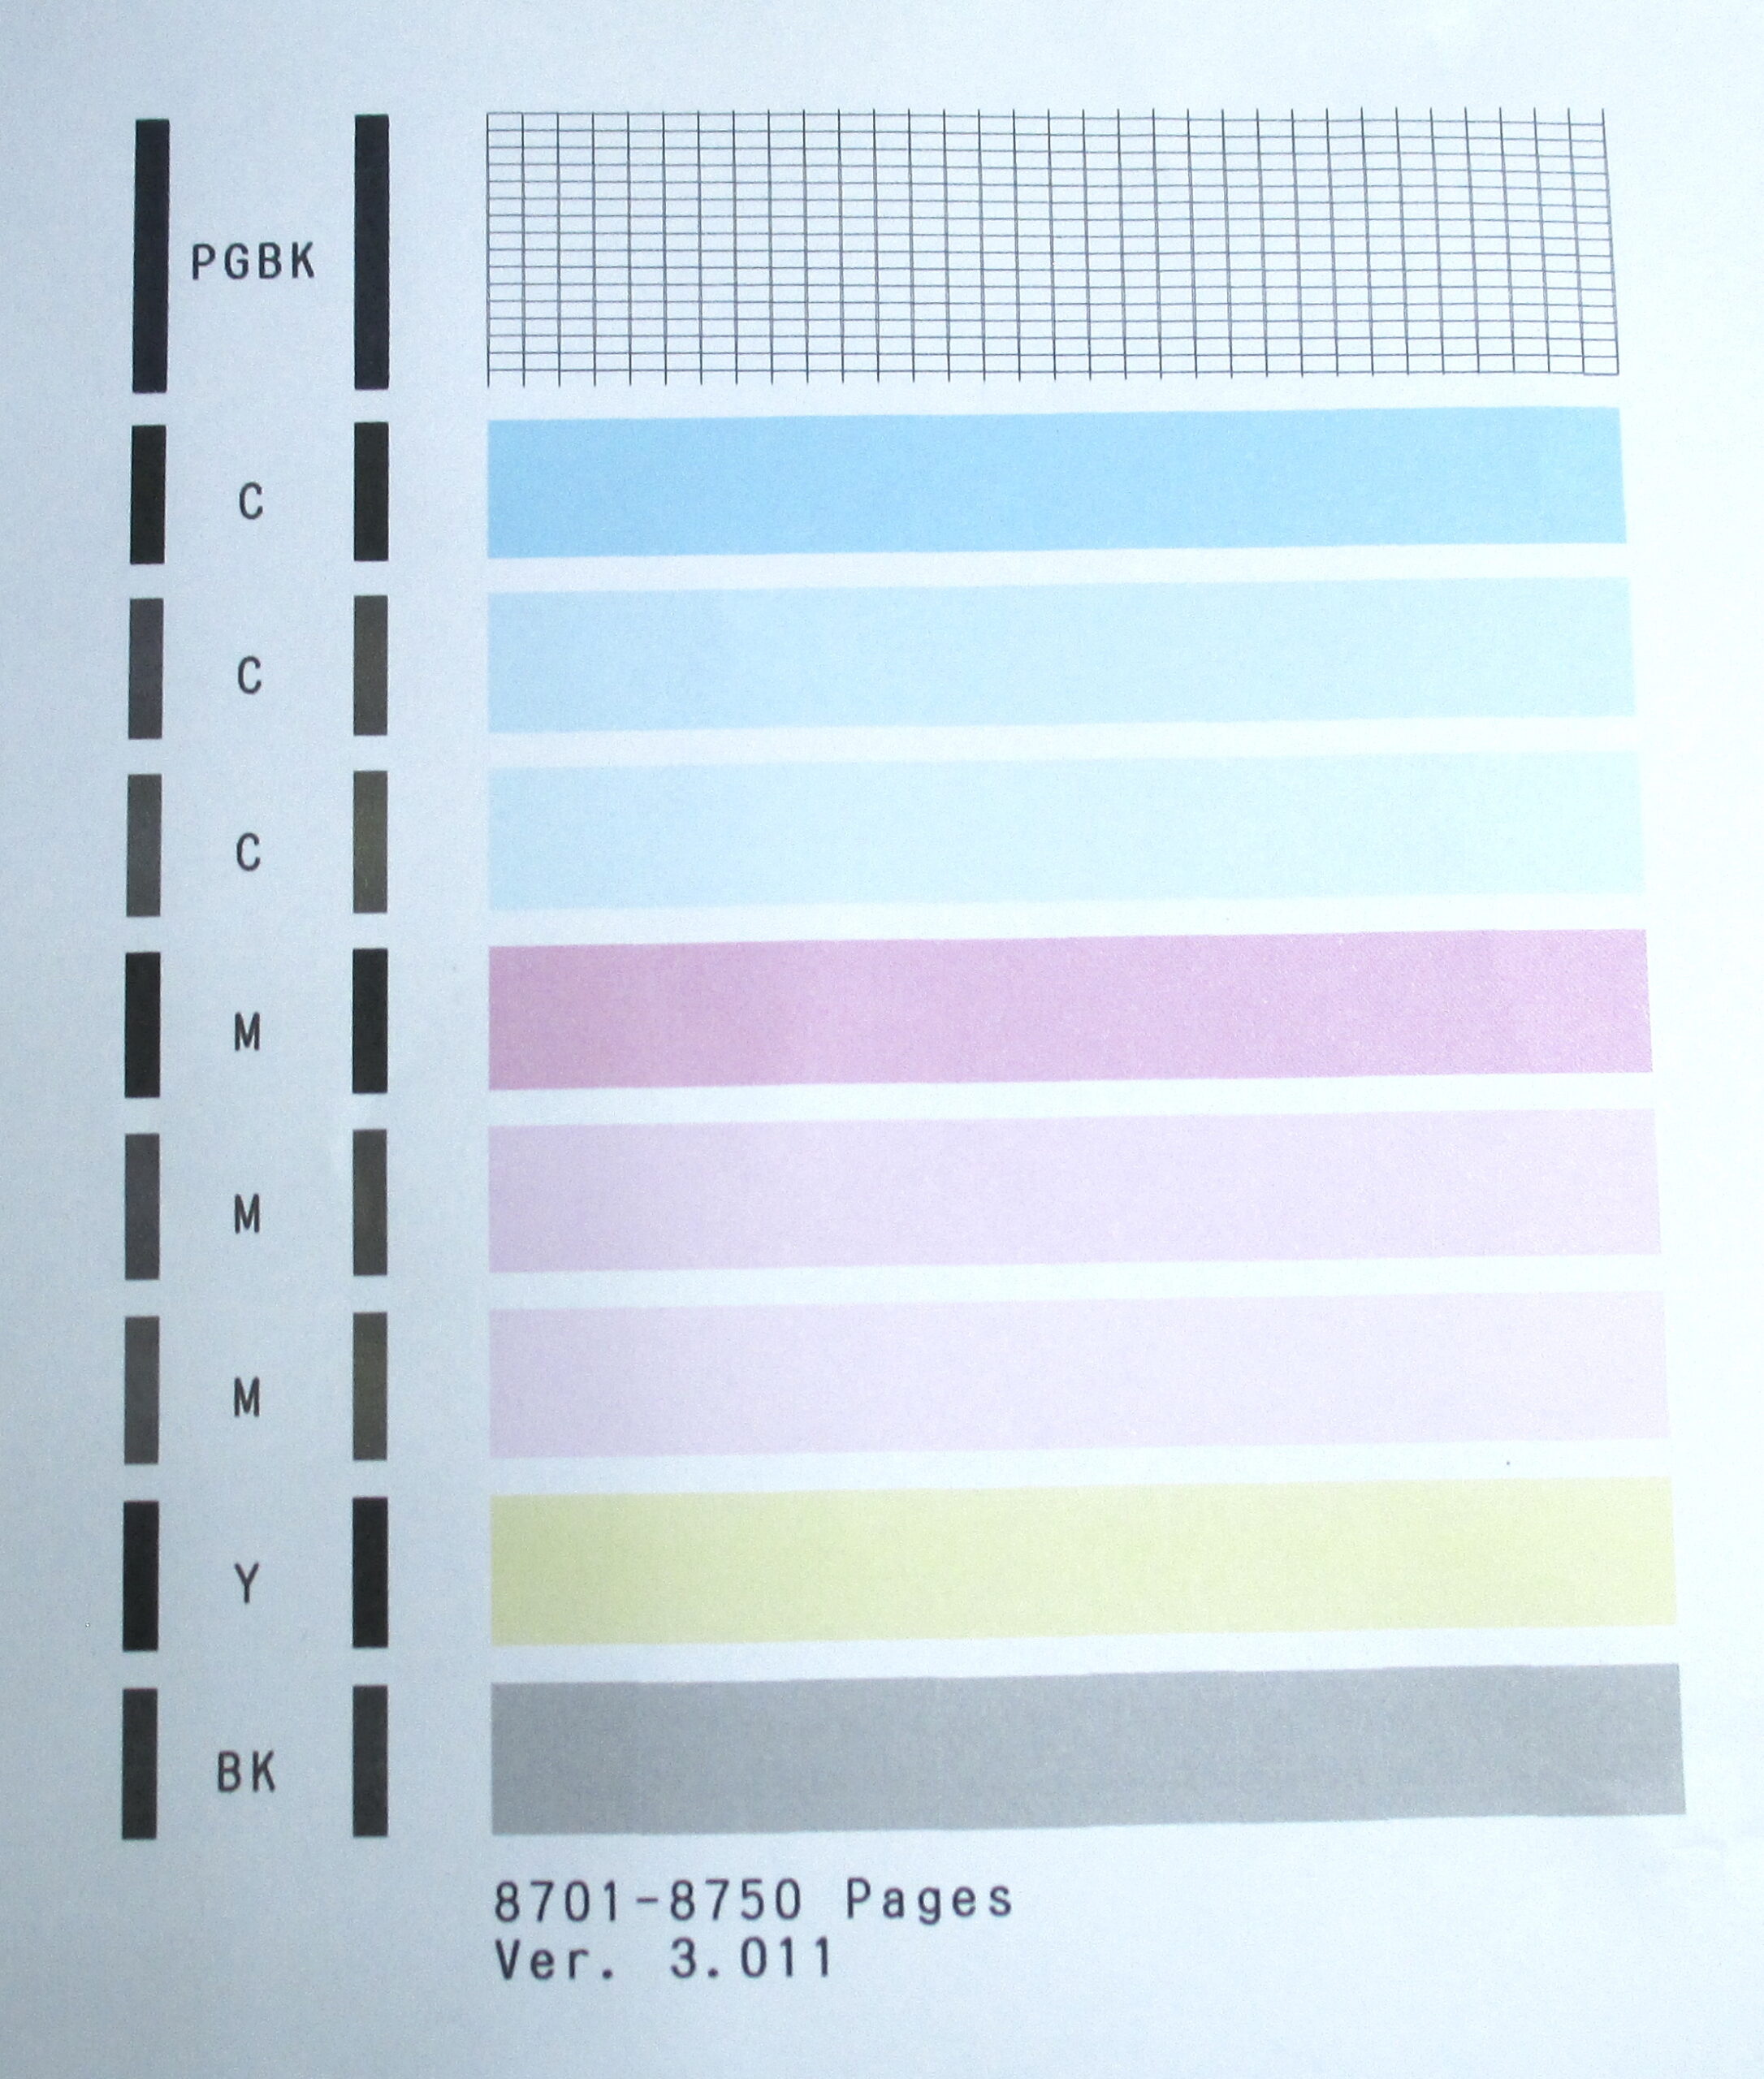
Your printhead is clogged if there are problems visible on a nozzle check print, and running the printhead cleaning and deep cleaning routines don’t solve the problem, or only solve it for a short time.
If you’re having double printing, see the end of this post.
What To Do
When this happens you can buy a new printer, they’re cheap after all (at least they used to be), or you can buy a new printhead, which used to cost as much or more than a new printer but now looks like a good deal if you can find one. Or you can try to clean the printhead. It’s messy and takes a while, and you risk damaging the printer, but the printer is close to worthless at this point anyhow.
Update: as of July 2021, printheads are very cheap and very available on eBay. It looks like somebody made a non-OEM version, and they are closing them out for around $25 or $30. I would recommend buying a couple if you want to keep your printer working for a long time. It also changes the economics of cleaning them — you have to ask whether it’s worth $30 to have to go through the trouble of cleaning the old one.
I got my cheap printheads from China, installed one, and it works! The nozzle check pattern isn’t quite perfect (faint unevenness in the small-ink-tank black), but for normal use it prints just fine. I recommend these printheads!
Get Some Supplies
Go to the drug store and get a bottle of ammonia, a bottle of isopropyl alcohol, and a gallon of distilled water. Put on some old clothes, and find a sink you can get dirty. You’ll also need a flat-bottomed bowl to work with.

Take Out the Printhead
I have read lots of different advice about this. I’ll describe what I did, which worked. There are no doubt other ways.
- Open the printer and the ink door as if you were going to change an ink cartridge. Then unplug the printer. It will complain about this when you turn it back on, but it will get over it.
- Take out all the ink cartridges. I put them in a pile and wrapped them with aluminum foil so they wouldn’t dry out. You probably don’t have to.
- Make sure the printhead carriage is lined up with the opening. The left edge of the carriage should line up with the left edge of the opening. Move the carriage by hand if necessary.
- Open the lower door and make sure it is all the way down (it will click).
- Pull on the printhead latch, which is the horizontal plastic bar with all the ink colors on it. Use a finger in each corner of the bar. You have to pull pretty hard. The latch bar should line up with the edge of the opening when it is all the way out.
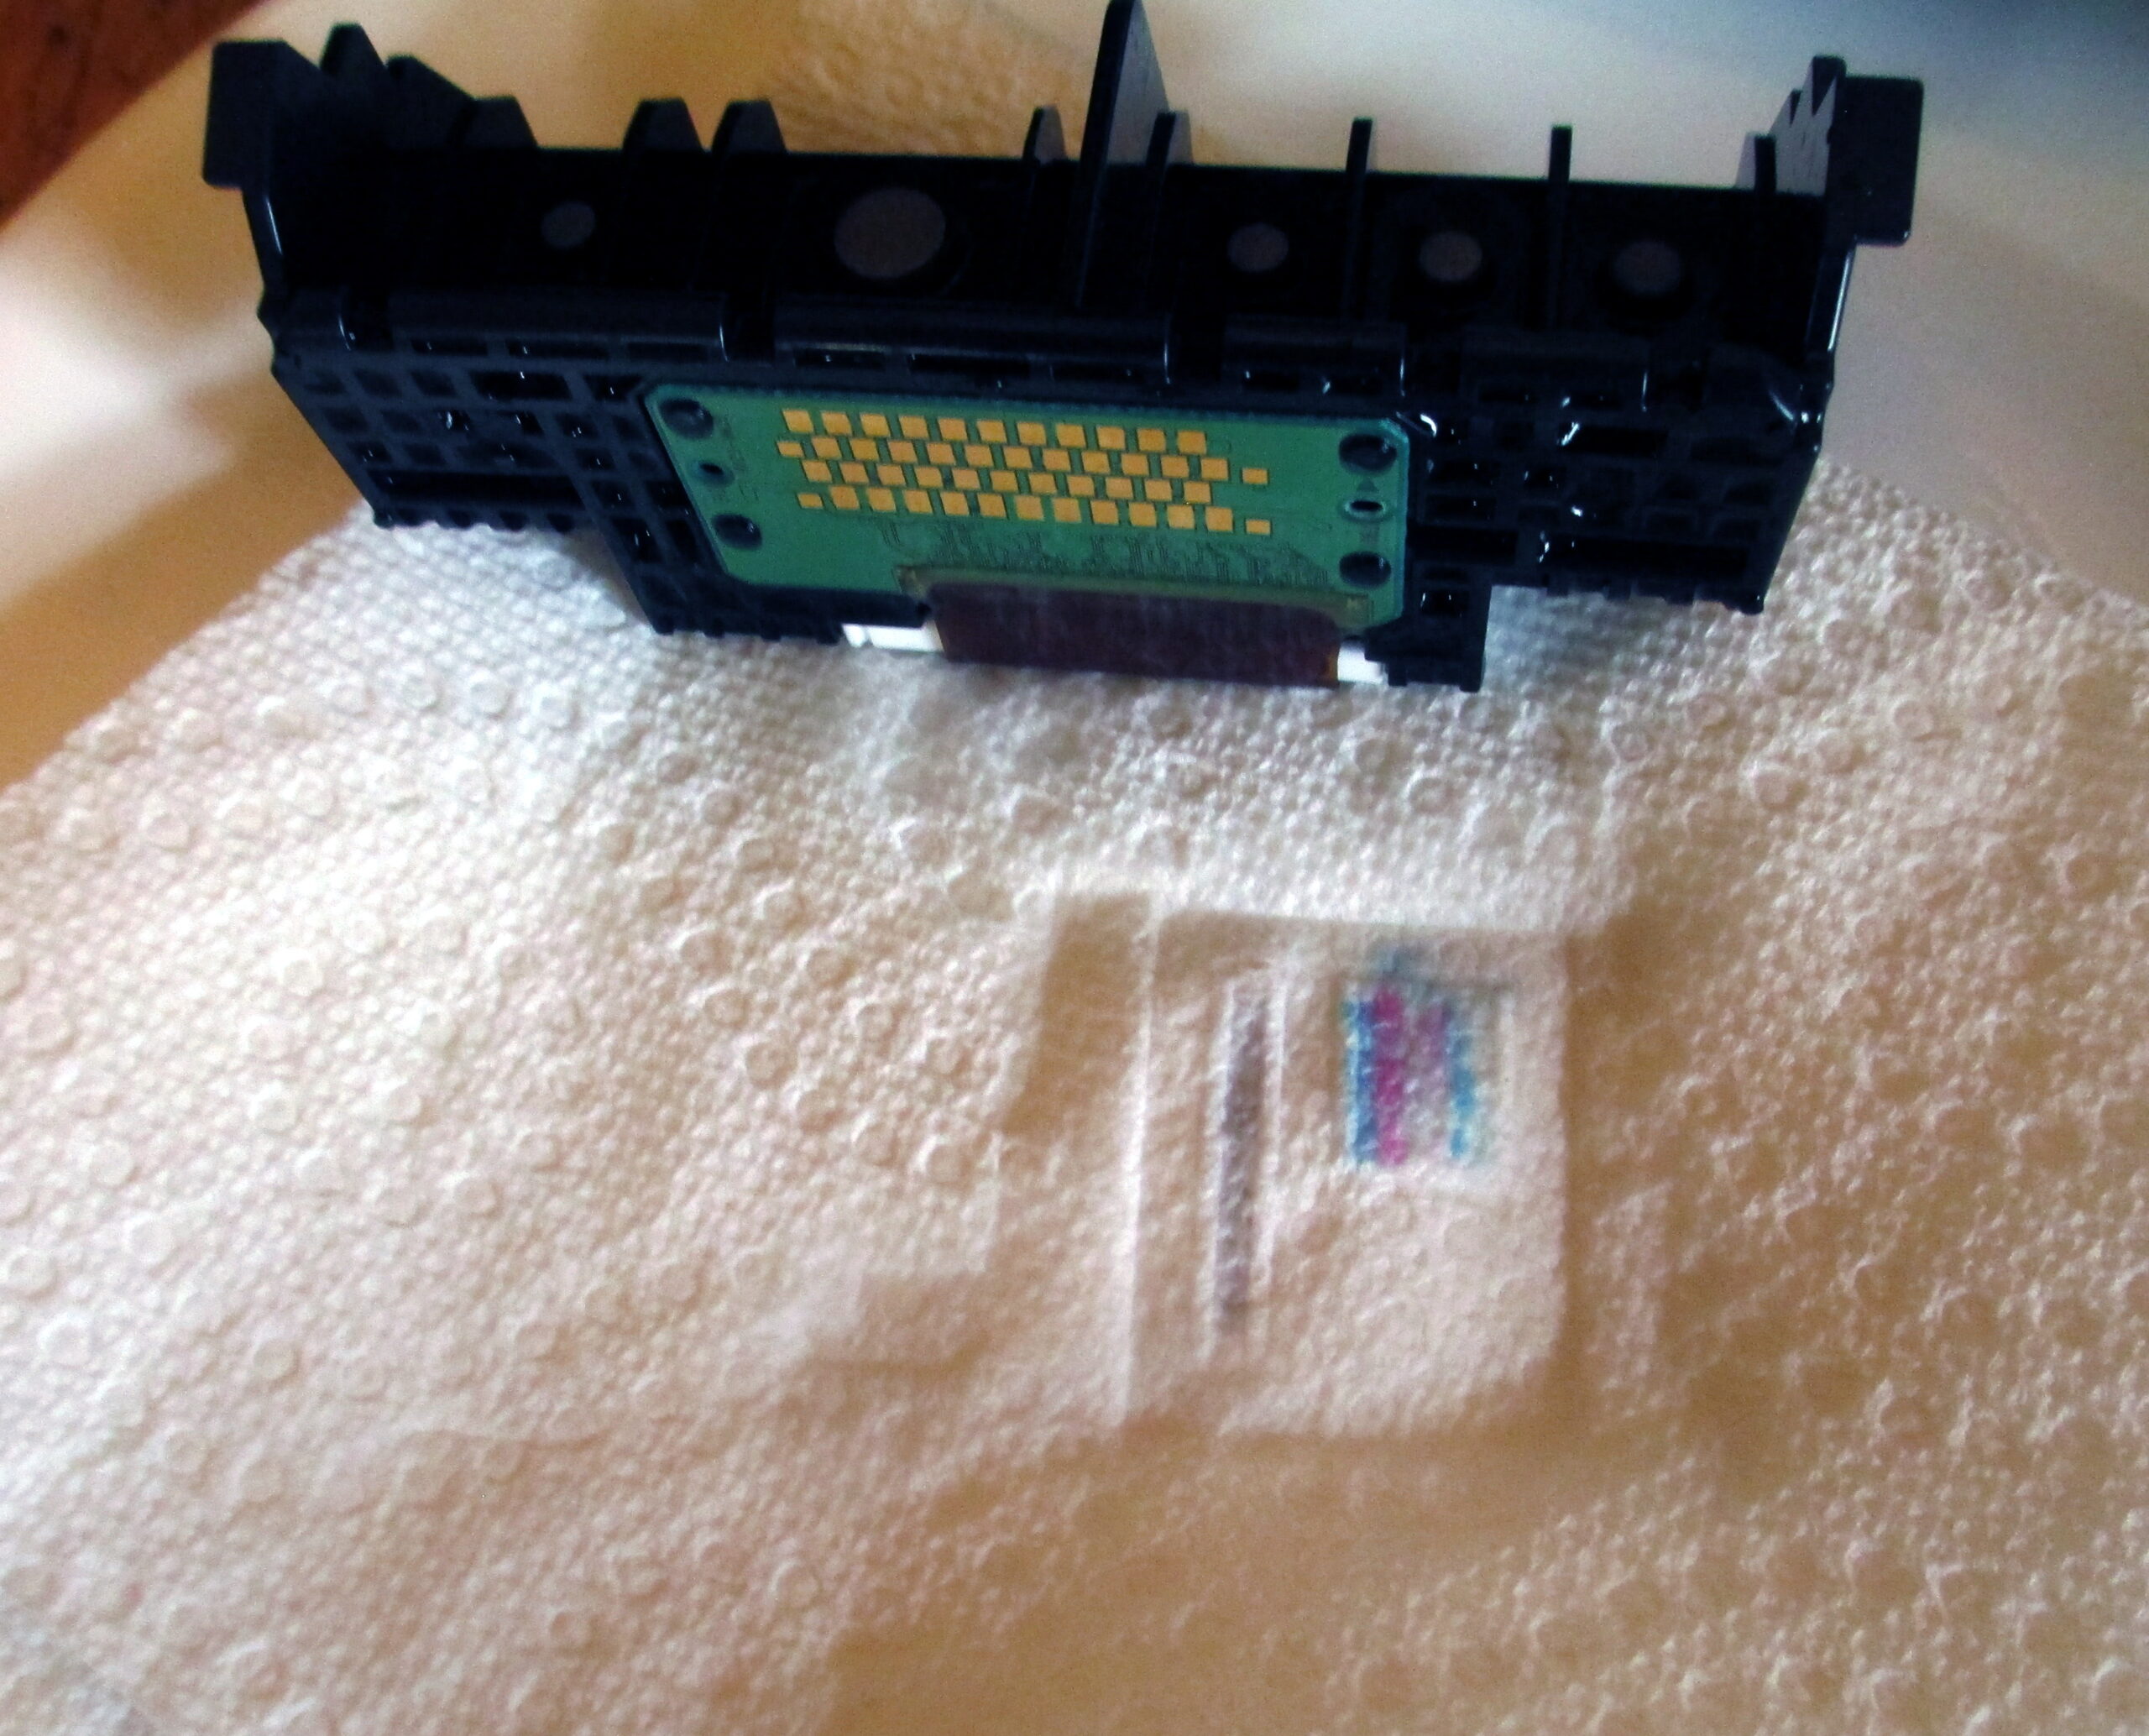
- Remove the printhead. This is tricky, but easy once you know how. First, recognize what part is the printhead. It has the ink ports on it (where the ink cartridges go), and a vertical divider in the middle. Use two fingers to grab it by that center divider. Pull it out, but realize that it rotates as it comes out; the top comes out before the bottom, and it will be rotated 90 degrees (with the back side with the electrical contacts facing up) when it comes out.
Clean the Printhead
It’s OK to get it wet. Fill the bowl with warm tap water (or distilled water if your tap water is not good) and add a little alcohol and ammonia. The proportions aren’t important, use a tablespoon or two of each to each cup of water. Dunk the printhead and swish it around. Leave it to soak for a while. (Don’t put the printhead in the microwave. That would destroy it.)
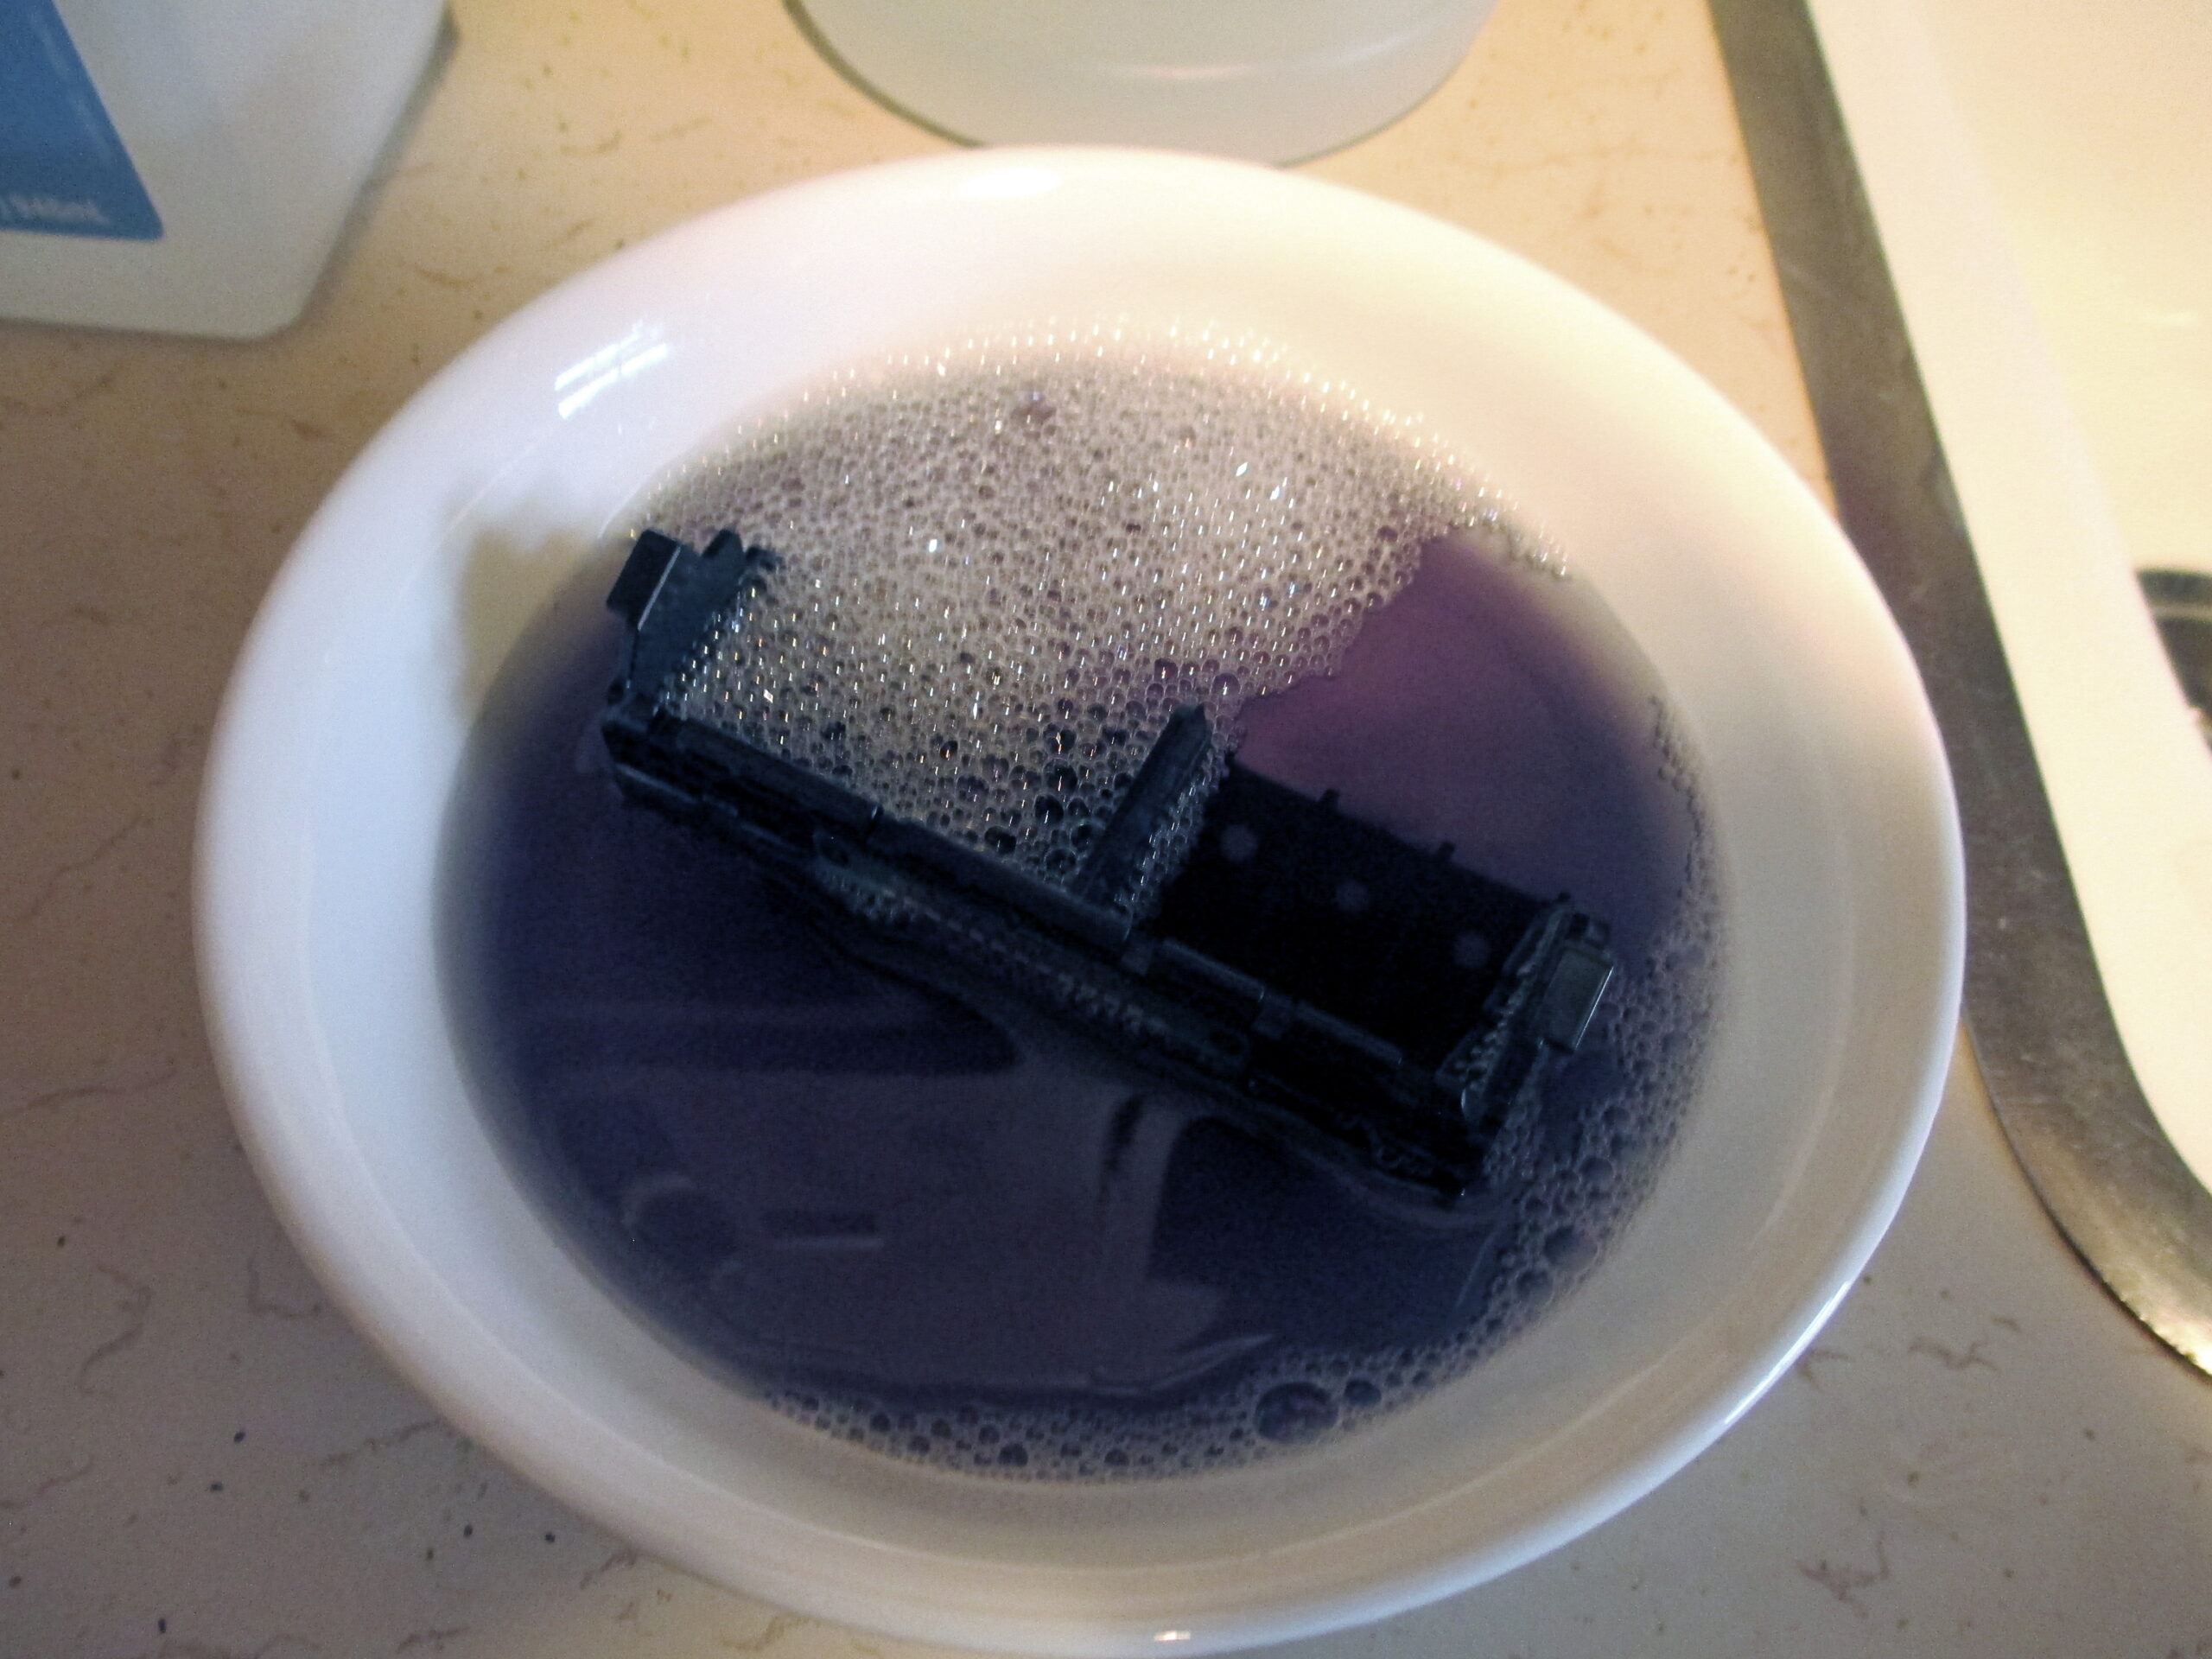
Repeat this process until you don’t see even a trace of color in the water after a good soak. It will take five or ten times. In between soakings, run the printhead under the tap until the water runs clear. Be especially careful to clean the little screens in the ink intake ports. They seem to collect ink-colored gunk, and I think that gunk is likely to be the problem you’re trying to solve.
Between soakings, also blot the bottom of the printhead on folded paper towels. If you see ink, you’re not done yet.
If you have one, you can try using something like a Water Pik, with warm water. Direct the stream into the screens not into the bottom of the printhead — you want the clog to come out the bottom, not get pushed back in.
When you’re done the screens should be screen-colored, without gunk or ink residue. Dunk and swish the printhead one more time, this time using half distilled water and half alcohol but no ammonia.
Dry the printhead on paper towels. If you’re in a hurry put it in the oven with it set to 120 degrees F for a half hour, or dry gently with a hair dryer. If you’re not in a hurry let it air-dry overnight. When you’re done you should be confident the printhead is dry inside and out. If you heated it, let it cool before reinstalling it.
Reinstall the Printhead
Put the printhead back in the same way you took it out. Start with the contacts up and the ink intake ports down, with the bottom of the printhead going in first. If you do it that way it will just drop in once you get it aligned right. Close the latch to secure the printhead.
Be very sure that the green printed circuit board with all the gold contacts on it is facing straight up, towards the ceiling, as you insert the printhead.
Get Ready To Print
Put the ink cartridges back in (in the right slots!) I would replace any that don’t have a decent amount of liquid ink in them. Close up the printer (don’t forget that bottom cover) and plug it back in.
Turn it on. It will complain about being unplugged while on, which is OK. Run a deep cleaning, then run a nozzle check.
If everything went well, the nozzle check will be perfect. If not, run some more cleanings.
If this procedure doesn’t fix your printer, well, you’re no worse off than when you started. Be sure to Google any error codes before giving up; you might have the cartridge in wrong or something else might be wrong that’s fixable.
With a bit of luck, the printer should be good for another couple of trouble-free years.
If You’re Getting Double Printing
I recently got a printer that had been sitting unused for a few years. I expected all sorts of trouble, but after replacing all five (dry) ink tanks, it started printing pretty well. However, some of the black print was strangely doubled horizontally.
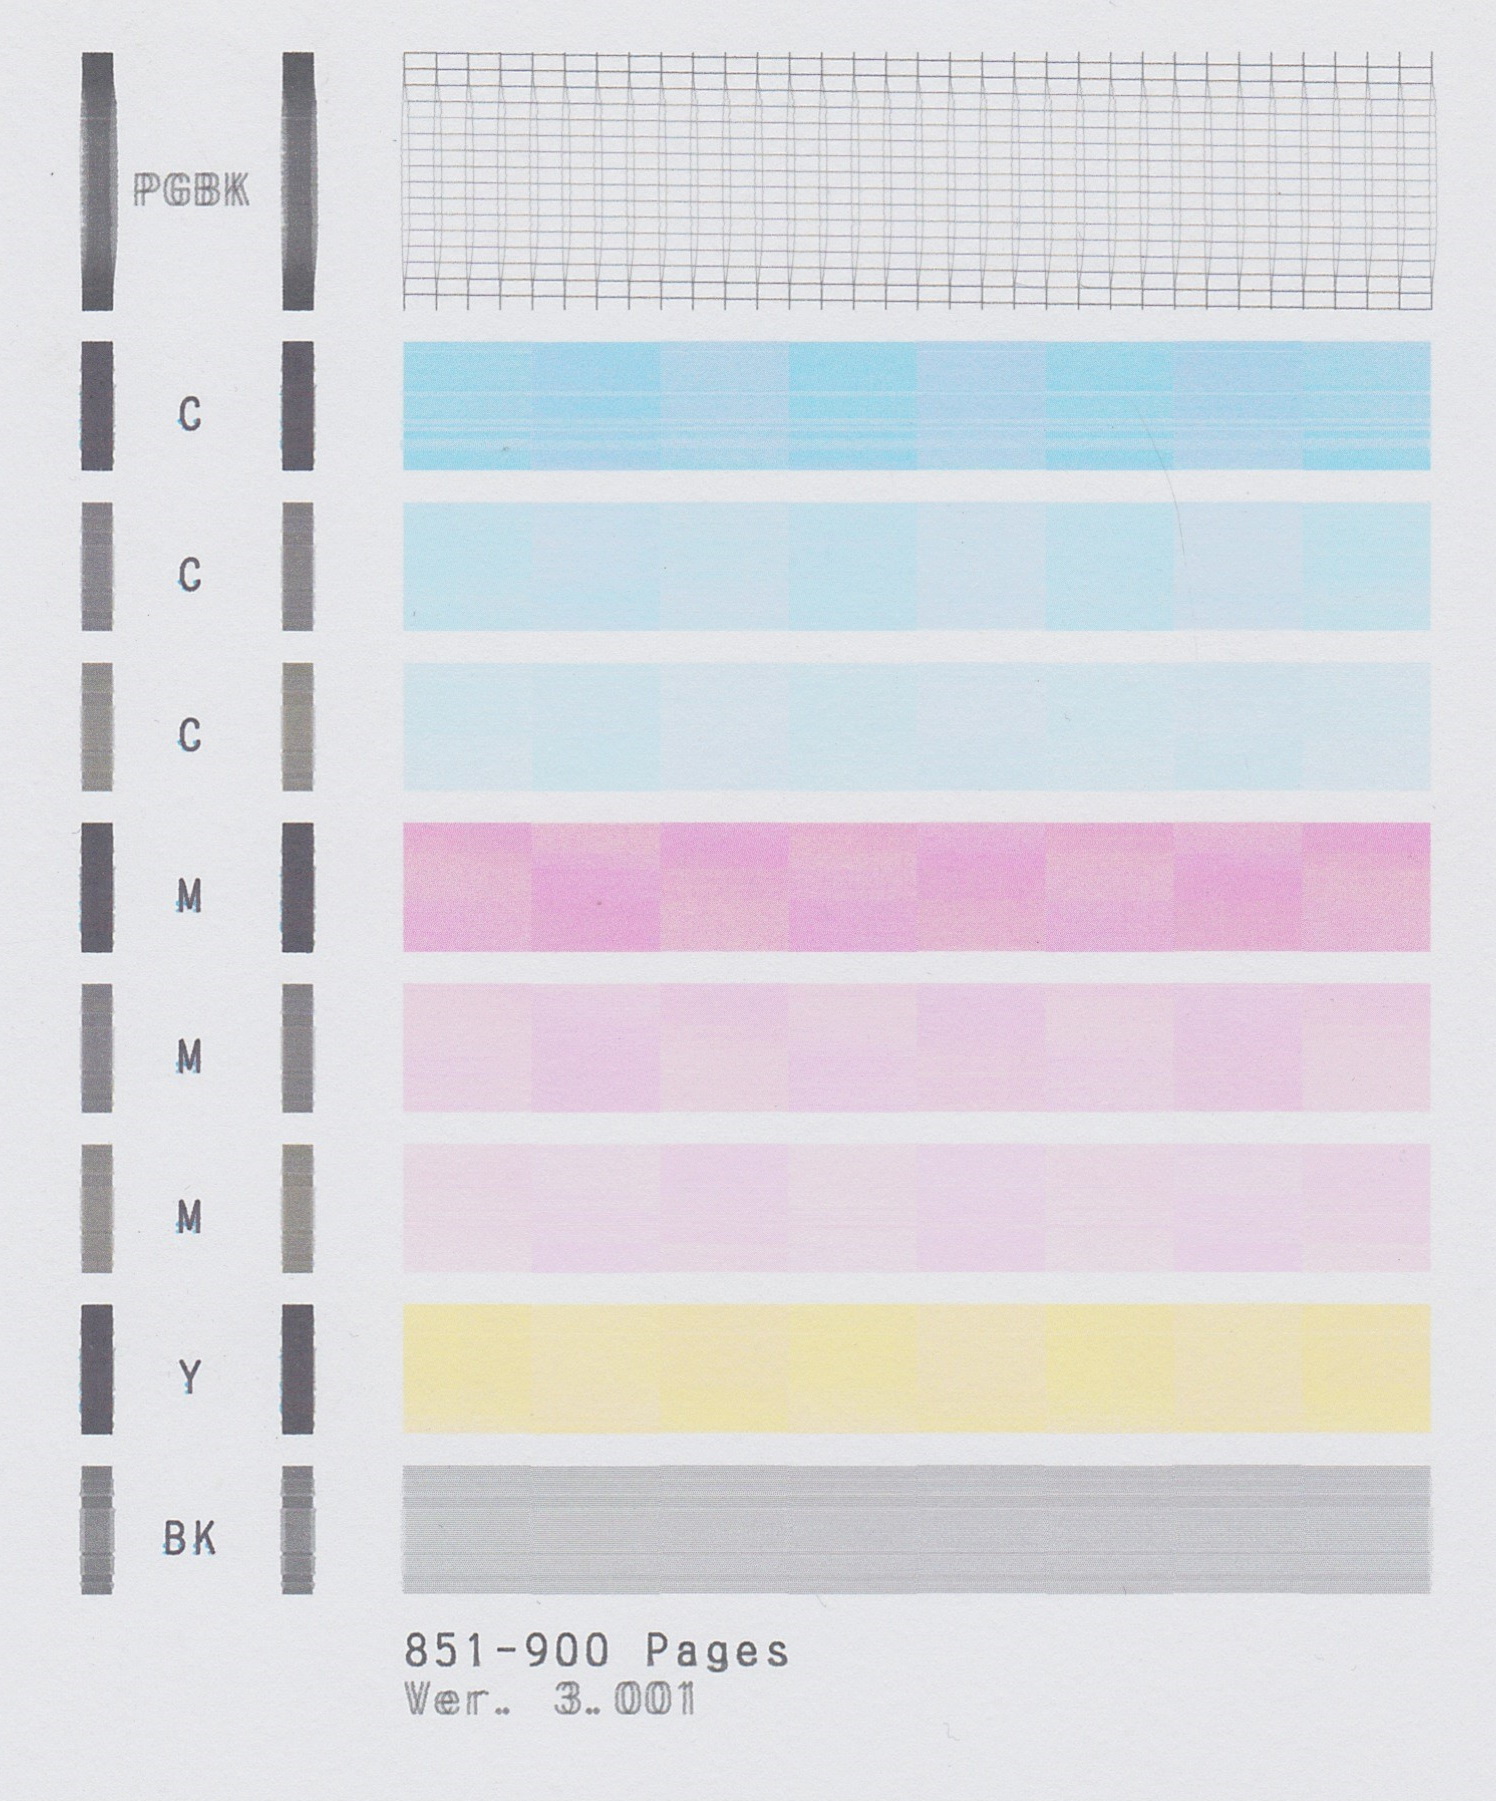
Look at the “PGBK” or the “Ver. 3.001” or the middle of the PGBK grid.
I don’t have any idea what causes double printing. Since printing happens in two directions, it might be that the affected nozzles are firing a bit early or late. I was also thinking that the nozzles might be aimed wrong due to debris in them, but that wouldn’t change the print position with printhead direction. It’s a mystery.
I went through the process described in this post. The printhead did look like something was wrong with the middle part of the PGBK ink nozzles. Cleaning cleared that up. But after cleaning, the problem was still there. I’ve ordered a new printhead and hopefully that will fix it. I’ll report on my success once I try the new printhead.
But, while it’s probably worth doing a good cleaning if you have double printing, don’t be too surprised if it doesn’t help.