I’ve been writing software for over 50 years and have evolved a set of rules for designing user interfaces that are easy to use and which allow users to get their work done as quickly as possible. These rules apply equally to desktop applications, apps, and web pages.
I don’t know what they’re teaching in user-interface classes these days, but software today is, as a rule, dreadful. It is extremely painful for me to use since I see glaring design failures at almost every step. Clearly, the rules people are learning are inadequate.
Users, as a rule, are used to abysmally bad software, and don’t complain about it so long as there is a way to get what they need to do done. The standards by which users judge software are extremely low. Most users have never encountered software that is a pleasure to use.
The rules in this article are intended to make developers think about the things that can produce software that is in fact a pleasure. Many of these things involve thinking deeply about development choices that are typically made with little or no consideration.
Many of our rules are intended to reduce the number of steps needed to accomplish something. That basic principle is, in my opinion, at the root of good user-interface design. I think that the focus these days is on appearance, but appearance should be secondary to function, which is not to imply that you have to sacrifice aesthetics to achieve ideal functionality.
Focus, in most development work, is also on getting things done rather than doing them right. Yes, developers have to meet deadlines, but it often takes very little extra effort to explicitly think about the choices you make. You’ll also find that by focusing on quality over speed, you’ll reduce the overall time that a development task takes, especially when considering things like documentation, user support, maintenance, and rework.
Here are some basic rules:
Eliminate Unnecessary Steps
Every step in a multi-step process should be examined to see if it is absolutely necessary. Consider this solely from the point of view of what the user is trying to accomplish, not from how the software is designed or what is easiest to program.
Make use of defaults and persistent settings to eliminate steps related to options. Often an operation that needs to be repeated uses data from the previous operation. Make it easy, or at best unnecessary, to enter duplicate information. For example, use something like Ctrl-D to copy the previously-entered value from a field, or default to the previous value if appropriate.
Very often a multi-step process can be reduced to one or two steps by careful design. This can greatly increase the speed at which users can get their work done, and make them much happier.
Be Judicious in the Use of Security
Most programs and websites are accessed from insecure computers, and don’t involve information that has huge consequences if access to it is compromised. Also, many people use password managers which automate logins for anyone using the computer. The security of even the most sensitive information is usually determined solely by physical access to the computer.
So probably most users just find it annoying (and completely unnecessary) to have to log in to most things each time they are used. Avoid the need to log in, or have an option to stay logged in. Consider Amazon, which has moderate consequences if an unauthorized user gains access — they keep you logged in pretty much forever. They want it to be easy to buy things, and having to log in repeatedly makes it less easy.
Eliminate Most “Are-You-Sure” Dialogs
Few things are more annoying than being asked “are you sure?” after you’ve already indicated that you want to do something. Some software does this for almost everything you do, and in most cases it is completely unnecessary.
The key question to ask is: what are the consequences of making a mistake here? If a mistake will cause significant work to be irrevocably lost, yes you should ask. But if the cost of recovering from a mistake is low, you don’t need to ask. Compare that cost with the cost of having to answer “yes” in the vast majority of cases.
If you still think you should ask, see if other design changes could eliminate or reduce the need for the dialog. For example, a “restore” or “undo” option would do the trick. Often the best solution is a multi-step “undo” function that will undo everything one step at a time. A special case is exiting without saving your work, and even that can be overcome by automatically saving the changed data in a temporary file before exiting.
Make the Most Common Next Step Easiest to Do
Most programs are used in predictable ways. Frequently there are sequences of steps that repeat often. Make the path through that sequence as straightforward, and as short, as possible.
Make the thing most likely to be done next the easiest to do. Minimize the movement necessary to accomplish it, for example by putting targets closer together. Don’t display targets that are inactive or irrelevant.
The classic example of failing to follow this rule is websites that have a search box, like the Amazon site. The first thing most users want to do is type something in the search box. But first the user has to click in the search box to get the cursor there. If the site came up with the cursor already there, the user could just start typing. There’s no reason I know of why that isn’t done; it doesn’t mean the user has to do more to click on something else if he doesn’t want to search. Worse, many people (like me) assume that they can just start typing, and they type a bunch of stuff before realizing that nothing is being entered.
So, if a screen comes up with a box to type into, and putting the focus on that box doesn’t add extra steps to other things, by all means put the focus there. The only exception I can think of is when the most likely next step is to scroll the page, in which case the focus might ought to stay on the page.
Minimize the Use of Icons
The most recognizable icons are words. Use them. How many times do you have to move your cursor over a series of icons to see the text that pops up? Eliminate that annoyance by just using words instead. People don’t remember any but the most recognizable and frequently-used icons, so they just slow down their work and increase errors.
Yes words often use more space on the screen. Good design will compensate, and will reduce clutter. It also helps to only display functions that are relevant to the current state. It also matters greatly what specific words you display.
Choose Words Very Carefully
It is extraordinarily important that you use the clearest wording possible. This is especially critical when naming functions or targets, where names need to be both clear and short.
In the 70s and 80s I was the lead designer of a CAD system that ended up being the main product of a 100-person company and which generated hundreds of millions in sales. The tag line for it in ads was “It’s Easy!”, and it was. When we named functions and targets for that product, there was often a meeting, sometimes a long one, just to come up with be best word to describe a single function. That’s a big reason it was, in fact, easy.
Messages, especially error messages, need also to be very carefully worded. When you are composing a message, think carefully about it and about how others might interpret it.
Button wording is also important. Stick with conventional words like “OK” and “Continue” when appropriate. Be very careful to avoid words with ambiguous meanings. When a button does something, label the button with what it does. Always use the same word(s) to describe the same function.
Trying Things Should Be Without Risk
It is common when learning a new program or website for a user to be unsure how to accomplish what he wants to do. You should of course make things as obvious as possible, but you also want the user to be able to try things without having to worry that picking some target will do something irreversible. Every target when picked should have a clear way out that 1) doesn’t make any changes, and 2) returns the user to where he was when he picked the target.
It takes thought and effort to make this true while also eliminating extra steps needed by a user who knows what he’s doing to get his task done. If your application is amenable to a universal “undo” function, that is an excellent way to accomplish this goal.
Few things are more frustrating, and are as likely to make a user hate (and reject) your software, as picking a target and having it 1) not do what he expects, and 2) do something irreversible or without a clear way to undo it. Worst is when something happens and it isn’t clear what was done.
Unsure? The User’s First Guess Should Be Right
This one is tricky, and is a good test of your ability to consider how a user relates to your software.
When a user is unsure of what to do next, their first guess should be the correct one. Implementing this requires that you be sensitive to the things in your interface that could be confusing, and your first effort should be to change your interface so that the ways to do all the things a user might want to do at any point are easy and obvious. That’s rarely practical in real life, but the fallback effort should be to design the choices available so that, no matter what the user might want to do, his first guess is most likely to be the correct one.
Thinking about things in this way will greatly increase your appreciation and understanding of how users relate to your software, and can make a big contribution to your ability to create easy-to-use software that will leave your users happy.
Optimize for Experienced Users
It’s important to consider the needs of beginning users, but nothing you add to help beginners should add steps for, or otherwise slow down, experienced users. If your software design is successful, the vast majority of time spent using the software will be by experienced users.
A great design will be easy to use by beginners, without the need for adaptations specifically for them. They’ll start out knowing nothing, but their first guess as to the next step to accomplish what they want will be correct.
Sometimes aids such as “cheat sheets” or keyboard overlays can provide helpful guidance for beginners when design limitations prevent making things obvious to a new user. For example, I helped design a text editor which was well-liked and had enthusiastic users. It was entirely keyboard-driven, with nothing on the screen except the text being edited. Clearly, a new user would be lost, but we provided a keyboard overlay with the editor which labeled each key with the function it performed. That overlay, combined with function design which emphasized simplicity, and well-chosen function names, made the software quick and easy to learn.
“Undo” is Your Friend
“Undo” is obviously important to correct mistakes. But it also changes a user’s relationship to the software: because when it is easy to undo an action, it makes it possible to try things without consequence. Users, especially new ones, can thus work quickly and fearlessly.
A good “Undo” function is usually hard to implement, but in many cases is very much worth the effort. The user should be able to undo multiple actions. If appropriate, he should be able to undo back to the beginning. Incomplete “Undo” functions that will only undo some actions will mostly serve to irritate users, and those that will only undo one step back are nearly as bad.
Rational program structure will often simplify implementation of “Undo”. If there is common code at the beginning and end of each action that changes anything, you have a place to do the things needed to support “Undo”. Put some time into cleaning up your code before trying to implement :Undo”.
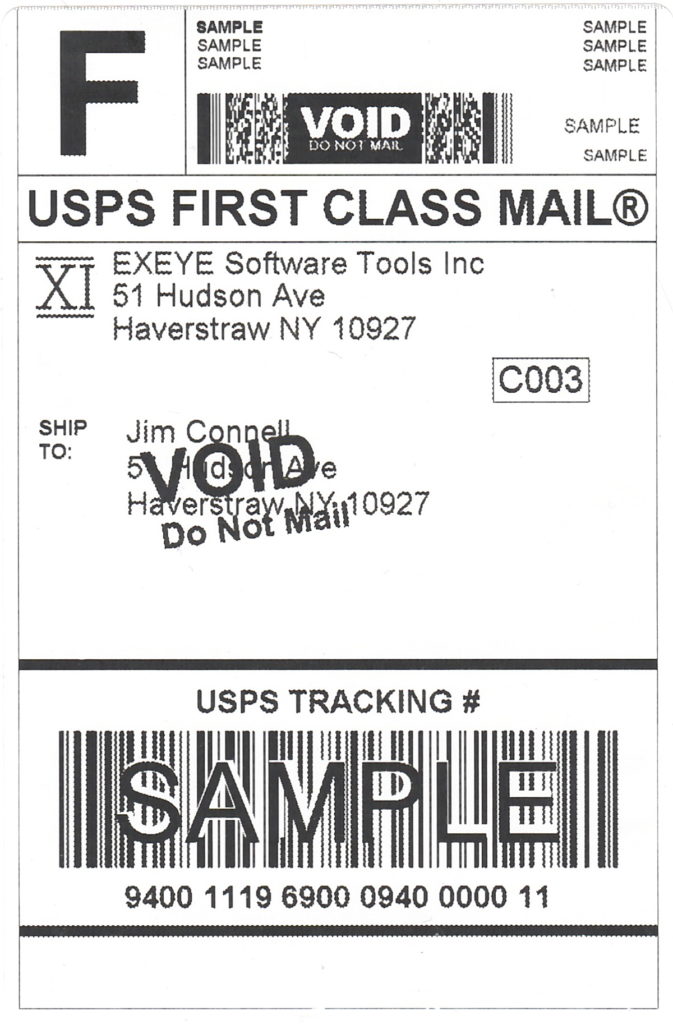
An “Undo” function does not make sense for every program, and often only makes sense for actions taken between obvious demarcation points. For example, a program which prints address labels might reasonably break the undo chain when a label is printed. An important caveat, however, is that the software designer shouldn’t limit undo actions because some are hard to implement. It’s often the case that the ones that are hardest to do are the ones that provide the most value to the user.
Seldom-Used Functions
Very often a program has a small set of functions which are used constantly, and a much larger set of functions which are seldom if ever needed. A considerable effort should be made to design the screens where the user will spend the bulk of his time so maximum screen real estate is devoted to functions he is likely to need, and the absolute minimum is used for special cases.
Screen space is extremely valuable. It is desirable to make access to functions which are seldom or never needed a multi-step process. This gives more room to display data and status related to what is being worked on frequently, and to use the available space to reduce the steps needed to accomplish things.
It’s perfectly ok, in fact highly desirable, to add steps to what needs to be done to gain access to seldom-used functions. The overall goal is to reduce the number of steps that the user has to go through to get his job done. Adding multiple steps to something that is rarely done is justified if it allows you to eliminate one step in a process that is done over and over.
More about how to accomplish this in “Menu Design” below.
Modes
Most programs are modal but developers often do not think in those terms. Programs differ in the strictness of their modality. A well-designed program will have strictly-defined modes with a small amount of screen space devoted to switching to other modes, and most of the space devoted to the mode’s task itself.
Most programmers use modularity in their program design, but often without thinking about it. They fail to divide the program’s functionality along clean modal lines, or include the right set of subfunctions in each mode.
To get modality right, you must think clearly about what task the mode is intended to accomplish, what steps are needed to accomplish it, and what options apply to it. In many cases the mode’s screen can be organized for the entry of necessary values in a conventional or rational sequence. Group optional values or settings by type or function.
Often there are subfunctions or groups of subfunctions that are included in multiple modes. They should always work exactly the same way (ideally by being the same code) everywhere they appear, and be positioned and grouped exactly the same in each mode in which they are included. When there is a group of related subfunctions, it often helps to give the group a name, which is displayed onscreen as well as in documentation.
Menu Design
Everyone designs menus so everyone should be good at it. Why then are so many menus so hard to navigate?
It takes a lot of work and thought to design a good menu. There are a lot of rules, and often they are conflicting. The overarching consideration is that the menu organization should make sense and it should be easy for the user to grasp the underlying structure.
Functions should be organized by type. Frequently used functions should be easiest to get to. When you’re in a function, the functions you’re most likely to need next should be the easiest to get to, and part of that involves minimizing the distance the user will have to move to get to them. Sequences that require switching between the keyboard an the mouse should be minimized.
Well designed menus frequently have several levels of submenus. Deeper levels should be used for increasingly infrequently-needed functions. The functions on a given submenu should be related. It is bad design to give the user too many choices on a single screen — avoid complex, cluttered menus, as well as excessive simultaneous menus.
No matter what the user wants to do, there should be a function to do it, and at each menu level the user should be presented with a set of functions or function categories such that the choice that gets him closer to the function he needs is clear. Getting this right takes planning, including the consideration of multiple prototypes, and a lot of careful thought.
There are a number of types of standard menus that should be used where appropriate, since users are familiar with them. These include settings menus, three-dot menus, help, and other standard menu types. Consider how a user is likely to categorize what he wants to do to when deciding where he is most likely to look for the function he wants.
Three-dot menus in particular are a good place to put access to less-frequently-needed submenus. Think about where and why the user will end up looking in the three-dot menu for what he’s trying to do.
It’s usually best to avoid multiple paths to the same function. Putting access to a function in multiple places tends to increase the complexity of the menu system without significantly reducing the number of clicks required to complete a task. If you are tempted to put access to a function in multiple places, consider whether that function would best be accessed from a higher-level menu, or whether you’ve come up with the best allocation of tasks to functions.
Entering Formatted or Repetitive Values
A glaring design error found in much software is a data entry field that rejects “improperly formatted” values when the intent is clear. Things such as social security numbers, and phone numbers are example of these. Users should be able to enter the requested data in any format that is unambiguous, and the entry should be reformatted automatically as needed on leaving the field. Programmers should have a set of functions prepared that will reformat each of the values that they regularly encounter.
An example of this is is the entry of a date value. Regardless of the format used to display the value, the user should be able to enter it using any format desired. Examples are 7/26/24, 07/26/24, 26Jul24, 26 July 2024, or July 26 24. There are no doubt others. Consider also the locale; in some places you would use 26/7/24, and this affects both interpretation of entered values and display of formatted values. Modern programming environments have easy ways to look up which format is correct for the current locale.
Drop-down boxes should be used with care. They require the user to switch from the keyboard to the mouse which is disruptive and time-consuming, and also often prevents auto-fill provided by things like password managers from working correctly. A particularly egregious example of this is the entering of state names, where only two characters need to be typed. If you feel that you must use a drop-down box, set it up so the user can also type the value. Many programmers use drop-down boxes to ensure that the entered value is a valid one; it’s much preferable to simply check the entered value when the user is done entering it. That is a bit harder to program; however programmer laziness should never result in software that inconveniences or slows down the user.
While dropdown boxes are best avoided in many cases, it’s often helpful to use drop-down boxes populated with all previously-used values for a field, especially when those values are not short. The user can pick a previously-entered value or enter a new one. “Previously used” might include just the current session, or previous sessions; if previous sessions are included older unused entries should be dropped after a period of time.
A variation of this that is commonly used is having fields autocomplete based on previous entries. This can be tricky to implement well — study how other programs do it.
If you need to check an entered field for validity, do it upon leaving the field. It is annoying and disruptive to check on each character entered. Doing so usually means an error is displayed when the only error is that the software hasn’t waited for typing to be completed.
Keyboard vs Mouse
Badly designed programs frequently require the user to switch between the mouse and the keyboard, which slows things down (a lot) and annoys users. Situations which require switching should be minimized. It’s often possible to map functions to both input methods: consider “Right-Click->Copy” and “Ctrl-C”.
Generally, keyboard input is faster. However, it suffers from requiring the user to remember sometimes obscure key sequences or combinations. This can be helped by using mnemonic key combinations (like “Ctrl-C”). But there are few good ones available and the operating system or browser may have already consumed most of them. Frequent users can learn the ones most useful to them, but the learning curve is steep and few users do.
This can be helped by providing users with a simple “cheat sheet” or keyboard overlays or maps. Key combinations can also be shown in menus and on targets, as Windows does in some (but not enough) places.
Another consideration is whether to override predefined keys and key combinations with ones specific to your program. It’s often a good idea to take over many of them, but some, such as “F1” for help, should be retained. This is another area where the overall design needs to be carefully worked out, with considerable thought.
Look at the “Optimize for Experienced Users” section for more about this topic.
Program Errors
It seems that the convention for finding program errors is to write programs full of “debug” statements, and then to turn off the debug checking for release builds. The result is that internal errors that occur in production programs will cause crashes or malfunctions when something goes wrong. I’m a strong believer in having release builds contain extensive internal checking and that even release builds report such errors when they occur. Internal errors should be reported even when they’re not catastrophic — having software doing stuff that is not what was intended is a recipe for flakiness.
I realize that it is politically bad for programs to report internal errors. My response is that doing so makes it possible (and easy) to identify and fix bugs. Overall, users will see less bad behavior from programs that report errors than from programs that don’t, since bugs will get identified and fixed early. If marketing types try to get you to hide malfunctions, fight.
There are many ways to record and report internal errors. The simplest of course is to just display a message and exit. With a little more work, error details can be recorded in the Windows application log or elsewhere. What is essential is to see that errors that occur get reported to the developers. Ideal is an email or other message to the developer.
It is also very important to report the error in an identifiable way. Reports should identify the error explicitly, and include a call stack. The way I do it in simple programs is to have an error reporting function that does this and which then terminates the program. A call such as “gterm(“func3″,123)” produces a message like:
Terminal error FUNC3 123
app->func1->func2->func3>gterm
which is generally all a developer needs to identify where and why the error occurred as well as what the user had done to cause it to occur. All calls to the GTERM function contains the name of the function in which the error occurred, and a number unique to the call which identifies exactly where (and thus why) the error occurred. Depending on the error-reporting capabilities built into the language or environment you are using, much or all of this may happen automatically.
If you write highly structured code this reporting technique may not be sufficient, in which case you might want to add information about classes and such to the call stack information. Also, if you make extensive use of third-party libraries, you may need to find ways to deal with their opaque nature, perhaps by writing wrappers for the library functions.
You can use similar techniques to report unhandled exceptions.
In complex or critical programs, terminating the program on every error will probably not be acceptable, though you may be surprised at how rarely it happens when 1) encountering an error is painful, and 2) error messages give sufficient information to identify specifically what caused the error. Terminating the program strongly motivates users to report errors and developers to fix them.
Whatever method you decide on for handling errors, it must result in all errors being reported to the developers with sufficient identifying information, and developers must promptly address all reported errors. If you do this, errors will be few and far between.
Implicit in all this discussion of errors is extensive internal checking, for example of values for things like null or something out of the expected range. Nowadays languages tend to throw exceptions for basic things like bad subscripts, but there are always ways for things to go off the track, and you should get in the habit of thinking of, and checking for, all of them. Your programs will have lots of checking, but they’ll work. Extensive error checking adds code to your software but generally does not slow things down materially.
Emphasize These Rules when Managing Developers
Most developers who work on software work against a specification. These specifications typically describe functionality and often include details relating to appearance. What is uniformly lacking is an implicit emphasis on optimum usability.
All specifications should include language about maximizing ease of use, minimizing user effort, and making things as clear and understandable as possible. A good way to do this is by referencing a detailed usability standard, similar to what is in this article. Consider creating one.
Developers should aim higher than just cranking out something that will satisfy the specification. Every development decision, especially the small ones, should be evaluated to consider alternatives and analyze which of those alternatives will yield the best result for the user. The small things matter, a lot, if you want to have users who love using what you write, rather than just not complaining about it.
Improving Production Software
Bad software is everywhere, and all software can be improved. However when you have a user base for bad software that you want to improve, you’re left in a quandary. Users don’t like changes, and major changes requiring significant relearning are enough to get users to consider alternative products.
There is something called “the baby duck syndrome” which applies here — the first thing a baby duck sees when it comes out of the shell it considers to be its mother. Likewise, users get attracted to the first application they learn for a specific task. Curiously, the attraction is strongest for the hardest-to-learn software, basically because users don’t want to have to go through that painful learning process again. Consider AutoCAD or Photoshop.
If you need to improve bad software, you can either make incremental changes over time, or release a new version incorporating major improvements. Both alternatives have advantages. Either way, if the updated software is designed well enough, users will adapt to it smoothly and quickly.
Note that even in a production program, the vast bulk of the program’s functionality is rarely used. Even radical redesign to such functionality is possible with little or no effect on the user. And seldom used functions are some of the ones where improvements can have the most benefit, especially things that make it easier and safer for users to find their way in parts of the program they’re unfamiliar with.
Some software is used to automate workflows, often in a production environment, and extra care needs to be taken not to break important processes. With thought and care, major improvements can still be made without undue disruption. Remember, and make clear to your users, that adaptations they must make are intended to help them work more efficiently, and will be well worth the trouble in the long run.
Develop on Modest Hardware
Many users have minimal hardware: slow computers, limited memory, single monitors, and slow internet. Similarly, many smartphone users have $250 phones and slow and spotty internet connections. If you develop software on top-end machines and environments you will produce software that doesn’t run well for most users.
There is a tendency to use the rationale that software development is expensive so it pays to use the best hardware to do it. Unfortunately that only makes sense if your users are also going to have equivalently high-end hardware. Doing your development on consumer-level hardware will cost you more time, but less than you think. And you can use the few seconds here and there that you spend waiting, to think about how to make things work faster and more smoothly for your users.
Don’t think that having a slow machine available to test software will be enough. By the time the software gets to that point it will be too late to improve it. And your testers will have the attitude that unusably-slow software on a slow machine is acceptable.