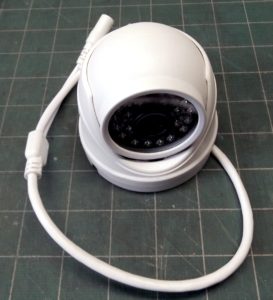
I just bought a $19.99 IP security camera from Amazon. There is a bit more that I’ve learned about it than will reasonably fit in a review, including lots of tips and tricks, so I figured I’d share what I’ve learned. What follows is far from complete, and may contain errors. Please comment if you have any suggestions or corrections, or if you find this information useful.
This camera is a HoSafe 1MD4P. You can see it on Amazon here, but it seems to be discontinued. However, I suspect that much of what appears in this post will apply to most other cheap cameras (though I don’t see any as cheap as this one).
This is a long post. Here are links to the various sections; sort of a table of contents:
- Other Similar Cameras
- Physically Setting Up and Installing the Camera
- Supplying Power to the Camera
- Passwords and More Passwords
- Security (or Lack of Same)
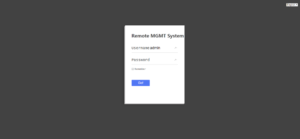
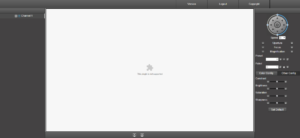
- The Camera’s Web Interface
- ONVIF and ONVIF Device Manager
- Loading and Installing the CMS Software
- Installing and Using the NVSIP App
- Third-Party Software
- Installing and Using iSpy
- Installing and Using Blue Iris
I can recommend this camera if you are willing to put up with serious software limitations, some reported security issues, and reportedly questionable reliability. In exchange you get a really cheap camera with pretty good picture quality and high resolution, that may or may not last.
Let’s start with a list of features/capabilities:
- It’s a fixed dome camera for indoor/outdoor use
- It is a wired IP camera, not Wi-Fi
- Color 1280×720 resolution
- Power by adapter or POE (see below)
- White-painted metal case (black is also available but not on Amazon)
- ONVIF compatible: works with 3rd-party software
- IR night vision up to 40′
And to be fair, a list of weaknesses and problems:
- No SD card memory
- No audio
- No pan/tilt/zoom
- Reported: security concerns
- Reported: some cameras won’t retain settings
- Horrible software/firmware
- Difficult to mount and aim
- May require a large hole to run cable(s)
In the descriptions which follow I will give instructions for doing a number of things. Don’t be surprised if the steps don’t do what you want or expect. Be willing to experiment, and to retry things different ways. Sometimes it helps to reboot the camera by disconnecting power. I’m also not sure I haven’t done something at some point that has changed how things work, so don’t be too surprised if some things are different from what I describe.
Other Similar Cameras
There are many similar Chinese-made cameras available from a wide variety of manufacturers. I’ve tried several of them with fairly poor results. They all seem to suffer from bad software and bad firmware.
You shouldn’t buy any of these cameras without expecting to have to use third-party software to run it. Doing so requires that the camera supports a standard API such as ONVIF. Many don’t, which makes them pretty much worthless.
Many of these cameras use similar software and firmware; I suspect there are vendors in China that supply chipsets, firmware, and operating software, and that camera manufacturers all use the same basic parts and code.
So it doesn’t much matter what off-brand camera you buy; they’re all pretty bad. At least with Amazon you can try them and get your money back if they don’t work.
Physically Setting Up and Installing the Camera
This should probably be the last thing you do, but you’ll have questions right away.
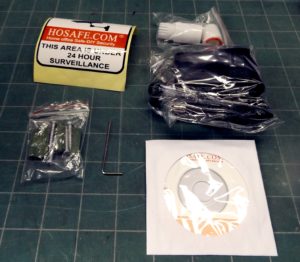
The pan/tilt position is locked. You might be able to adjust it a little by forcing it, but don’t. There is a tiny Allen wrench in the box. Use it to loosen the three tiny setscrews around the base. Loosen them a little to make minor adjustments; a lot to take the camera apart for mounting. To tighten them, hold the part with the setscrews tight against the mounting ring while tightening the setscrews. It’s a little awkward and I wouldn’t want to do it while up on a ladder.
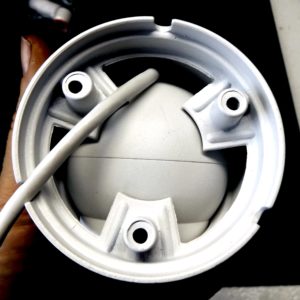
If you play with the adjustment you’ll probably get the camera rotated in the mount, so the picture looks tilted. Don’t be alarmed. The camera itself is a ball and is not restrained on any axis. Expect to have to fiddle with it to get it right.
If you loosen all the setscrews the camera will come apart into three pieces: the baseplate, the cradle, and the camera ball. To mount the camera, say to a ceiling, first remove the baseplate. You’ll see three mounting holes to be used to screw the baseplate to the mounting surface. Once the baseplate is mounted, you can put the camera back together. It’s probably best to just tighten the setscrews enough to hold things together, so you can adjust the aim of the camera. When all is the way you want, fully tighten the setscrews.
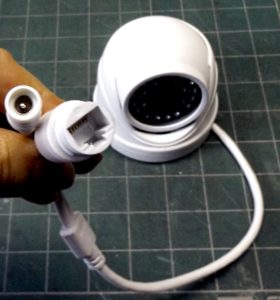
The camera requires a wired Ethernet connection and that in turn requires a big hole to run the cable. Figure on drilling a 3/4″ hole to run the wires through, if you run the wires through the mounting surface as you would on a ceiling or soffit mount. If you use surface wiring, you could conceivably drill a 1/4″ hole, thread Ethernet cable through it, and terminate the cable by crimping on an RJ45 plug. If you do this and are mounting the camera outside, use the included shield to protect the cable from the weather — I’d add silicone grease or RTV to it for extra protection.
Supplying Power to the Camera
The camera I got came with a little wall transformer and a two-ended cable with both an Ethernet connector and a jack to connect the transformer. Other reviewers have said that their camera was POE only and didn’t come with a transformer. But no matter; you’ll probably want to use POE.
POE (Power Over Ethernet) is, as the name implies, a way to power things using just an Ethernet connection. It works very well and greatly simplifies the installation of cameras. I very highly recommend it.
Regular Ethernet doesn’t include power. You have two ways to add power to an Ethernet connection: a POE switch, or a POE injector. A POE switch is much easier — you use it like any other switch, and some or all ports include POE power — and is cheaper if you’re powering several cameras. A POE injector just moves the complexity from the camera location to your router/switch location, but may be preferable if you’re only mounting one or two cameras and there isn’t power readily available where the cameras are to be installed.
I don’t worry about POE standards. There seems to be a fair amount of anxiety about making sure standards match for POE equipment. My experience has been that there is agreement among hardware vendors about what “POE” means. That may not have been true in the past.
Passwords and More Passwords
The camera itself has an admin password, and I think you can define more passwords with other usernames and varying sets of permissions. The CMS software also has a password. And in the NVSIP Android app there is a password associated with an email address that I entered once, I think for some sort of cloud storage that may or may not be implemented.
I haven’t figured out how to set most of these passwords, and I haven’t seen any evidence that they do anything. I think when I first started out I set a password for the camera somehow, but I’ve not been able to reproduce that condition. All software I use just works, no matter what password I use.
If your experience with passwords is different from mine, you may want (or need) to set up and use a password for the camera itself. To do this, use the CMS software (described below) to connect to the camera. Then right-click on the camera image, Pick System->User Setting, select the “admin” user, pick Modify, then enter a desired password.
Security (or Lack of Same)
Passwords are just the beginning. Some reviewers on Amazon have done packet tracing on the network traffic generated by the camera, and have found communication to a variety of servers in China. I tend to not care about such things, and to suspect that most of it is just bad programming such as incomplete/undocumented cloud storage or remote access. But maybe I’m foolish and I should be worried about it all.
I’m not that interesting and I don’t have much of value, so I really don’t care if hackers can get to my camera feeds. Yes the lack of security theoretically makes it possible for someone to hack my system and disable cameras or delete recordings, but the odds of some lowlife, looking for something to steal so they can buy drugs, having the ability and motivation to hack my system is pretty low.
One source of communication with China is the camera’s time lookup setting, which refers to a server in China. It’s harmless, but you can change it in the CMS software or ONVIF Device Manager to use a local time server such as pool.ntp.org.
Many cheap cameras are listening on port 23 (Telnet), and this one is no exception. This theoretically gives you the ability to log in to the Linux shell running on the camera, and do pretty much whatever you want. The login requires a username and password, which are not readily available. If you search for them, you’ll find lists of passwords that have worked on similar cameras, but I’ve tried all I could find (dozens of them) without luck. From the command prompt, type telnet camera_IP_address and try your luck.
A major danger of the lack of security demonstrated by the Telnet vulnerability is that cameras can be hacked en masse and recruited into botnets. Also, any camera that is successfully hacked will have access to everything on your local network.
The Camera’s Web Interface
ONVIF and ONVIF Device Manager
A good place to start is to download a third-party open source program called ONVIF Device Manager. ONVIF is a standard for interfacing with IP cameras, and is most likely how you will be using the camera. The ONVIF Device Manager (“ODM”) pokes around in the camera settings that are accessible using ONVIF, and lets you change some of them. Unlike CMS, it is fairly straightforward to use, and it’s nice to have something working this early in the process.
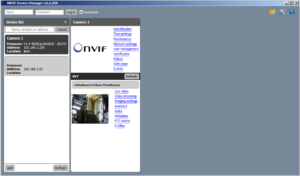
You can use ODM to set up many of the configurable parameters in the camera. Most things work but a few don’t, so test any changes you make with it to make sure they “stick”. You can use it to reset or reboot the camera, which no other software will let you do. The “soft reset” function supposedly resets camera parameters but not things like networking parameters, and seems to work, and “hard reset” is supposed to return the camera to original factory settings but it doesn’t.
I’d suggest setting the following things with ODM:
- Identification->Name: camera ID
- Identification->Location: changes don’t “stick”
- Time settings->Time zone: set this here not in CMS
- Time settings->Daylight savings time: changes don’t “stick”
- Network settings: set these up how you want; I like fixed IPs
- Network settings->NTP servers: set to “pool.ntp.org”
- User management: I couldn’t get any of this to work
- Live video: seems to work most of the time
- Video streaming: changes don’t “stick”
- Imaging settings: seem to work
The various display modes work sometimes but sometimes put up a “NO SIGNAL” message. I don’t know what that means, but I’m not worrying about it.
ODM development is based in Russia. It is open source so is unlikely to be doing anything that it shouldn’t. Use your discretion as to whether you think it is safe.
Installing and Using the CMS Software
You’ll find one of those annoying little CDs in the box. It has a bunch of software on it and some very modest documentation. Once you’ve looked over the documentation, install the CMS software and nothing else. Run it and prepare to enter a bizarro-world of software design. The stuff is not just bad, it’s bad in ways that took considerable creativity. Luckily you only have to use it to set up the camera once (we hope).
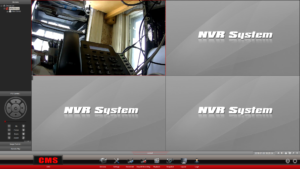
I’m going to give very terse instructions for using it. It’s painful to use, and it doesn’t work the same way every time, so instructions are not terribly helpful. Expect to have to fuss with it to get it to do what you want.
Note that the CMS software is supposed to be a complete monitoring system, and as such it has many, many options. Most of the options control the functioning of the software, not the camera. A few control settings in the camera itself, and those are the ones we’re interested in.
The CMS software has its own password. I use a blank password since I won’t be running it much or leaving it running. Once you get past logging in, you need to select your camera. Pick “Devices” from the menu at the bottom (if the menu doesn’t show, fuss with it until it does). There is an auto-detect function which I’ve never gotten to work — add your camera manually. All you need to enter is the camera ID taken from the camera’s label.
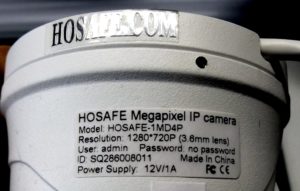
Once you’ve gotten your camera selected, you should see video from it. It may take a few seconds to connect. You then can get to camera-specific settings by right-clicking on the camera image and picking “Remote Config”. That will put up a new menu bar in the center of the screen. Note that the “Exit” target will exit the remote configuration mode, not the CMS program.
Start by picking “System”. This gets you into a property page for the camera itself. In “System Setting” you will probably want to change “OSD Position” and “Time Position” to “HIDE”. This will let the software you end up using to manage text overlays. In the “Time Setting” section make sure “time synchronization” is checked, and verify that the time zone and NTP server are set as you want (you set these in the ONVIF Display Manager).
In the “Maintenance” tab of the “System” menu you can set up automatic rebooting of the camera (I don’t) and attempt to upgrade the firmware in the camera. I couldn’t get it to work, but if you like to live dangerously, give it a try by picking “Update begin”. Also in this tab are three buttons, “Diagnosis”, “Restart”, and “Recovery” that sound like they might be useful if things go south.
Back to the “Remote Config” menu. Pick “Stream” and you get to yet more property pages. Of interest is the “Image” tab, on which you will see two checkboxes: “Mirror” and “Turn”. These control the orientation if the camera image. If the picture is upside down or otherwise wrong, some combination of those checkboxes will fix it. I find that my camera requires both to be checked, which is not the default.
Another icon on the “Remote Config” menu is “Network”. This lets you set things like the IP address of the camera. You should already have set this up the way you want using ONVIF Device Manager, but take a look and fix up anything that isn’t how you want it.
One last thing about the CMS software: there are Minimize and Close icons at the lower right corner of the screen. Minimize minimizes to the tray. Close brings up a login screen, which you must satisfy before the program will actually exit. It’s some sort of security I think.
Installing and Using the NVSIP App
There are apps that will let you access your camera from a smartphone. If you want to be able to do this, you’ll want to use a third-party app that comes with the software you use to run the camera. This section is about the NVSIP app that comes with the camera. You may want to play around with it, but I doubt it will be something you’ll want to use on a regular basis. I use an Android phone so I can’t report on the iPhone app; I assume it is similar.
Don’t install the app from the little CD; go to the app store to get the latest version. Search for “NVSIP”. Once you get it installed and running, it will ask you to log in with your email address and password, or to sign up or enter using “Guest Mode”.
I haven’t had luck signing up for an account, and have always just used “Guest Mode”. I don’t know what features you’ll unlock by signing up, but I expect to be able to do whatever I need to do using third-party software. The account is probably necessary to allow access remotely using the app, but once again I’d suggest just using other software to do this.
Next, pick the “+” in the upper right to begin adding your camera. I haven’t had luck with automatic methods of adding devices. You can try if you want but I’d recommend just adding the device manually. Enter the camera ID from the sticker on the camera; it will look like “SQ286123456”. It will ask for “Channel Amount”; enter “1”. I think the camera has two channels but they both seem to show the same video, so I don’t know what the point is. Enter a password, but it doesn’t seem to matter what you enter. Leaving it blank doesn’t work.
Once you’ve entered your camera you will see a list of available cameras. Pick the one you just entered, and you should be taken to a screen that shows the camera’s output. At the bottom of the screen are several targets, some of which work and some which don’t. You can play around to figure out what they do.
Third-Party Software
There are a number of third-party programs out there that let you manage and use your camera. Two of the most popular are Blue Iris and iSpy. Both are free for the basic functions and require a subscription if you want to get fancy. If you are serious about using your camera(s) for security purposes you’ll probably want to get a subscription. To date I have not done so, so will not be able to report on their subscription-based features.
Theoretically you can do everything you want using the free CMS software. But that software is so awful that I can’t imagine it doing everything you want without glitches and bugs. Third-party software works much better, even though it may cost a bit to be able to use the features you want.
Installing and Using iSpy
First download, unzip, and install iSpy. It will ask you to create an account, used for logging on to the iSpy program, and accessing camera feeds and recordings from other devices. It doesn’t commit you to buying anything; go ahead and sign up.
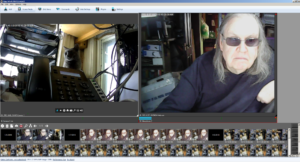
Once you get started, pick “Add” then “ONVIF Camera”. Ignore the camera’s “User:” and “Password:” fields; they don’t seem to do anything. It should show the IP addresses of all ONVIF cameras you have; pick the one you want. Now, pick “Next”. You’ll get a list of all streams available for the camera. These cameras seem to have two identical streams so it doesn’t matter which one you pick. Next pick “Done” which will take you to the camera’s property page. Give it a name and turn off motion detection if you want, then pick “Finish”. You should have an active camera being displayed.
iSpy can add other “cameras” to monitor, including webcams and the screen of the computer you are using, so long as they are connected to the PC you are using or are accessible from the local network.
iSpy has several property pages, some of which are hard to find. Right-clicking on a camera image will get you to some of them. Play around and see what you can do.
The iSpy subscription versions unlock remote monitoring features. If you’re happy with only being able to view cameras and recordings from the local network on which iSpy is running, you don’t need to subscribe. There are a number of subscription options which are pretty much all the same, differing only in the number of PCs that iSpy can be running on and the term of the subscription. Once you subscribe you can enable SMS alerts based on events you select; to use this feature you need “SMS credits” some of which may be included in your subscription plan, or which can be purchased separately. There is also an Android-only app which will alert you directly without requiring SMS credits.
For remote access from a PC, go to www.ispyconnect.com/monitor/. Log in to your server, pick Live->Video Wall, and drag and drop cameras to the “Wall” to display them. Remember that without a paid account you can only do this from your local network.
For remote access from a smartphone, open Chrome or another browser and go to m.ispyconnect.com. Log in with your iSpy credentials and the rest is easy. Again, you need a paid account to use this away from your local LAN.
Installing and Using Blue Iris
Blue Iris is paid software. If you download it you get 15 days to try it out then it stops working until you pay. Paid versions are $30 for one camera or $60 for up to 64. The license comes with one year of email support. You can buy more support for $30/year and better support for $60/year.
I long ago used up my trial and don’t want to pay, so I don’t have much help to offer.
I can say that it looks like a good, professional product, it’s not expensive, and many people use it. Documentation is limited, and there’s no user manual.
One difference between Blue Iris and iSpy is that iSpy requires an ongoing monthly charge to use remotely, for which you get to use their servers to facilitate remote access without needing to use dynamic DNS or requiring setting up port forwarding. Conversely, Blue Iris runs a web server on your machine to be used for remote access, which (I think) requires DyDNS and port forwarding. Someone please correct me if I’m wrong — I can’t check this myself.
Thanks for pulling this together! Not easy to find this type of information lately. Not sure why. I do have several questions but want to re-read first before asking something really dumb. Appreciate it.