Monthly Archives: February 2019

Saving Money for Sodastream Users: Sodamix

Part 2: Making Your Own Sodamix

The first post in this series tells how to avoid having to buy or refill the expensive Sodastream CO2 carbonation cylinders. This second post will introduce various ways to make your own sodamix, so you don’t have to buy that from Sodastream either.

Sodamix is the syrup you add to seltzer to make soda. Sodastream bottled flavors are a form of sodamix.

There are several good articles on this subject, which you can find by searching, and which are written by people who are as obsessive about this kind of stuff as I am. Much of what I present here came from that information. But I also learned a lot myself along the way.

What You Need to Get Started

There are some things you’ll need right away. I’d suggest just buying the ones you don’t already have. They’re not expensive.

Dispenser bottles: I started out using the original Sodastream sodamix bottles to bottle my own. I quickly learned that they are just too small to bother with. I found quart squeeze bottles like restaurant kitchens use work very well. I started with six, which has turned out to be a good number. Amazon has lots of them for a couple of bucks each. I got mine from US Plastic, item number 60147. These are also a couple of bucks once you add shipping. The bottles have little red caps that get lost. Just throw them out.

Utensils: you’ll need a container, a funnel, and a spoon. I use a beaker for a container, but any glass or plastic measuring cup will do. If you don’t have an appropriate-sized funnel, just buy a set of them.

Digital scale: you need a good one, that reads to .01 gram and goes up to 500 grams or more. These are dirt cheap on Amazon or eBay; figure about $15. Buy one. Be sure it has a “tare” function; I think they all do.

An Overview of the Process

The key ingredient in making your own sodamix is flavor concentrate. This is very, very concentrated flavor, without any sweetening added. I buy it from a company called Rio Syrups, but they aren’t set up for retail sales and sell in large quantities, so I buy it in bulk, rebottle it in pints, and sell it on eBay. A pint of concentrate will make about a gallon of sodamix, which in turn will make a whole lot of soda, 64 or more liters depending on how strong you like it.

I’m also selling 2-oz sample bottles of flavor concentrate on eBay. If you just want to see if making your own sodamix is something you want to do, or to try out one of the flavors, it’s a cheap way to do so. The sample-size bottles make about a pint of sodamix (roughly equal to one bottle of Sodastream flavors), which in turn makes about 8 liters of soda.

You’ll also need sweetener. If you don’t mind the calories (and the diabetes), you can use sugar. I prefer diet soda and use artificial sweetener. I’ve tried a number of combinations, and have settled on a mix consisting primarily of stevia, since it seems to have the fewest people saying it’s bad for you, and my mix tastes to me just like sugar.

Lastly, you’ll need a bit of preservatives. Sodamix will get moldy if you don’t use it. If you look at the ingredients Sodastream uses, preservatives are in there too. I’ve settled on a little citric acid and a tiny bit of sodium benzoate. I don’t refrigerate my home-made sodamix with the preservatives in there. If you choose to avoid preservatives, you’ll have to refrigerate it.

Once you get set up to make sodamix, you measure out the ingredients in grams using the scale, which gets reset to zero after adding each ingredient using the tare function. Then dump everything in a quart bottle using the funnel. Rinse your mixing container several times with hot water and dump that in too, to be sure to get everything. Shake well, fill the rest of the way with cold water, and you’re done: a quart of freshly-made sodamix. It only takes me a minute or two to make a bottle.

[Note: I also include traditional kitchen measurements in my recipe, but recommend that you go by weight instead. It’s more accurate, and much easier using your scale’s tare function.]

A note about concentrations and dilutions: there is much variation in how strong your sodamix is, and how much you use in a liter of soda. I started out trying to make everything come out the same strength as Sodastream’s sodamix, and I think what I’ve come up with is pretty close. But you can vary the quantities of the various ingredients quite a bit to get soda as strong or as sweet as you’d like. Treat these recipes as a starting point. I personally make sodamix about 25% stronger than the recipe listed below so I don’t have to make it so often. Also, don’t be too fussy about quantities as you measure things — being off quite a bit is fine.

Note that flavor concentrate is very concentrated, and also quite expensive. It costs me as much as $85 a gallon, so I have to charge quite a bit for what I sell. I don’t make much on it. It’s also heavy, which makes shipping expensive. If you look at my eBay listings, notice that there are quantity discounts, and a substantial combined shipping discount. You can save a lot by buying more than one.

Preservatives

I use two common preservatives to keep the sodamix from getting moldy: citric acid and sodium benzoate. Both are readily available from Amazon or eBay, in packages much bigger than you need. Citric acid is pretty innocuous but sodium benzoate might be objectionable to you; leave it out if you prefer, but if you do so keep your sodamix in the refrigerator.

For a quart of sodamix I use 0.5 gram of sodium benzoate, and 2 grams of citric acid. It’s not much but it does the trick. It comes out to about 11mg of sodium benzoate and 22mg of citric acid per 12-oz serving.

I suggest using citric acid even if you want to avoid preservatives as it also contributes to the flavor of the sodamix.

Sweetening With Sugar

If you prefer sweetening with sugar, use about 610 grams (3 cups) of sugar to a quart of sodamix. That’s a lot of sugar, well over a pound.

I’ve never tried mixing up sugar-based sodamix, so I don’t know how hard it is to make. It’s probably best to put the sugar in the bottle first, then measure out the rest of the ingredients and add them before adding water. It might not be easy to get that much sugar to dissolve. Using hot water would help.

Sweetening Without Sugar

I went through quite a few variations before settling on a stevia/erythritol blend. Stevia by itself is extraordinarily sweet but has a somewhat unpleasant aftertaste. Adding a bit of erythritol kills the aftertaste and makes it taste (to me at least) just like sugar. Erythritol is a sugar alcohol and occurs naturally in some foods.

There are many stevia blends available (often with erythritol), but what we want is pure stevia for our sodamix. It’s a little hard to find but you can get it in liquid form and in powder form from Amazon or eBay. I like to use a combination of both liquid and powdered stevia. I’ve found that 3.5 grams of powdered stevia, 9.5 grams of liquid stevia, and 12 grams of erythritol make a good combination for a quart of sodamix.

I prefer to use stevia as I think it’s healthier than other artificial sweeteners like sucralose, which is what Sodastream uses. But using sucralose is cheaper and if you don’t object to it, here’s how: use 2g of acesulfame potassium (Ace-K) plus 10g of pure liquid sucralose instead of the stevia and erythritol. The Ace-K makes it taste better and is in Sodastream’s recipe too.

The Diet Sodamix Recipe

Now let’s put it all together. To make a quart of diet sodamix, use the following ingredients along with enough water to make a quart:

Weightvolumeingredient
0.5 gscant 1/4 tspsodium benzoate
2.0 g1/2 tspcitric acid
12 g4 tsperythritol
3.5 g1-1/2 tspstevia powder
9.5 g1 tbspstevia liquid
130 g1/2 cupflavor concentrate
Sugar-Free Sodamix Recipe

When measuring flavor concentrate (or adding sodamix to your soda), be sure to shake it well first. Actually I forget about half the time and it doesn’t seem to matter. But the label says to shake it, so I’m passing on that suggestion. Some of the concentrate flavors, like the colas, separate on standing which looks terrible. They haven’t gone bad, just shake well to recombine them.

Using the recommended quart squeeze bottle for the sodamix, I like to use three to four squeezes of sodamix per liter of soda — that’s an ounce and a half up to three ounces. If you like your soda light, use less; if you like it strong and sweet (like bottled soda) use more.

Enjoy!

Flavor Concentrates

As mentioned earlier, flavor concentrates are not readily available in quantities suitable for home use, so I’ve decided to buy them in bulk and rebottle them in pints. A pint of concentrate will make about four quarts of sodamix. A quart of sodamix in turn makes maybe 16 liters of soda. So a pint of concentrate will last you quite a long time.

There are literally hundreds of varieties of flavor concentrate available. Some are great and some not so much, and I’m selling only the ones I like. If you want a flavor not listed, let me know and I’ll try it, and add it if it’s decent. I’ll also be adding ones I’ve tried and liked.

One of the flavors I offer is called Dr Rio, and it’s supposed to be a knock-off of Dr Pepper. It’s pretty good, but it’s not much like the original. If you’re looking for something that tastes like Dr Pepper, do try Dr Rio. You’ll probably like it even though it’s not very close.

I’ve been adding some of the other ingredients, individually and in kits, as well as supplies like sodamix bottles, to my eBay store.

My Sodamix Supplies on eBay

I sell ingredients individually and in kits. You can get everything but the flavor concentrates on Amazon, but in package sizes much larger than what you need. My ingredients and kits are cheaper and more convenient. If you add them to an order they won’t usually increase the shipping cost. The flavor concentrate bottles will make 8 quarts of sodamix (80 to 120 liters of soda), other ingredients are sized to make 25 or 50 quarts of sodamix.

This stuff is expensive, especially when you add shipping. But do the math and it’s still cheaper than Sodastream flavors. I’m charging very little above my cost, and shipping is flat-rate. As noted above, there are very significant quantity discounts on multiple items, both for price and for shipping.
 

Saving Money for Sodastream Users: CO2

Part 1: Using Your Own CO2 Gas

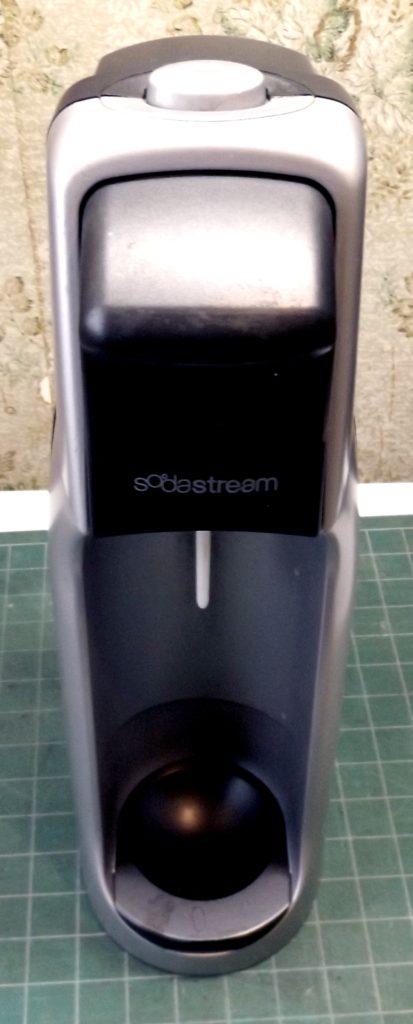
Many years ago I bought a Sodastream machine to make soda. I figured I’d save some money, and save having to lug bottles home and return them for the deposit. I drink a lot of soda.

My Sodastream Machine

Well, it worked out great, with one exception: it wasn’t cheap. I went a few years using Sodastream’s CO2 bottles and sodamix, annoyed by having to spend hundreds of dollars a year on it, to say nothing of the inconvenience of having to return CO2 bottles to the mall which is ten miles away.

So I started exploring alternatives. First was buying a few paintball tanks for CO2, and an adapter that converts paintball-tank threads to Sodastream threads. I found a local sports shop that would fill the paintball tanks for a few bucks, and I was in business.

Everything was great until the sports shop stopped filling CO2 bottles, and I couldn’t find anyone else to do it anywhere nearby. I was back to spending $30 to refill a couple of Sodastream cylinders every couple of weeks.

The next step was to buy a big tank that I could use to fill my paintball tanks myself. You can also get an adapter hose to connect a big tank directly to the Sodastream machine, but I didn’t like that idea, mostly because it seemed awkward. So I bought a big aluminum tank, and another adapter, this one to connect to the big tank, with a hose to connect to a paintball tank, and a couple of valves. It was all pretty expensive, but it doesn’t take long to make back that money with your savings.

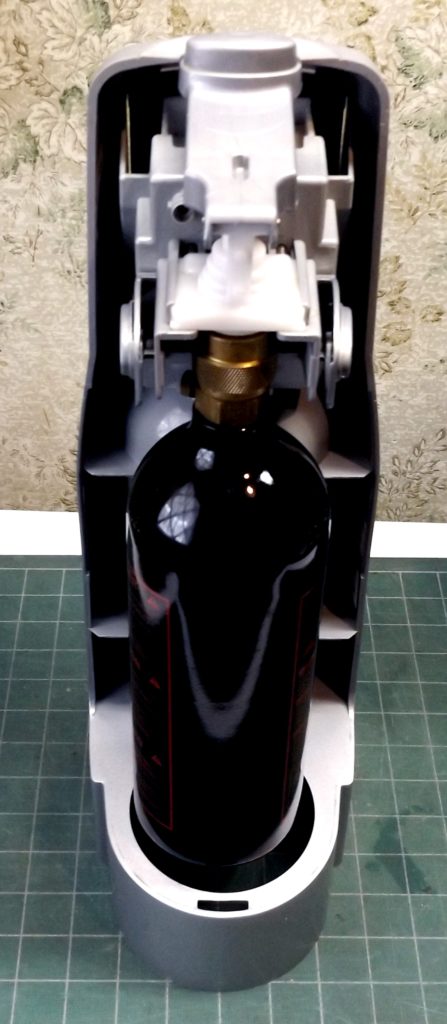
Paintball tank installed in Sodastream machine

Now I pay about $25 to fill the big tank, and it lasts a year. I have three paintball tanks, which I have to refill about once a month.

So that’s the story. The rest of this post tells how to do it yourself. Another post tells how to make your own sodamix, which frees you from having to buy those expensive flavor syrup bottles from Sodastream.

Starting with Paintball Tanks
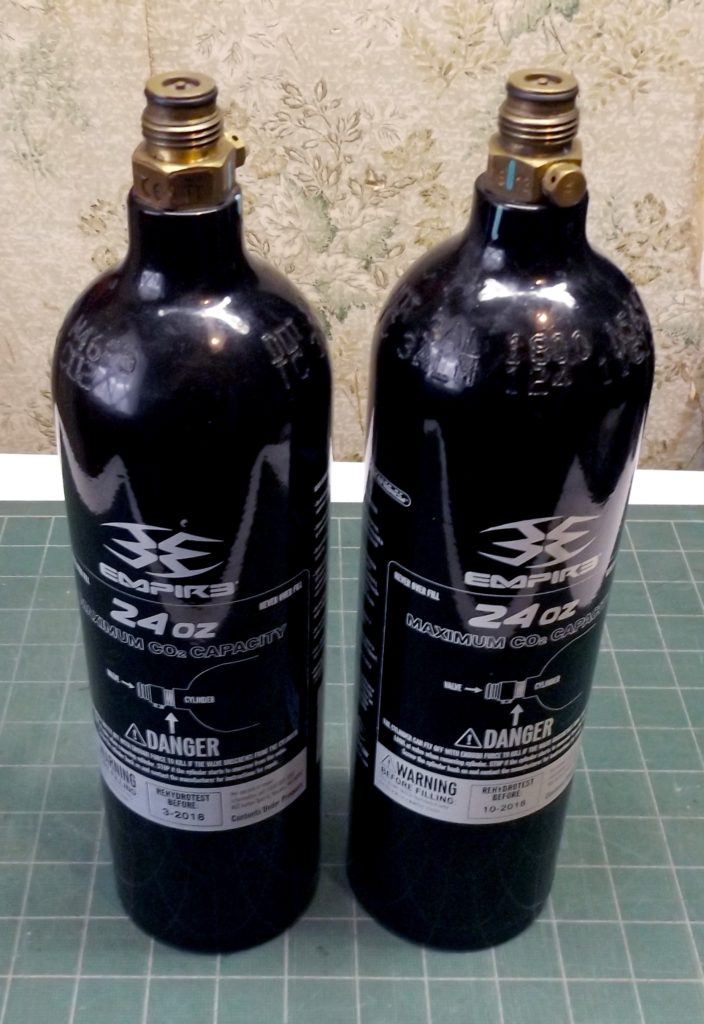
24 oz paintball tanks

You want to get 24 oz paintball tanks. That’s the biggest size that will fit in the machine.

Warning: there are many models of Sodastream machines, and I don’t know if they all take the big Sodastream cylinders, or even if Sodastream still makes the big cylinders. Look at your machine and see if the space where the Sodastream cylinder goes is big enough for a paintball cylinder, which is about 3-1/8″ in diameter. If not, I can’t help you (for now…). But you might consider one of the direct-to-big-tank hoses.

Right now 24 oz paintball tanks are about $25 on Amazon and eBay has them for 2/$45. I suggest starting with two of them.

Adapter

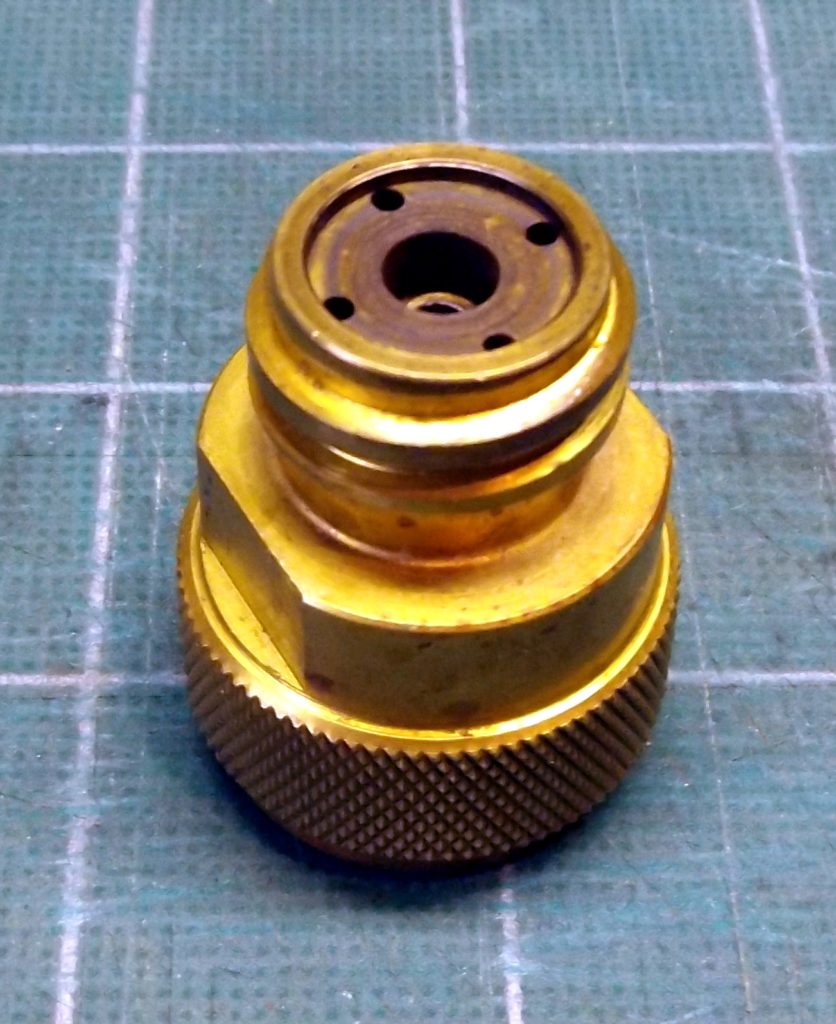
The adapter you need is $15 – $20 on Amazon, and $12 – $16 on eBay. Get one that comes with an Allen wrench.

Note that the paintball tanks use an o-ring for a seal. I’ve had trouble with them leaking. I sell oversize o-rings for paintball tanks on eBay. If you have trouble with leaks, try those.


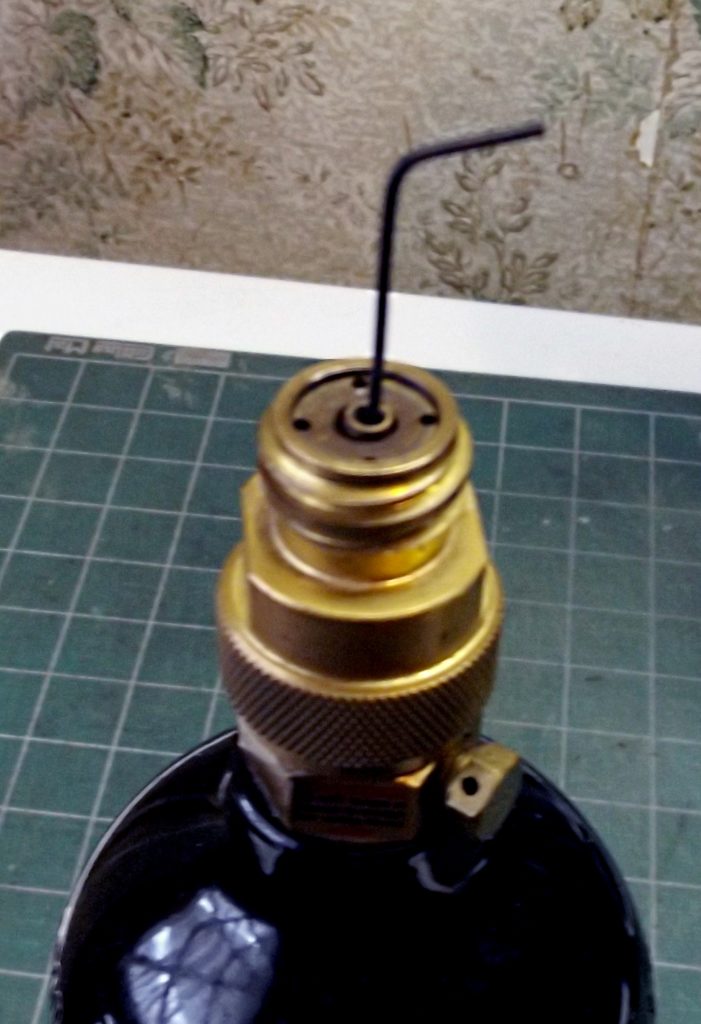
You need to adjust the adapter after installing it on a paintball tank but before mounting it on your Sodastream machine. Use the little Allen wrench that came with the adapter. Stick it in the top of the adapter and engage it with the adjusting screw. Tighten the screw until gas escapes, then back it off a bit. If you ever push the button on the Sodastream machine and little or no gas comes out (but the tank isn’t empty) you need to perform this adjustment again.

Adjusting adapter valve
Getting Paintball Tanks Filled

Some sports shops can fill paintball tanks for you. The chains typically don’t. Don’t worry about getting “pure” food-quality CO2 — it’s all pure. There are endless threads on message boards about this. It is people worrying about nothing. Expect to pay $3 – $5 for a fill.

Like me, you’ll probably have trouble finding a convenient place to get this done. That’s why I recommend biting the bullet and getting your own large-size CO2 cylinder. It’s a big investment but you’ll make back your money pretty fast.

About CO2

Here would be a good place to tell you about CO2 — you need to know the basics to understand what you’ll be doing.

CO2 isn’t like most compressed gasses. When the pressure reaches about 700 lbs it condenses into a liquid, and the liquid form holds way more CO2 than the gas form. You want to be working with the liquid form. CO2 cylinders are rated by their capacity of liquid by weight. A 24-oz paintball tank holds a pound and a half, and a 20-lb cylinder holds, well, 20 lbs. You’re not supposed to overfill the tanks, which means weighing them as you fill them. I’ve never bothered, and never had a problem. The only problem I’ve seen is that it’s hard to get the full weight into a tank.

Because CO2 is a liquid, you need something called a “siphon tube” in your big tank so the paintball tanks will get filled with liquid sucked from the bottom of the tank. Without a siphon tube you’d just end up filling the paintball tank with 700 psi of gas, which isn’t much gas.

When your big tank starts to run out you’ll be getting mostly gas out of it. When you fill your paintball tanks you’ll still be getting 700 lbs of pressure but since you won’t be getting any liquid, the tank will only last for a handful of bottles of soda in your machine. It’s time to get more CO2.

At this point an option would be to use a direct connection from the tank to the Sodastream machine. This lets you use all the CO2 you paid for. More about this later.

It’s important to empty all the gas out of an “empty” tank before refilling it. This goes for paintball tanks and the big tank. You’re only going to be filling it until it get to 700 lbs, and you want the full 700 lbs worth of liquid CO2. If the tank still has 600 lbs of gas in it when you refill it, you won’t get much liquid before it’s “full”.

Be somewhat careful when releasing CO2 to get the tank completely empty. If you do it in a closed space you can die from lack of oxygen. I’ve had the pilot lights on my stove go out after emptying out a big tank in my kitchen. That’s getting pretty well into the danger zone. Now I always empty out the big tank outside.

A note about CO2 and climate change: the CO2 you buy was removed from the atmosphere, and when you use it it goes back into the atmosphere. The net gain of CO2 is zero. Of course like everything else it takes energy to “make” CO2 and that energy likely comes from fossil fuels, but let’s not go there.

Setting Up to Fill Your Own Paintball Tanks

To fill your own paintball tanks, you need a commercial-sized tank, and an adapter.

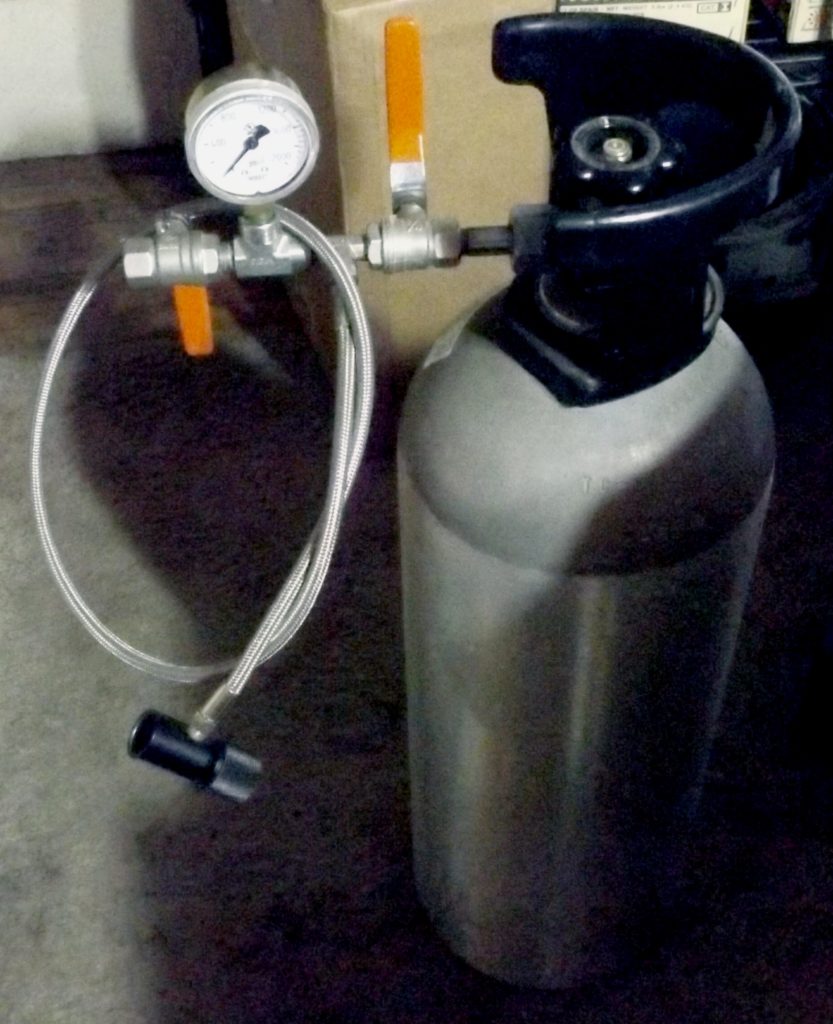
CO2 cylinder with “fill-station” adapter

You can then get your tank filled at any compressed-gas place. There are lots of them, often with “welding supply” in the name. Expect to pay about $25 to get a tank filled. Some places will do it while you wait, some want you to come back later to pick it up. The sizes of tanks that you’ll be dealing with get refilled, and you get the same tank back; they aren’t done on an exchange basis like the really big tanks.

I recommend a 20-lb-capacity aluminum tank. It’s a nice size and not too heavy. You want one that has a standard CGA320 valve and a siphon tube. (A siphon tube sucks the liquid CO2 out of the bottom of the tank — without one you’ll end up filling your paintball tanks with (not much) CO2 gas.) I bought mine from http://www.beveragelements.com, and recommend them. A new 20-lb aluminum tank with a siphon tube costs $126 plus shipping; they also sell on eBay and have the same thing for $139.90 with free shipping. Sounds like a lot? It’s cheaper than ten Sodastream tank refills, and how long would it take you to go through that many?

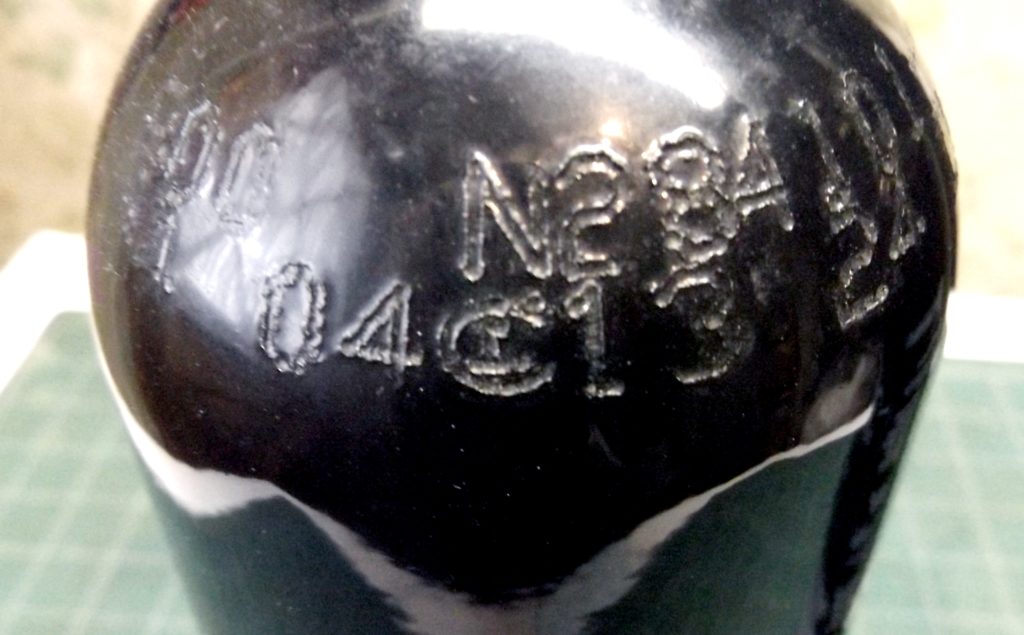
This tank was last tested in April 2013, and certification expired in April 2018.

A note about cylinders (tanks) and pressure testing. Tanks (including paintball tanks) have a date stamped on them — a two digit month and a two digit year, separated by some sort of symbol. The date is when the cylinder was last pressure tested. It is “good” for five years from that date, after which it is supposed to be recertified. If the cylinder certification has expired, the gas place is supposed to refuse to refill it. I don’t know if they actually check, and I also don’t know how one goes about getting a cylinder recertified.

Certification testing (also called hydrotesting) is why I don’t recommend buying used cylinders. You’re likely to get a cylinder that has expired or is about to expire, and you then might have trouble getting it filled.

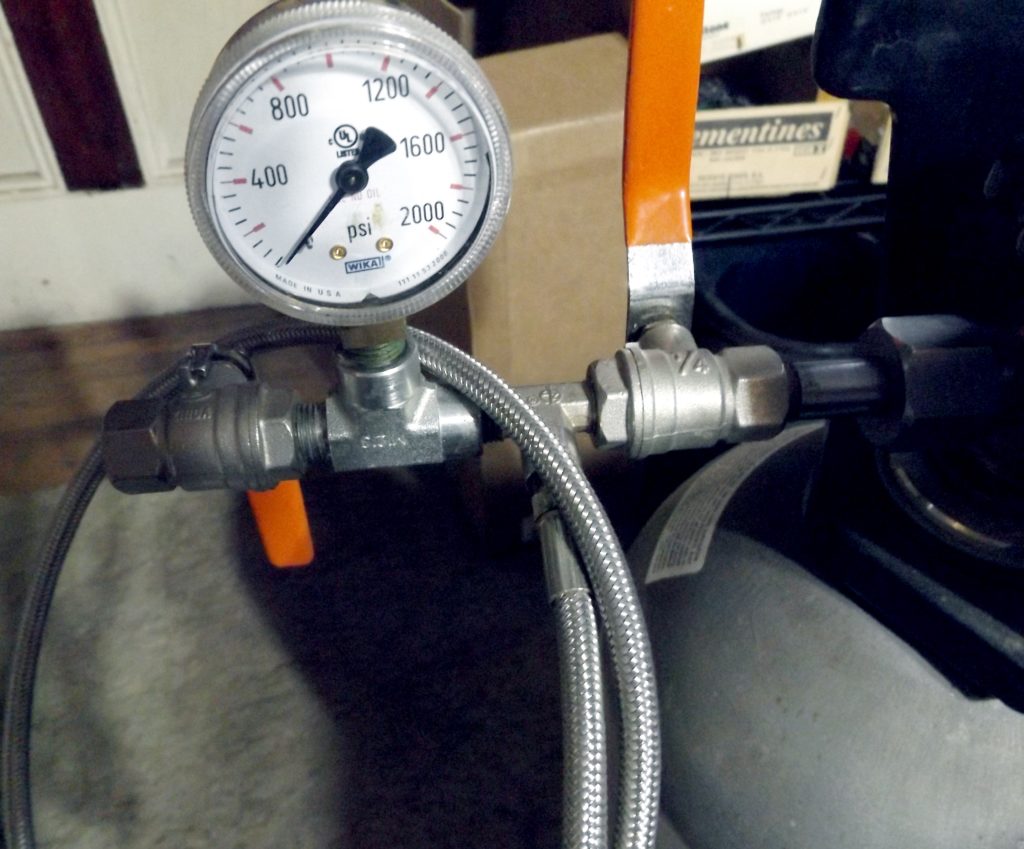
Paintball tank “fill station” adapter with added gauge

Now you’ve got a big tank full of CO2 and you need to be able to fill your paintball tanks. What you need is a paintball tank fill station. Search for that on eBay and you’ll find one — they start at about $30. You want something that fits on a CGA320 valve and has a hose connected to something that screws to a paintball tank. You don’t want anything made for scuba tanks.

Some “fill stations” have gauges; most don’t. You can add a gauge if you want. I think they help, even though they don’t tell you how much CO2 is left, until the liquid CO2 is gone. The fill station consists of valves and fittings, usually 1/4″ pipe thread. You can buy more fittings, and gauges, to add to it so long as they have the right threads. It’s most useful to have a gauge between the two valves.

A good source for the parts you need is McMaster-Carr. To add a gauge, buy one each of “0-2000 psi 2″ gauge” 32255K7, and “1/4″ high-pressure tee FxFxM” 50925K197. It should cost about $30 plus shipping. Once you get the parts, separate the fill station fittings in the right place and put it back together using Teflon tape.

Filling Paintball Tanks Step-by-Step
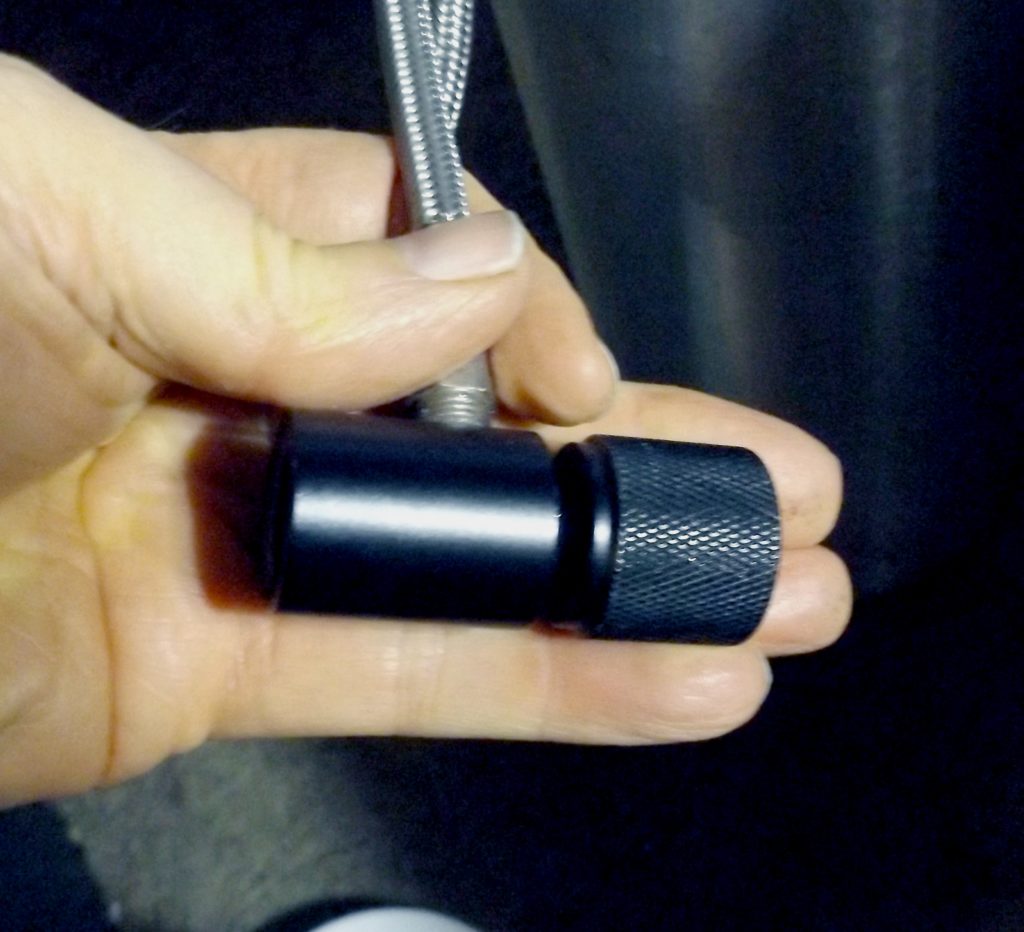
Fill station paintball tank adapter — connect your paintball tank to this. Knob opens paintball tank valve.

To fill a paintball tank, screw your adapter onto your CO2 cylinder, first making sure all the valves are closed. Open the main valve on the C02 cylinder, which shouldn’t make anything happen.

In the next step you will be screwing the paintball tank (which has brass threads) onto the adapter (which has aluminum threads). It is very easy to cross-thread the tank/adapter connection, which will ruin the adapter. The tank should screw onto the adapter smoothly. If it binds, even a little, back it off and try again,

Now that you have been suitably warned, screw a paintball tank onto the adapter at the end of the hose, and screw down the knob to open the valve on the paintball tank. Now, open the adapter valve furthest from the CO2 cylinder. That should let any CO2 left in the paintball tank escape. This is important because you want as much room for CO2 liquid as possible, to get a complete fill.

Close the valve you opened in the last step, and open the other adapter valve. Liquid CO2 should rush into the paintball tank. It will be cold and heavy. Wait until nothing more is happening, and wait another few seconds just to be sure. Close both adapter valves, then unscrew the valve on the paintball tank to seal the tank.

You’re almost done. Before unscrewing the paintball tank from the hose adapter, you need to let the remaining CO2 out of the hose. To do this, open the outer valve on the adapter and let the gas from the hose escape. There will be a lot. Finally, unscrew the paintball tank from the hose adapter, and you’re done.

It takes a lot less time to do than it does to explain.

Directly Connecting a Big Tank
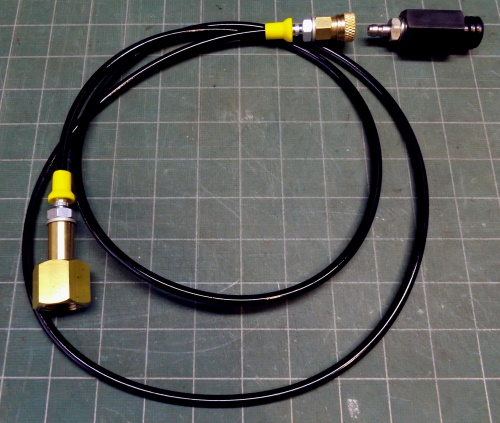
Hose to directly connect a big tank

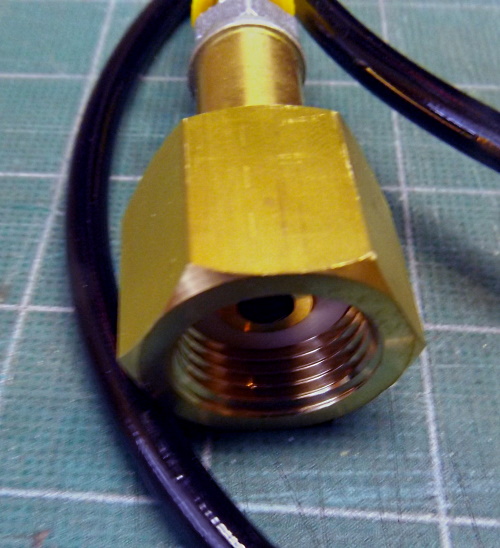
There is another kind of hose you can buy, which connects from your large CO2 tank directly to your Sodastream machine. This is useful for getting the rest of the CO2 out of your tank once you’ve used all the liquid CO2. The hose has a CGA320 connector on one end (to connect to your tank), and a fitting on the other end that srews into your Sodastream machine where you ordinarily attach Sodastream cylinders, or paintball tanks with a paintball tank adapter as described earlier.

It is also a way to connect a big tank to any Sodastream machine that doesn’t have room for a paintball tank, which I think is true of most newer machines.

Tank end of hose

If you want to skip the whole paintball-tank thing, you need a CO2 cylinder without a siphon tube. If you have a siphon tube in your tank, you’ll get liquid CO2 instead of gas, and that will not work. Remember: with a siphon tube you get liquid (until the liquid is gone), without one you get gas. The Sodastream machine wants gas.

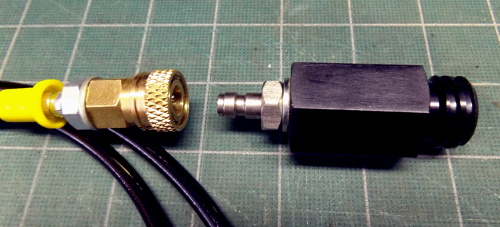
To find the hose you need, search on eBay for “sodastream co2 tank adapter hose”. You don’t want a “fill station” for this. Some of them have a quick-connect at the Sodastream end, which is very convenient. I paid about $25 for mine. Note: the quick-connect fitting uses tiny o-rings, which tend to come out. If they do, stuff them back in — there are two of them, one on top of the other. It’s hard to get them in place, but it can be done with some fussing.

Sodastream machine fitting with quick-connect

I’ve noticed that the o-rings tend to swell in use. Let them sit overnight and they’ll go in much more easily. If you lose the o-rings, they are 6mm ID and 10mm OD. You can get them from McMaster-Carr, item number 9262K166. Slightly smaller ones might go in more easily: order 9262K576.

So far I don’t have a lot of experience doing this, and it hasn’t been going well. The button in the Sodastream fitting that releases the gas appears to require a lot of CO2 pressure to activate. Under about 450 lbs you can’t get any CO2 out of it. Maybe there’s something wrong with my adapter, or maybe it’s just designed that way. In any case if you want one of these hoses to get the last bit of CO2 out of your tank, you may be disappointed.